15 February 2006 SCANNER
3-23
Replacement
Adjustment
Attaching the New Wire
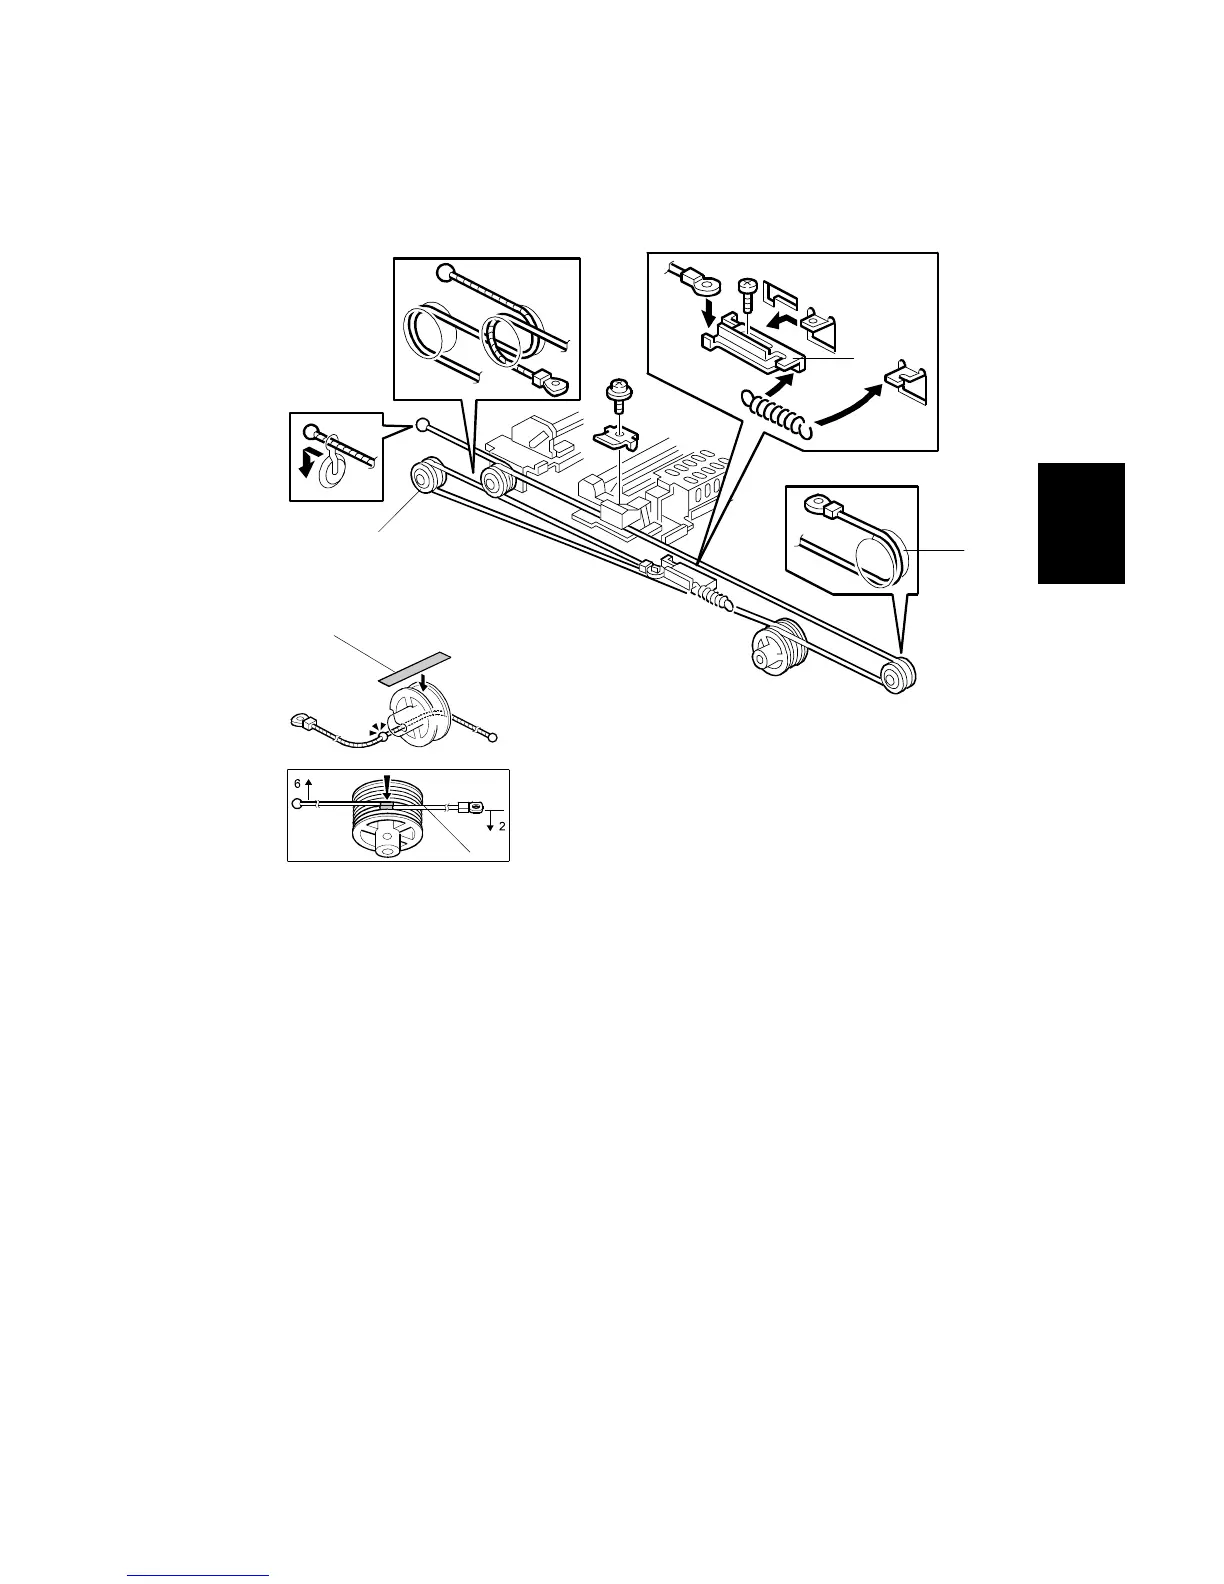
1. While paying attention to the direction of the wire (the leading bead), thread the
wire [A] through the pulley, wrap the wire on the pulley, then apply tape to hold
it in place.
• Wind the wire on the bead side [B] clockwise 6 times, and the ring side 2
times as shown ().
2. Set the pulley with the taped wire on the scanner drive shaft.
3. Position the 1st scanner with the positioning pins, part number A0069104 ([A]
on the next page).
4. Wind the end of the wire with the bead [C] as shown ().
5. Wind the ring-end of the wire around the pulley [D], install the tension bracket
[E] , then tighten the screw slightly to temporarily lock the wire to the bracket
(
).
B246R924.WMF
B246R925.WMF
[A]
[B]
[C]
[D]
[E]