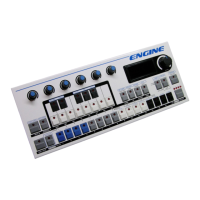
SELECT A TRACK
First we will select the track we want to sequence. The default mode for Engine is TRACK
SELECT mode, meaning that you can use the eight white buttons of the mini keyboard to
select one of the eight available tracks.
After initialization, Engine automatically creates synth type patterns in tracks 1 through 4
and drum type patterns in tracks 5 through 8. These can be changed to suit your studio.
MIDI channels are automatically assigned to match the track number. These channels can
also be changed to match your studio.
1. Select a track by pressing one of the eight white buttons on the mini keyboard:
•
Because our sound source is a synthesizer, select a track from 1 to 4
2. Match the MIDI channel of the track to the MIDI channel of the synthesizer
•
Double click the FUNCTION button to pin FUNCTION MODE
•
Press and hold the MIDI CHANNEL (snapshot) button
•
Select the desired MIDI port and channel by turning control knob 1.
•
The current MIDI port and channel is shown on the LED display
3. Click the FUNCTION button to leave function mode.
4. The track is now ready to be sequenced
CREATE A PATTERN
Now we will quickly create a new pattern. There are multiple ways of entering pattern
data, but for this exercise we will use the grid programming method. For details on other
methods, please refer to the REFERENCE GUIDE section of this manual.
1. If you have not done so, press the RUN/STOP button to start the sequencer
2. By default the pattern is 16 steps long, the chase LED should move across the 16
pattern steps and loop back to step 1
3. Now click and hold one of the 16 step buttons to enter a note event
4. To set the length of the note, while still holding the step button, click a second step
button located after the first. The length will be shown with dim LEDs.
5. While still holding the step button, set the pitch of the note in semitones using the
mini keyboard buttons