Prepare the instrument
1.
In the Dashboard, check consumables status (see “Check consumables status“ on
page 33). Ensure that:
• Consumables are not expired
• Adequate injections remain for consumables
2.
Ensure that buer levels are at the ll lines (see “Check buer ll levels“ on
page 34).
3.
Set the oven temperature, then click Start Pre-heat.
Pre-heat the oven and detection cell while you prepare for a run (detection cell
temperature is set by the software). Pre-heating helps mitigate subtle rst-run
migration rate eects. The pre-heat function automatically turns o after 2 hours.
We recommend that you pre-heat the oven for at least 30 minutes before you
start a run if the instrument is cold.
Temperatures are displayed in red as they warm to the set-points. When
temperatures are at the set-point they are displayed in green. Temperatures may
uctuate slightly when they reach the set-point as they stabilize.
4.
Check the pump assembly for bubbles and run the Remove Bubble wizard if
needed (see “Remove bubbles from the polymer pump“ on page 237).
Prepare the fragment/HID install check standard
Prepare the standard as described in the product insert. See Appendix D, “Catalog
numbers“ for catalog numbers.
• Fragment analysis: DS-33 GeneScan
™
Installation Standards with GeneScan
™
600
LIZ
™
Size Standard v2.0
• HID: AmpFℓSTR
™
Identiler
™
Allelic Ladder (For HID install check)
Prepare the standard plate
IMPORTANT! Do not use w
arped or damaged plates.
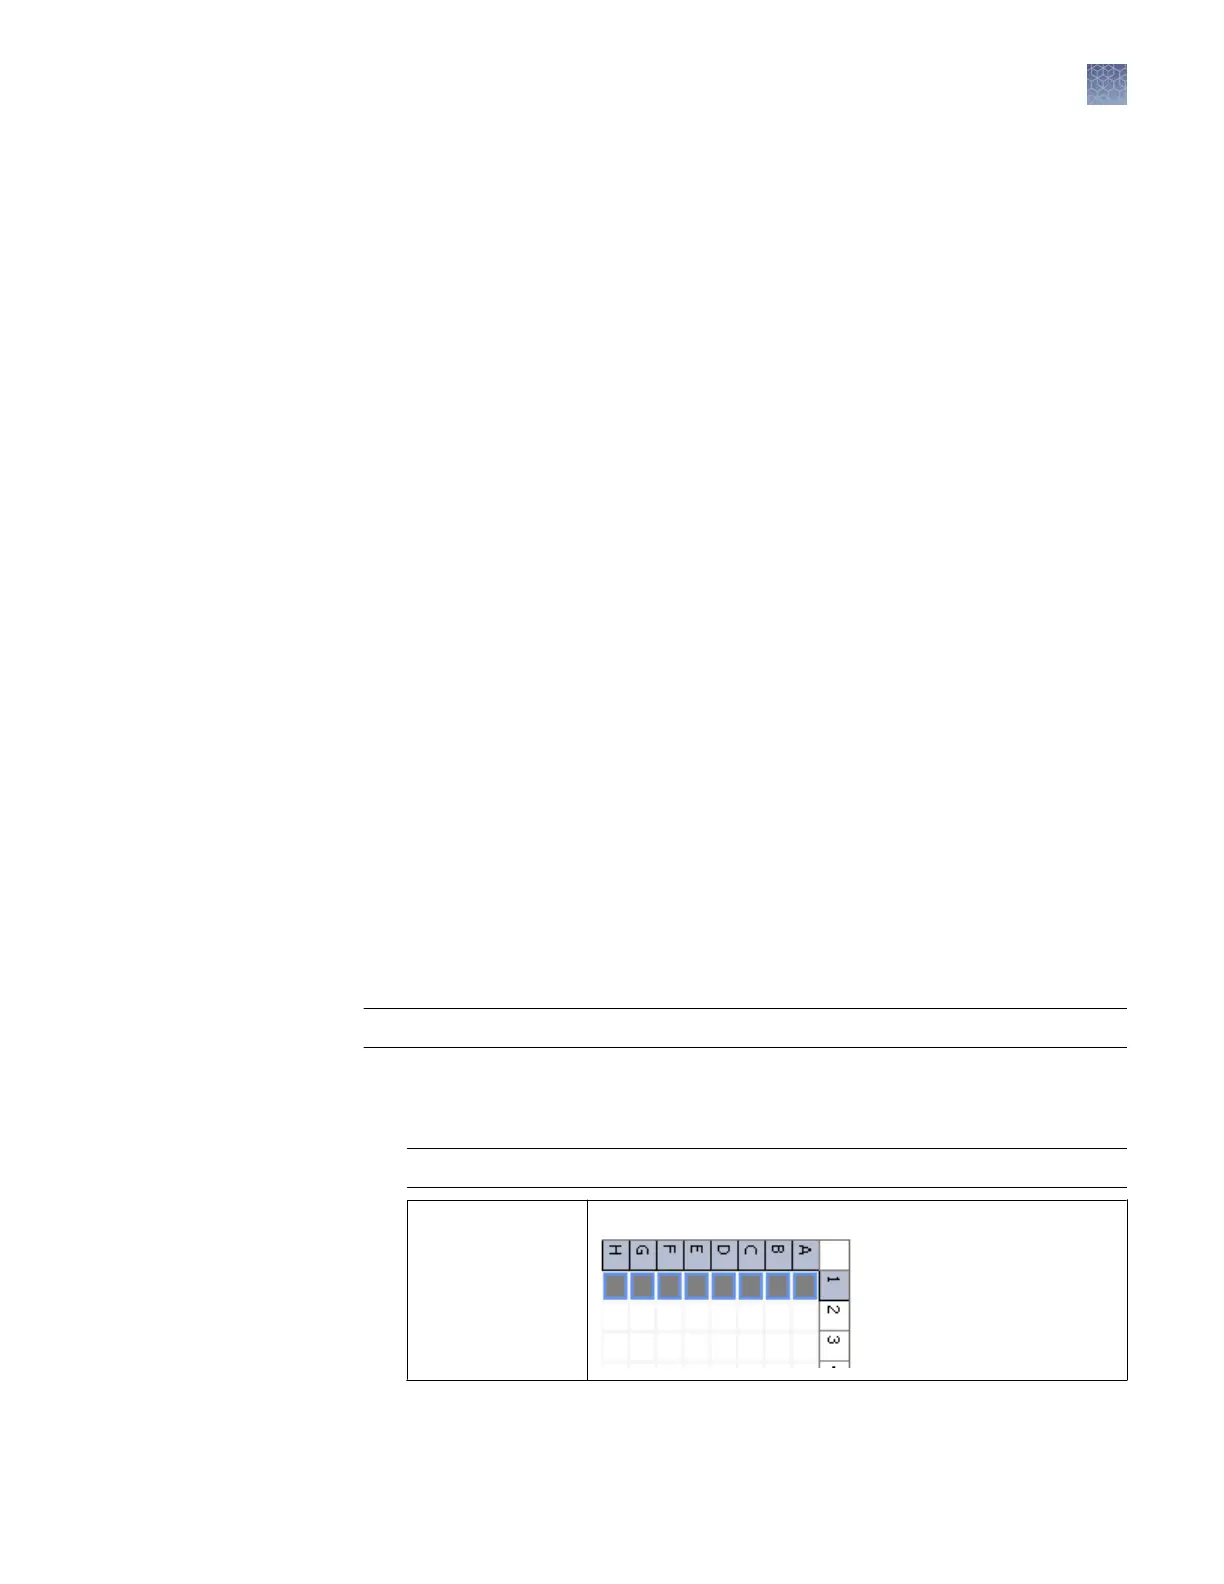
1.
Load the standards in any injection position in the plate. The example below
shows injection position 1, but y
ou can specify the starting well for an injection
position.
IMPORTANT! You do not create a plate in the software for the install check.
8-capillary
96-w
ell plate
A1 through H1
Chapter 6 Run calibrations and install checks
Run a fragment/HID install check
6
3500/3500xL Genetic Analyzer User Guide—Data Collection Software v3.1
131