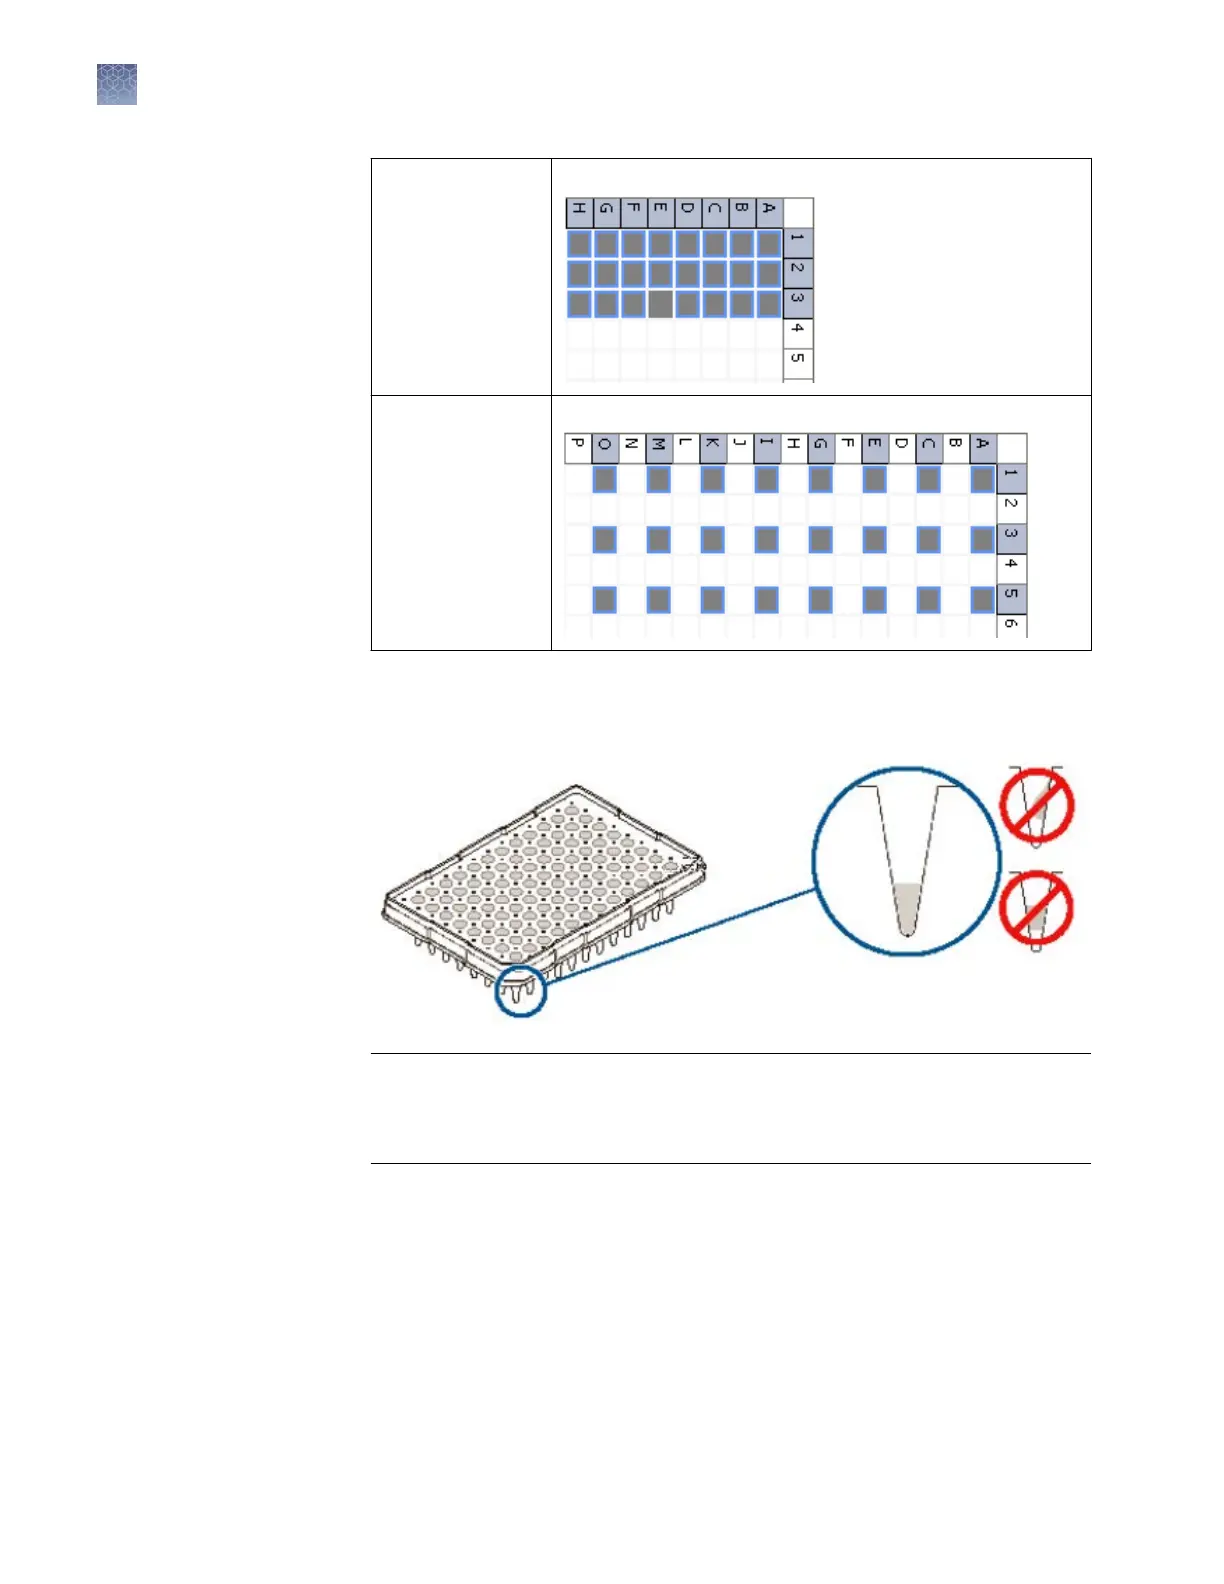
24-capillary
96-well plate
A1 through H1, A2 through H2, and A3 through H3
24-capillary
384-w
ell plate
Note: 384-well
plates are not
supported on
8‑capillary
instruments.
Columns 1, 3, and 5 in rows A, C, E, G, I, K, M, O
2.
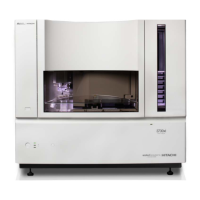
Briey centrifuge the plate that contains the standards.
3.
V
erify that each standard is positioned correctly in the boom of its well.
IMPORTANT! If the contents of any w
ell contain bubbles or are not located at the
boom of the well, briey centrifuge the plate, remove the plate from the
centrifuge, and verify that each standard is positioned correctly in the boom of
its well.
4.
Store the plate on ice until y
ou prepare the plate assembly and load the plate in
the instrument.
5.
Prepare the plate assembly as described in “Prepare the plate assembly“ on
page 53.
Chapter 6 Run c
alibrations and install checks
Run a fragment/HID install check
6
132
3500/3500xL Genetic Analyzer User Guide—Data Collection Software v3.1