6. GUI orientation
It is possible that after the unit is turned on, the hardware configur ation can be altered m aking c ertain Destinations to have invalid
Output c onfigurations.
In this case the Destination in the System Diagram becomes grey and adjus tment are disabled. In this case the destination needs
to be deleted and new one cr eated to reflec t the existing output configuration.
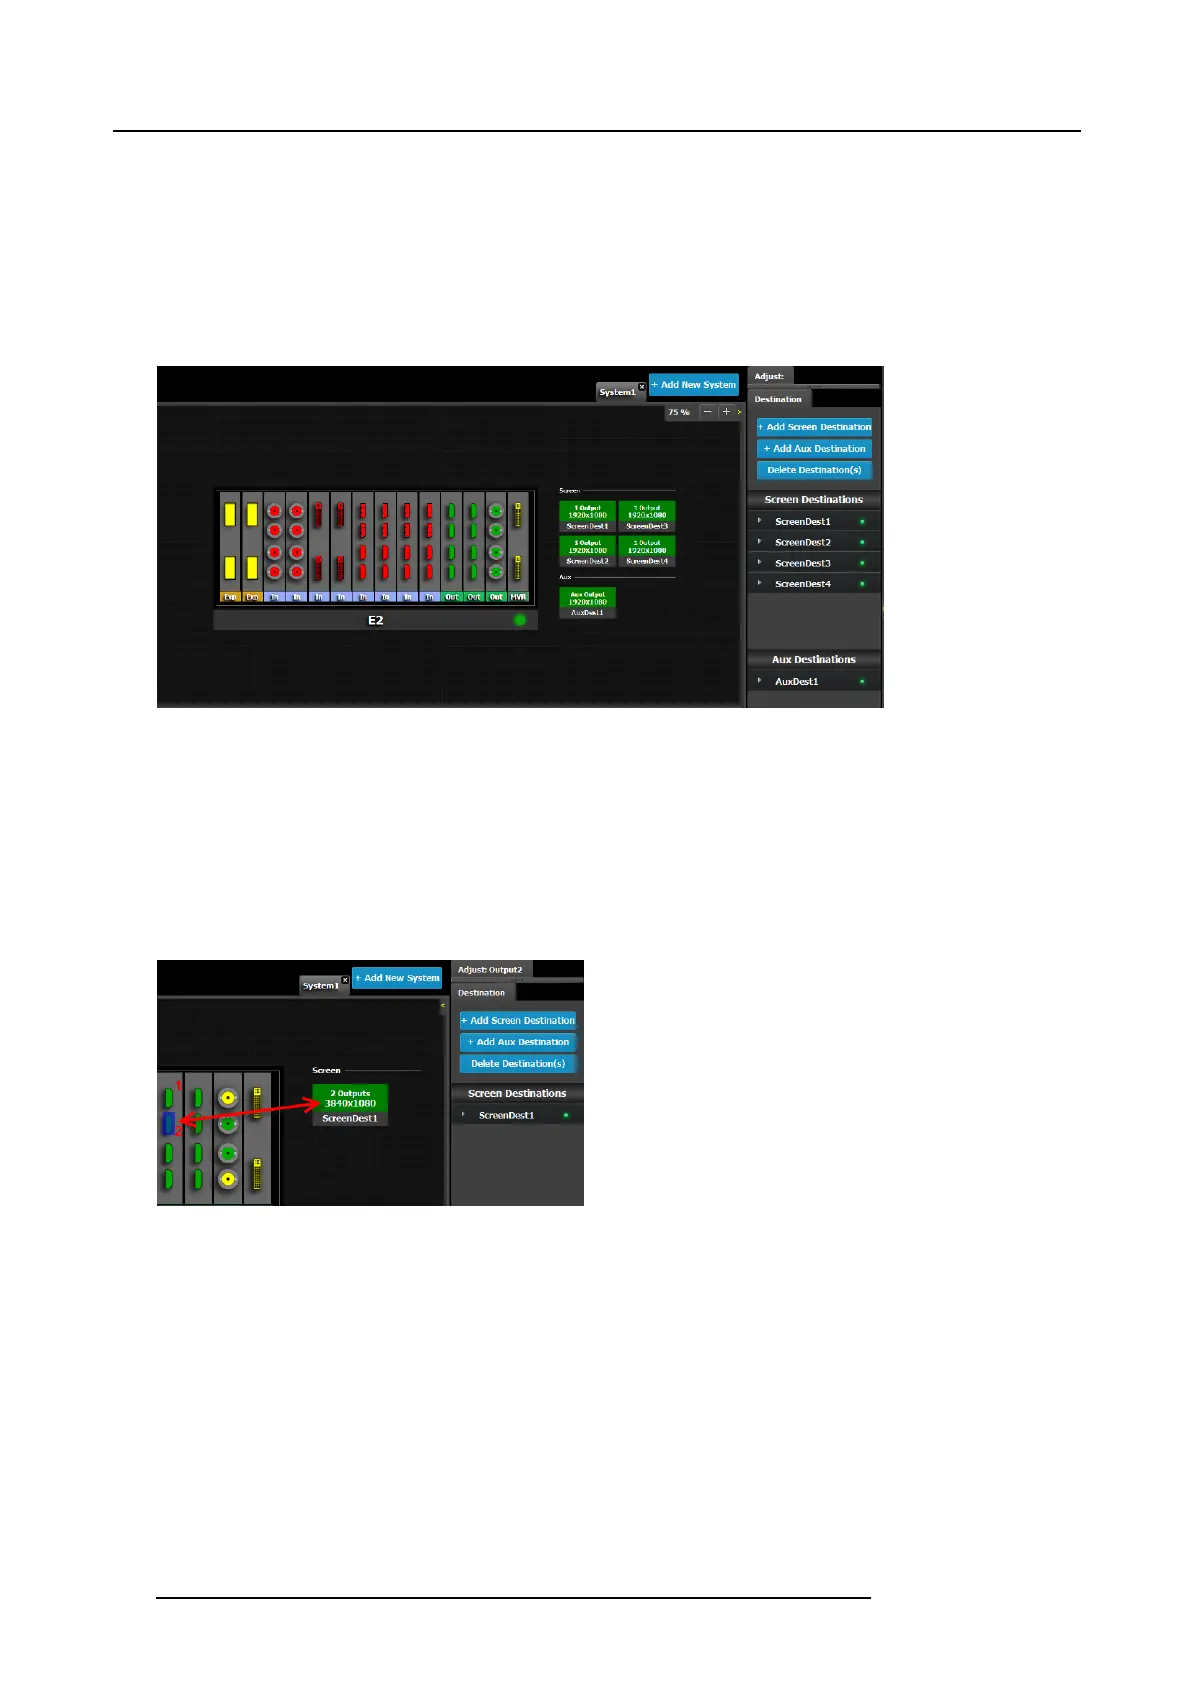
How to a dd De stination
To assign an output configuration to a des tination, select the output configuration (output Tab) and then click on the Add Screen
Destination or the Add Aux Destination b utton (Destination Tab). These buttons are e nabled (highlighted in blue) as long as there
are unassigned output configurations.
Image 6-27
If the Ad d destination button is pressed w ithout selecting an output configuration, the software will automatically a ssign the first
unassigned output configuration (from left most output c
ard) to a destination. The output configuration format is c opied to the desti-
nation output format.
New Sc reen or Aux destinations can be added as long as there are unas signed output configurations to destinations.
Alternatively, you assign outputs to destinations b y dragging them into the output c onfiguration the Destination block. In the example
below, the output 1 was assigned to ScreenDest1 and the destination format was set to 1920x1080 reflecting the format of output1.
When output 2 is dr agged into the same destination, then the format changes to 3820x1080 refl ecting a 2x1 setup. When outputs
are dragged into a destination in this matter, the s oftware assumes it is a horizontal setup with 0 pixel overlap. The overlap can
be modified in the … m enu. If a ver tical setup is desired, then the output configu ration needs to be s etup as such in the output
config uration menus.
Image 6-28
How to delete Destination
1. Click on the Delete Des tination(s ) button
The D elete Destination(s) button is replaced by the Delete Selected bu tton (highlighted in red) and the E 2 diagram is greyed
out, except the area dedicated to destinations (Screen and Aux ).
2. Click on destination in the graphical area.
100
R5905948 E2 12/12/2014