6. GUI orientation
6.20 Programming Menu > Layer Modifier area
General
This area is spec ifically for layer adjustments.
Description
The area is broken up into several sub areas. The left side is for alignment, priority, size and position of the layer. M iddle is f or layer
transition. The right is for misc. operations.
Image 6-44
Buttons in this ar ea operate on selec ted lay ers in the preview d estinations. If no layers are selected, all buttons in this panel is
disabled, ex cept for the “Select All” button. “Select A ll” selec ts all the layer s in preview for the Destinations in the current view,
regardless wheth er the Destination is armed or not. The area is divided into several sections. Detail description of each section is
provided below.
Alignment
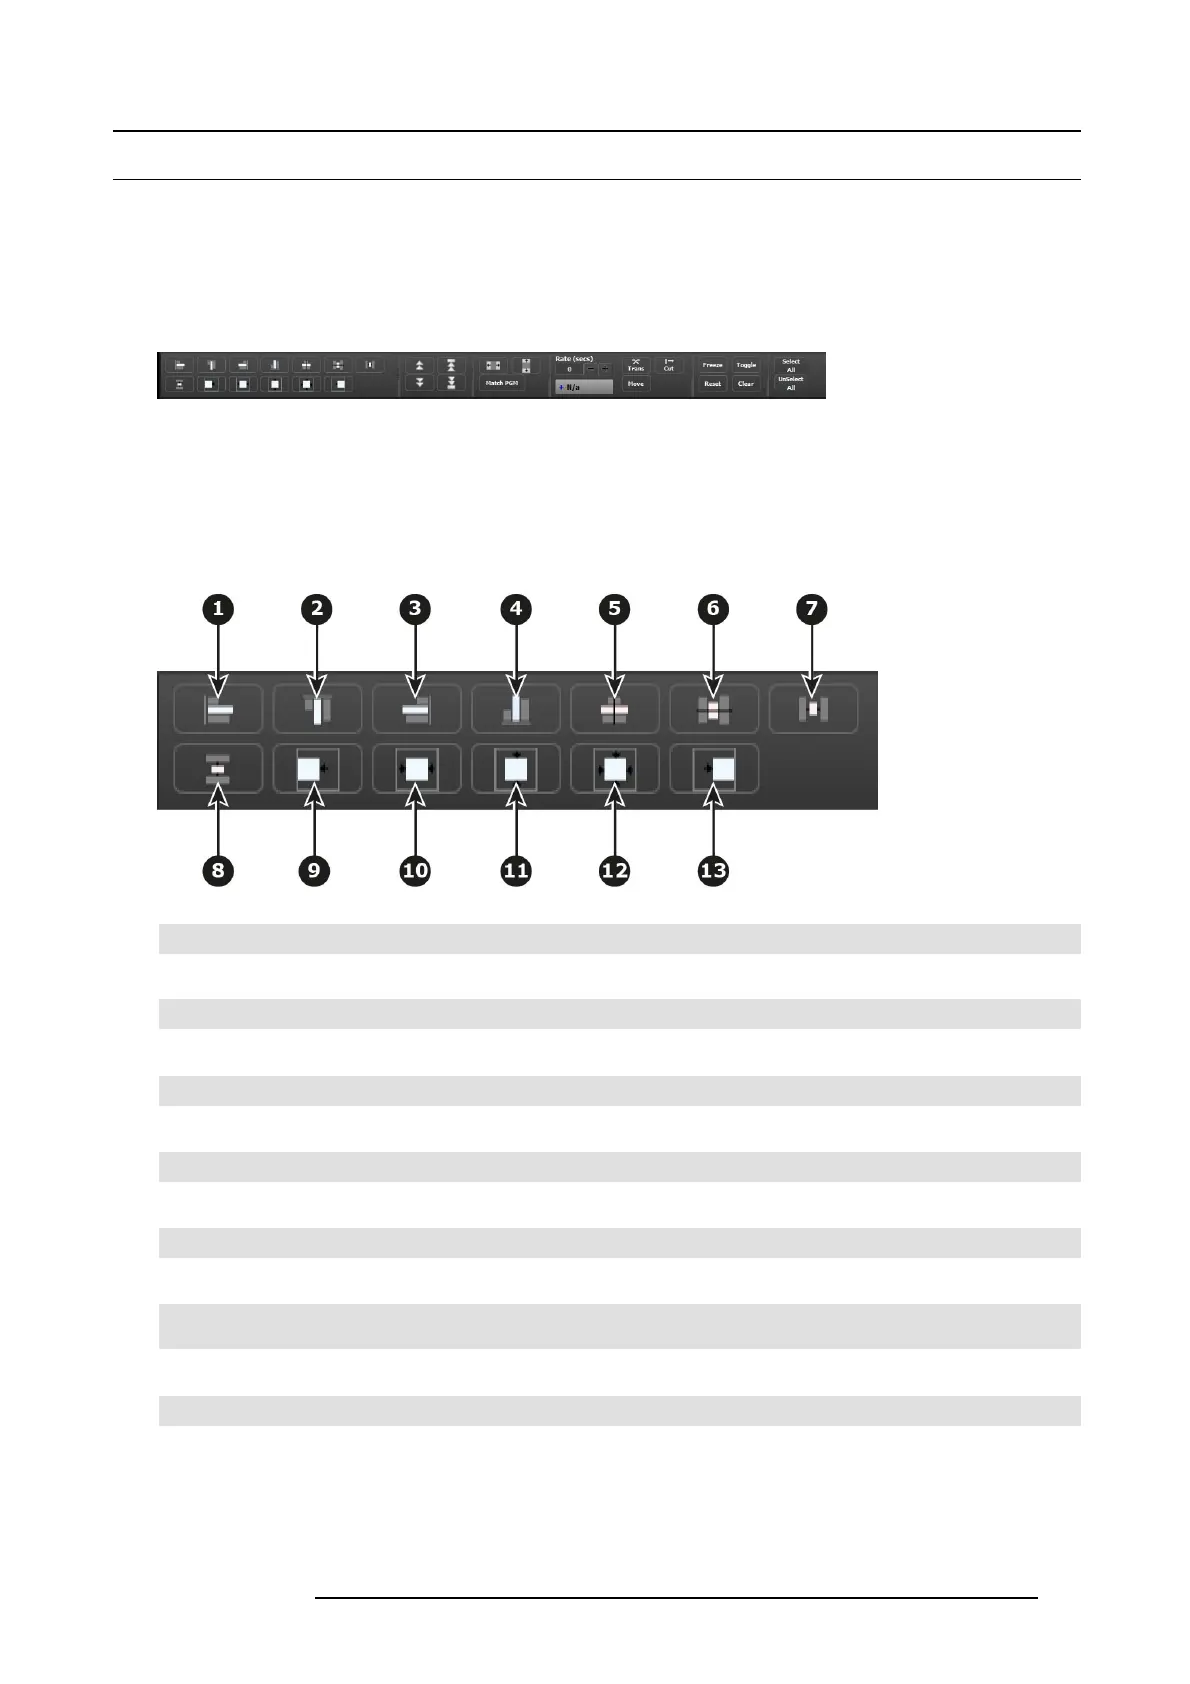
Image 6-45
1 Align Left to align the left edges of all selected PIPs.
2 Align Top to align the top edges of all selected PIPs.
3 Align Right to align the right edges o f all s elected PIPs.
4 Align Bottom to align the bottom edges of all selected P IPs.
5
Align Centers Horizontally to align the horizontal axes of all selected PIPs.
6
Align Centers Vertically to align the vertical axes of all s elected PIPs .
7
Space horizontally & uniformly -reference is the horizontal size of the screen .
8 Space vertically & uniformly - reference is the vertical size of the screen.
9
Align all selected PIPs al
ong the destination’s left edge.
10
Center Horizontally to c
enter all selected P IPs horizontally, along the destination’s vertical axis. PIPs do not ch ange
vertical position.
11
Center Vertically to center all s elected P IPs vertically, along the destination’s horizontal axis. PIPs do not change
horizontal position.
12
Center to center all selected P IPs vertically and horizontally, along the destination’s horizontal and vertical axes.
13 Align all selected PIPs along the destination’s right edg e.
R5905948 E2 12/12/2014
115