EasyManua.ls Logo

Barco E2 - User Manual

Barco E2
307 pages
Print Icon
To Next Page IconTo Next Page
Loading...
E2
User’s guide
R5905948/00
12/12/2014

Table of Contents

Other manuals for Barco E2

Questions and Answers

  • V
    vvincentAug 18, 2025
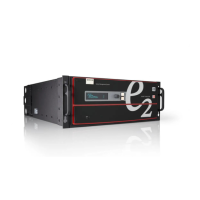
    What to do if my Barco Processor E2 doesn’t start?
    • T
      Timothy BrownAug 18, 2025
      If your Barco Processor E2 doesn't start, ensure that at least one power supply is connected to a valid power source. Also, make sure the power supplies are well inserted in their slots. If needed, remove the power cord and apply a little pressure using the handle until both supplies are fully inserted.
  • M
    Michael JonesAug 20, 2025
    Why is my Barco Processor E2 constantly rebooting after a software upgrade?
    • S
      Scott WrightAug 21, 2025
      If your Barco Processor E2 constantly reboots after a software upgrade, it might be due to an invalid upgrade, deployment, or defective installation. To resolve this, press and hold the SEL and ESC keys simultaneously until the front panel shows the choice of performing a factory reset or continuing. Performing a factory reset will allow the E2 to boot normally.
  • M
    Michael TurnerAug 23, 2025
    What to do if one of the power supplies is not coming on in my Barco Processor E2?
    • G
      George WhitneyAug 23, 2025
      If the input AC power LED on the power supply is off, the supply isn't receiving valid AC power. Check the AC power cable and ensure the unit is connected to a valid power source. If the input AC power LED is green but the output DC power LED is off or the status LED is amber, and the other power supply is functioning normally, swap it with the supply that doesn’t work. If the problem follows the power supply, then you need to replace the power supply. If the problem stays with the slot, then the fault possibly lies with the System Power card.
  • A
    abigail38Aug 26, 2025
    How to fix unstable or noisy images on Barco Processor E2?
    • M
      Mr. Matthew LopezAug 26, 2025
      If you're experiencing unstable or noisy images on your Barco Processor E2, consider the following: * Ensure the operating ambient temperature is between 0°C (32°F) and 40°C (104°F). * Run the board diagnostics to detect errors. * Ensure sufficient front and rear clearance to allow airflow through the E2. * Clean the EMI filter.
  • A
    aprilhuffmanAug 28, 2025
    What to do if the E2 and the PC running the GUI don’t communicate on my Barco Processor?
    • A
      Alexander PerezAug 28, 2025
      If the E2 and the PC running the GUI don’t communicate, check all Ethernet cables to ensure they are plugged in. If you're using a network switch, verify that it is on and operating properly. Also, ensure the IP address is within your LAN range and that the E2 network address is not already in use by another device on the local network. Finally, check if DHCP is not enabled.
  • N
    Norma BlankenshipAug 30, 2025
    How to resolve dynamic configuration (DHCP) issues when connecting PC running Event Master Control Software directly with Barco Processor E2?
    • A
      Amber HernandezAug 31, 2025
      When the PC running Event Master Control Software is connected directly with the E2, and dynamic configuration (DHCP) doesn’t work, disable the DHCP option and enter a static network address compatible with the PC running the Event Master control software (range, Subnet mask,..). This is because there is no DHCP server in this configuration.
  • S
    Stephen PorterSep 2, 2025
    What should I do if a specific image is unstable or noisy on my Barco Processor E2?
    • B
      butlerjessicaSep 2, 2025
      If a specific image is unstable or noisy, run the board diagnostics to detect errors. If the board diagnostics doesn’t detect any errors, change the output card from which the image is derived via the GUI. If the problem persists, switch the input source to a different input card. If the issue persists then the issue is not with input card.
  • K
    Kelli GallagherSep 5, 2025
    Why can’t I read or write to or from the USB drive on my Barco Processor E2?
    • N
      Nicholas BlackSep 5, 2025
      If you can’t read or write to or from the USB drive, ensure that your flash drive is formatted to use the FAT32 file system. If you still can’t access the USB from a PC, then you might have a faulty USB drive.
  • C
    Chad TorresSep 7, 2025
    How do I adjust the brightness of the front panel display screen on my Barco Processor E2?
    • P
      Paul OrtizSep 7, 2025
      To adjust the brightness of the front panel display screen on your Barco Processor E2, use the “VFD brightness” sub-menu in the System menu to adjust the intensity of the front panel vacuum fluorescent display (VFD) screen.
  • R
    ryanhaysSep 9, 2025
    What to do if my Barco Processor E2 unit is not responding to any front panel button presses?
    • S
      Stephanie FlowersSep 9, 2025
      If the unit is not responding to any front panel button presses, the front panel may be locked. To unlock it, press and hold the SEL and ESC buttons simultaneously for 3 seconds. When the panel is unlocked, the display screen will show the Status menu.

Summary

2. Safety

2.1 General considerations

Provides general safety instructions and information on compliance with international safety standards for IT equipment.

2.2 Important safety instructions

Details crucial safety guidelines to prevent personal injury and damage to the E2 unit during installation and operation.

3. General

3.1 E2 overview

Introduces the E2 as a modular scalable Digital Video Processor for live screen management.

3.2 Features

Details the input/output capabilities, user interface, and processing specifications of the E2 system.

3.4 Control overview

Describes the four methods for controlling the E2: Front Panel, EM GUI, Web Interface, and E2 Controller.

3.8 E2 Rack-Mount Procedure

Details the steps and considerations for safely mounting the E2 chassis into a rack.

4. HARDWARE ORIENTATION

4.1 Front panel

Illustrates and describes the components and controls of the E2's front panel interface.

4.2 Rear panel

Details the connectors and components located on the E2's rear panel, including AC connectors and Ethernet port.

5. FRONT PANEL MENU ORIENTATION

5.1 Power-up initialization

Describes the system initialization process upon powering on the E2 unit.

5.3 Using menu system

Explains the conventions and rules for navigating and interacting with the E2's front panel menu system.

5.8 System menu > USB device (Backup;Restore)

Details how to back up and restore E2 configuration files using the front panel USB port.

5.9 System menu > Ethernet

Covers E2 Ethernet settings, including DHCP query and static IP address configuration.

5.14 Restoring Factory Default Settings

Details procedures for restoring the E2 to its factory default condition, with or without retaining IP settings.

6. GUI ORIENTATION

6.7 Configuration Menu

Introduces the Configuration menu for editing Presentation Systems, adding devices, and modifying parameters.

6.11 Configuration Menu > Adjustment area

Describes the Adjustment area for defining and adjusting unit-specific parameters, inputs, backgrounds, and outputs.

6.12 Configuration Menu > Adjustment > Unit Configuration

Details how to define and adjust unit-specific parameters in the Unit Configuration panel.

6.13 Configuration Menu > Adjustment > Input Configuration

Explains how to assign input connectors and adjust parameters to match incoming signals.

6.15 Configuration Menu > Adjustment > Output Configuration

Explains how to assign output connectors to configurations and adjust signal parameters for display devices.

6.16 Configuration Menu > Adjustment > Destination Configuration

Describes how to assign output configurations to destinations and manage destination formats.

6.17 Programming Menu

Introduces the Programming menu for setting up events, assigning layers, backgrounds, and creating presets.

6.21 Programming Menu > Adjustment area

Describes the Adjustment area for configuring Layers, Sources, User Keys, and Presets.

6.28 Multiviewer (MVR) Menu

Introduces the Multiviewer module for setting up and displaying multiple sources on monitors.

6.35 Settings Menu

Provides access to the E2 web app for diagnostics, FAQ, contact info, and system backup/restore.

6.37 Settings Menu > WebKit area > Dashboard

Provides access to card diagnostics software through submenus for inputs, outputs, expansion, and other components.

6.38 Settings Menu > WebKit area > Tools

Allows users to download software updates and perform system backup or restore operations.

6.39 Settings Menu > WebKit area > Tools > Manage Software

Details the process of upgrading the E2 system software via the 'Manage Software' function.

6.40 Settings Menu > WebKit area > Tools > Backup & Restore

Explains how to back up presets, user keys, and system settings, and how to restore them.

7. SYSTEM SETUP

7.1 Setup Prerequisites

Lists prerequisites for setting up the E2 system, including familiarity with menus and physical connection.

7.3 Power up and Status check

Details the steps to power up the E2 system and check its operational status.

7.4 Return to factory default

Explains how to perform a factory reset to restore default input, output, and source mappings.

7.5 Communication setup

Guides users through setting up communication between the E2 and the local network via Ethernet.

7.6 Restoring the system

Outlines the procedure for restoring the system configuration from a USB drive.

8. UPDATING FIRMWARE

8.1 Upgrading firmware using the USB port

Provides detailed instructions for upgrading E2 firmware using a USB drive.

8.2 Upgrading firmware using the web Upgrade

Explains how to upgrade E2 firmware using the web interface, checking for new versions.

9. GENERAL OPERATION EXAMPLE

9.3 Control Software Operation

Guides users through setting up the E2 and creating presets using the Event Master Control Software.

9.4 Configuration Menu

Details defining E2 components like inputs, backgrounds, outputs, and destinations within the software.

9.5 Programming Menu

Explains how to assign layers, backgrounds, and create presets and user keys within the Programming menu.

10. MAINTENANCE

10.4 Rear I;O and Link Cards

Details the rear I/O and Link cards, including concerned parts and procedures for removing/installing them.

10.21 Power Supply

Provides instructions for removing and installing the power supply unit.

10.22 System-Power Board

Details how to remove and install the System-Power board.

A. SPECIFICATIONS

A.1 Specifications of E2

Provides detailed technical specifications for the E2 system, including dimensions, weight, and connectivity.

B. REMOTE CONTROL PROTOCOL

B.1 E2 Remote control Introduction

Explains how to remotely control the E2 via a telnet connection to its IP address.

B.2 E2 Remote Commands

Lists and describes available E2 remote control commands, such as ATRN and PRESET.

C. TROUBLESHOOTING

C.1 Troubleshooting List

A list of common problems, their possible causes, and recommended remedies for the E2 system.

D. WARRANTY

D.1 About Warranty and RMA

Provides an overview of the E2 warranty terms and conditions for Return Material Authorization (RMA).

Barco E2 Specifications

General IconGeneral
4K SupportYes
GenlockYes
HDCP SupportYes
Input ConnectorsHDMI, DisplayPort, SDI
Output ConnectorsHDMI, DisplayPort, SDI
Maximum Resolution4K/UHD at 60Hz
RedundancyOptional
ControlWeb UI

Related product manuals