4. POINTS, BOUNDARIES
4-2
4.2 How to Enter Points, Event Marks
4.2.1 How to enter a point (plotter and radar displays only)
Method 1: Directly on-screen
1. Tap the position on the screen where to put a point.
2. Tap [New Point] on the pop-up menu.
The default point icon is put at the position selected, and the point is saved to the
[Points] list.
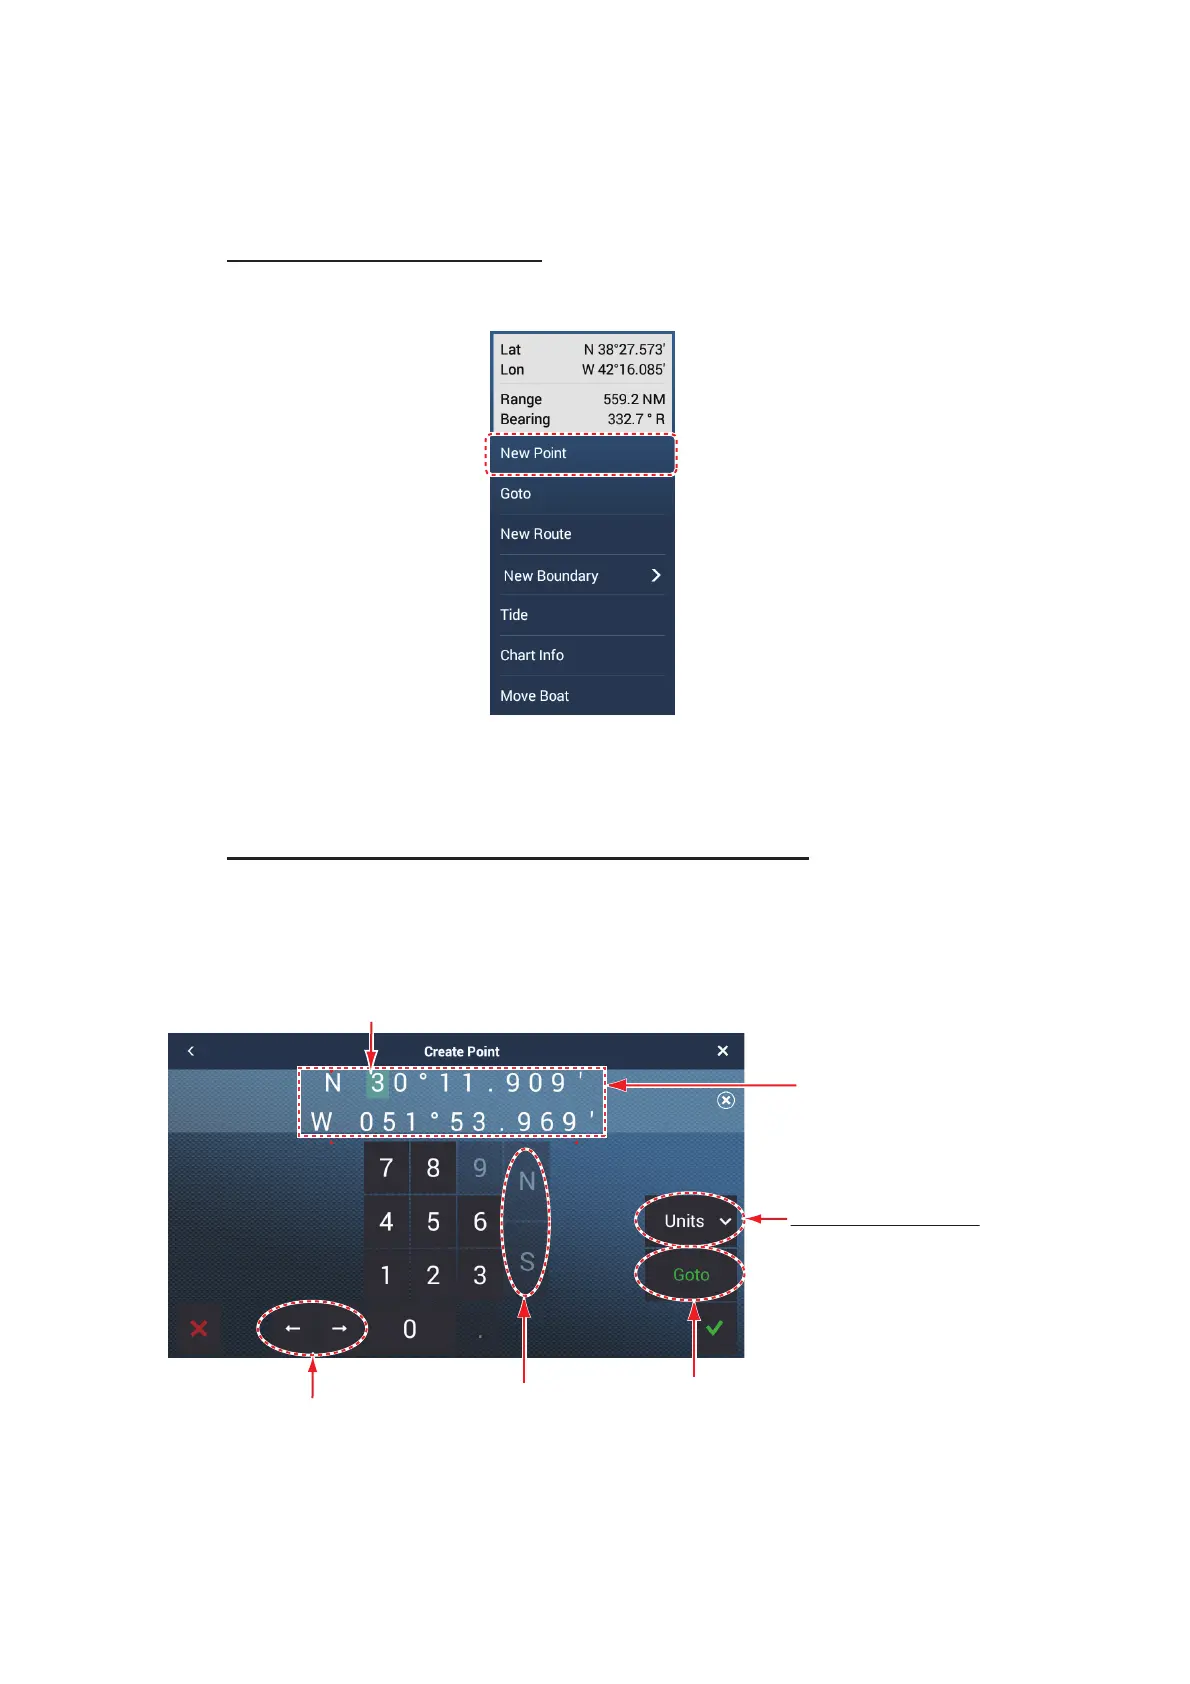
Method 2: Manual input (chart plotter, radar, weather)
Open the slide-out menu, then tap [Position Entry]. The position shown is latitude/lon-
gitude of the center of the displayed area. Edit the position as required. Tap [9] to reg-
ister the point and close the keyboard.
Cursor (light blue)
Latitude and
Longitude for
displayed screen’s
center.
Move cursor
Switch coordinate:
N↔S, E↔W
Position display format
Select position display
format from pull-down
menu.
Set point as
destination
 Loading...