5. ROUTES
5-12
5.10 How to Follow a Route
Before you follow a route, make sure that the path to the route is clear. Make sure to
zoom your chart to check for hazards that do not appear on a smaller scale.
5.10.1 How to follow an on-screen route
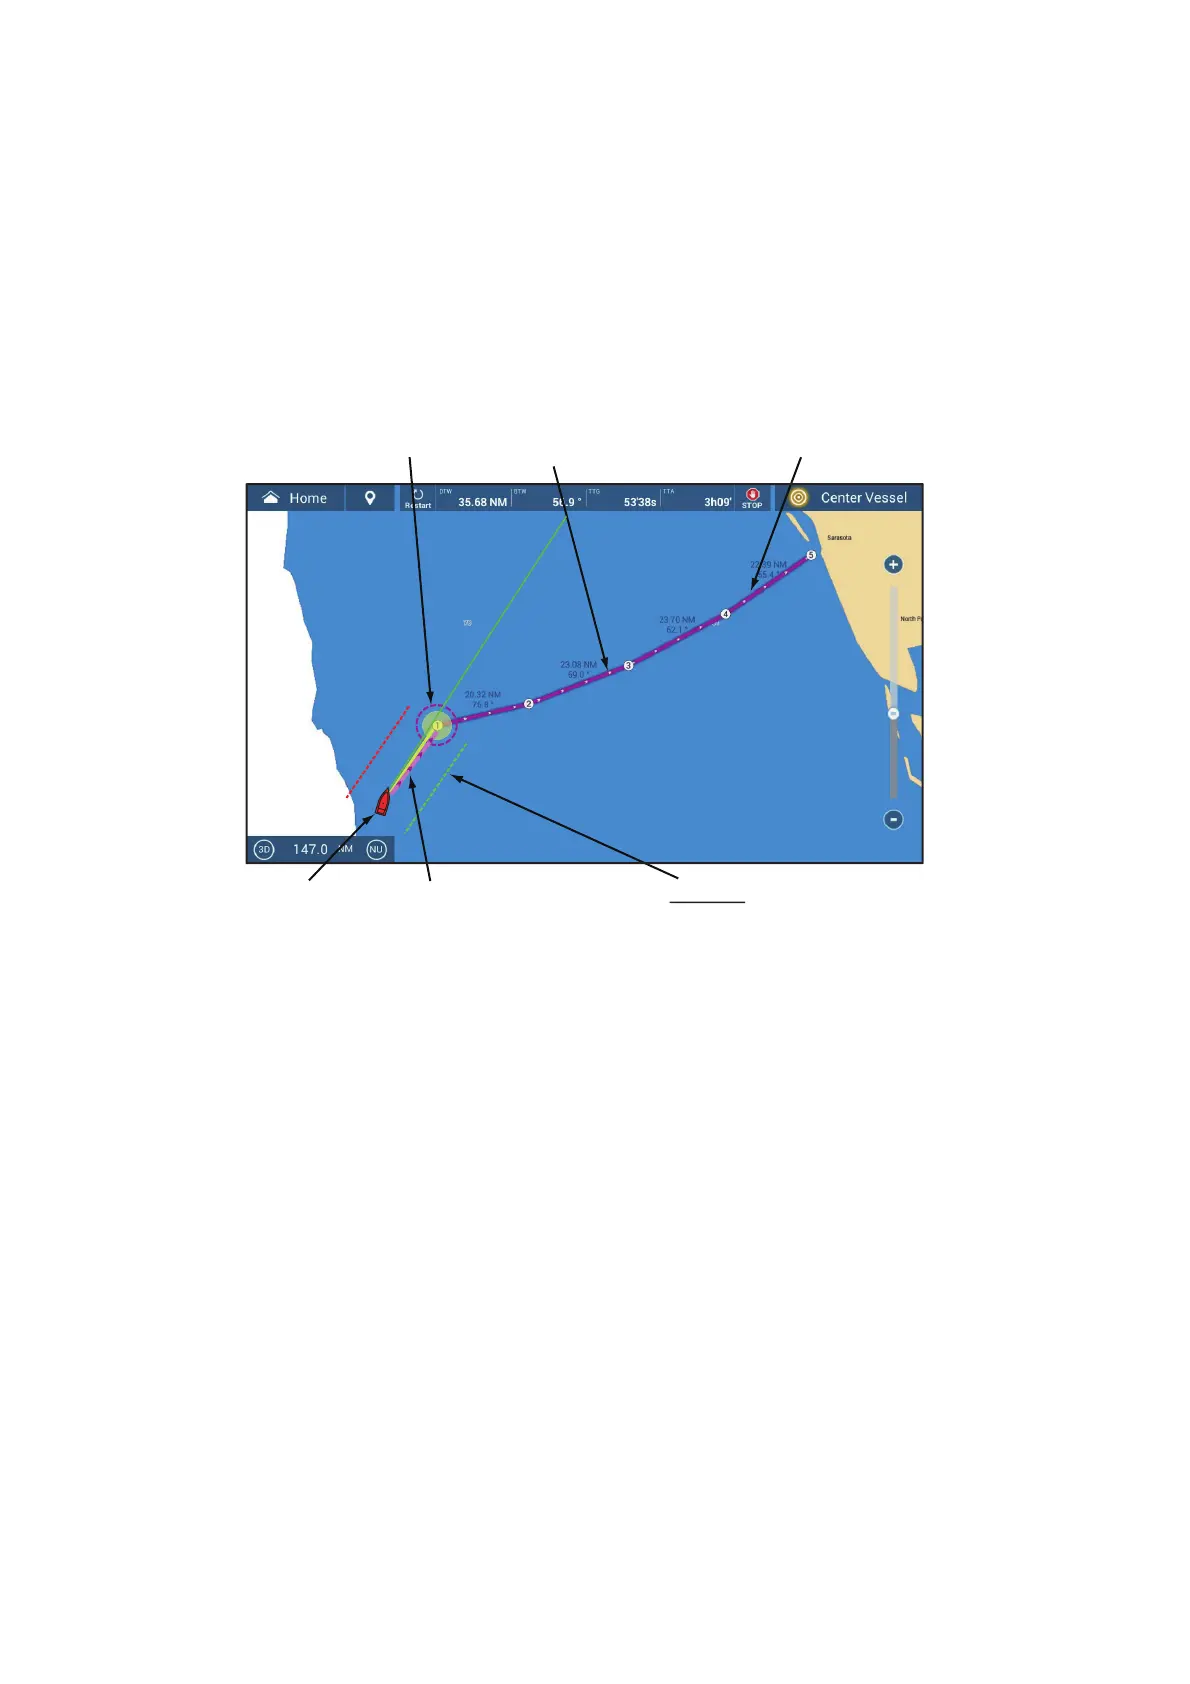
1. Tap a route leg of the route to follow to show the pop-up menu.
2. Tap [Start Nav]. The route now looks something like the one show in the figure
below.
The following occurs:
• The color of the route becomes purple, and arrows on the route point in the direction
in which to follow the route.
• The Goto point (1st route point) is highlighted.
• A solid purple line with arrows connects between current position and the points on
the route. This line indicates the set course. A solid yellow line runs between runs
between current position and the destination. This line shows the shortest distance
to the destination.
• Points are switch according the waypoint switching mode set on the menu. To se-
lect the mode, go to the Home screen, then tap [Settings]→[Routes]→ [WPT Switch
Mode]. Select [Circle and Cross Line], [Circle], or [Cross Line] as appropriate.
• The XTE lines, red for port side, green for starboard side, appear. You can show or
hide these lines and set their width with [Display XTE Lines] and [XTE Value] re-
spectively in [Routes] menu.
Note: If you want to be notified when you reach a Goto point, turn on [Waypoint Cross-
ing Notification] on [Routes] of the menu (see subsection 5.11.8). Then the message
"Waypoint Crossing" appears when you reach a Goto point. For the arrival timing, see
subsection 5.11.5.
Route leg (purple line)
Arrow points in direction
to follow route
Arrival area
Boat icon
(current position)
Set course to next point
(light-purple)
XTE line
Red: port
Green: starboard
 Loading...