GE HEALTHCARE
DIRECTION FC091194, REVISION 11 VIVID 7 SERVICE MANUAL
8 - 56 Section 8-9 - Software Loading Procedure - Software Version v2.x
8-9-6 Prepare MO Disks for Image Storage - Software Version v2.x
NOTE: When formatting the MO disks, give them logical names and make sure to physically label the
disks.
- A labelling convention should be followed so that each MO disk gets a unique label.
- A maximum numbers of eleven (11) label characters are allowed in the label name.
- Use different labels on the MO disk’s A side and B side.
1.) Label the MO Disks sequentially.i.e Image 1A (Side A), Image 1B (side B), Image 2A etc.
2.) If the MO Disks is already formatted and labelled continue with 8-9-7 "Move Images - Software
Version v2.x" on page 8-57.
3.) Insert a MO disk, side A, into the empty MO drive.
4.) Press CONFIG
(F2) and log on as adm, see 4-2-4 "Log On to the System as ‘ADM’" on page 4-12.
5.) Select Connectivity in the Image and Analysis menu.
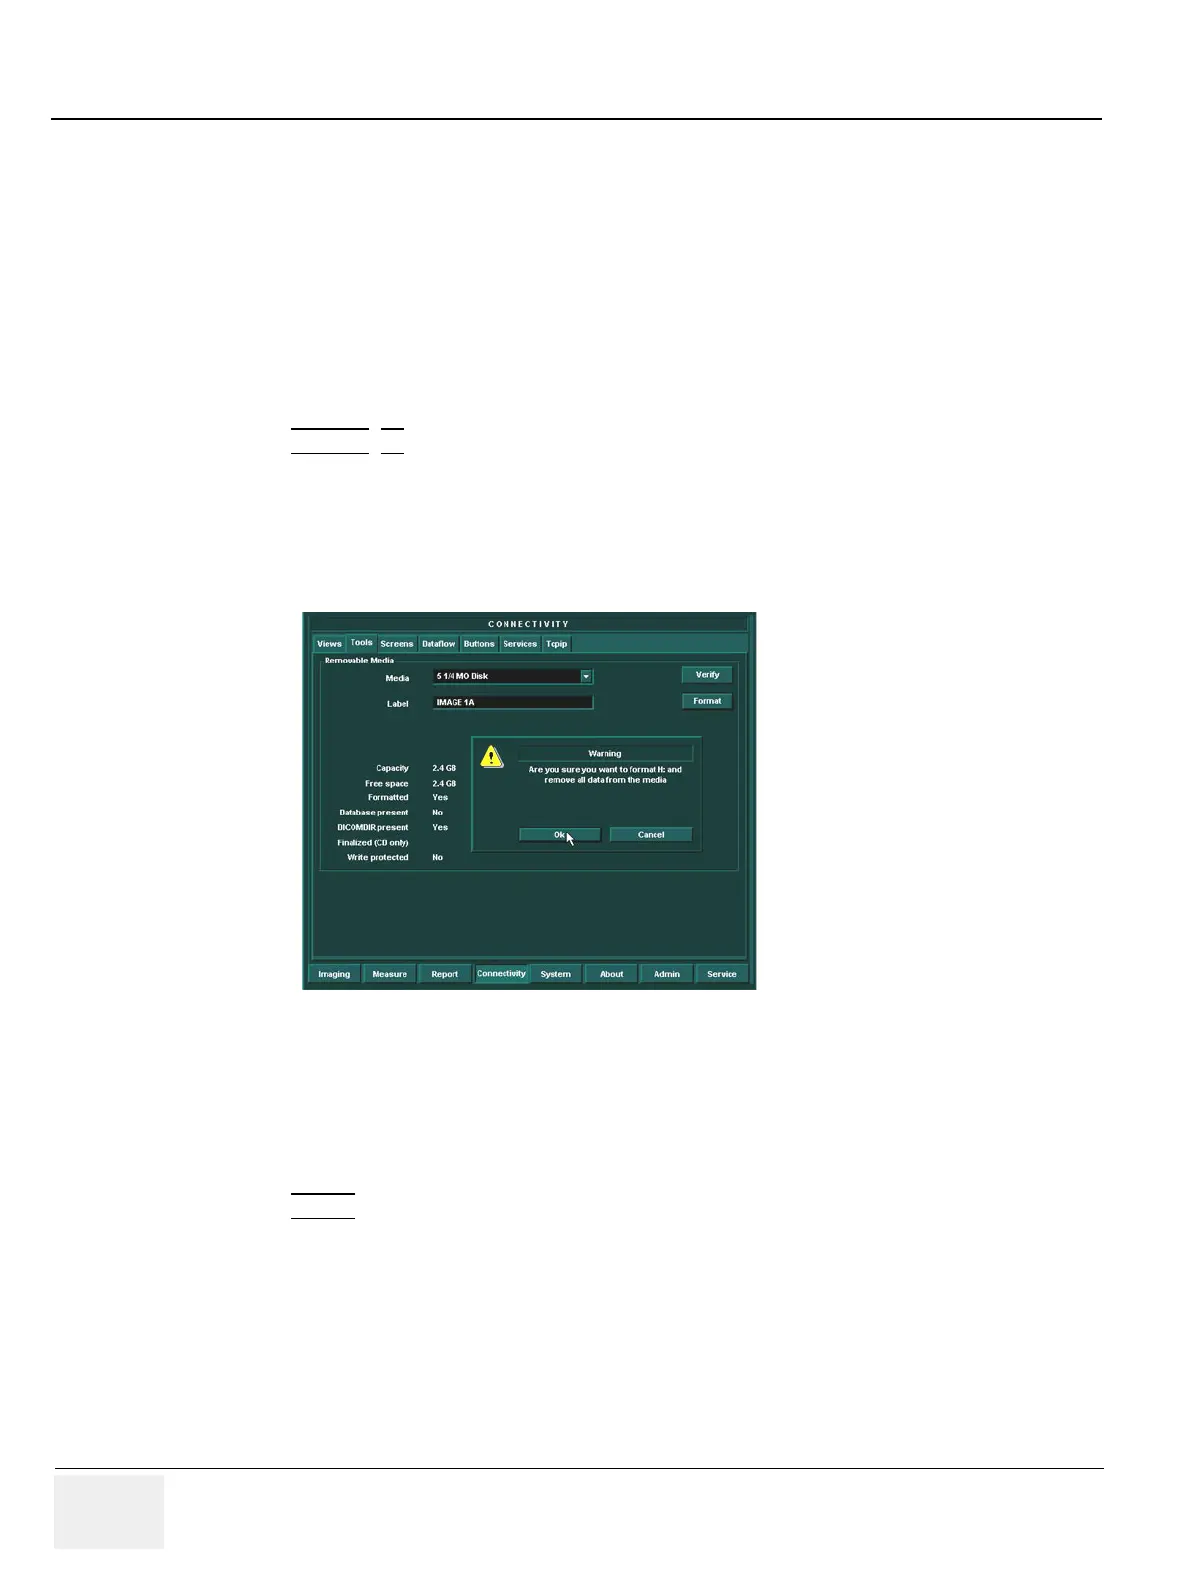
6.) Select Tools in the Connectivity menu.
7.) In the Label window, type the same name as labelled on the MO disk side A.
8.) Select Format.
9.) A warning “Are you sure you want to format H: and remove all data from the media” appears, select
OK.
10.)Wait until the information dialogue window appears on screen.
11.)Select OK to continue.
12.)Verify the disk formatting status has been updated.
13.)Press ALT-E.
14.)Select the 5 1/4 MO Disk, to eject Disk.
15.)Insert the MO disk, side B and repeat step 7 to 14.
Figure 8-49 Prepare MO Disk - Image Storage
 Loading...


