Repair information 4-17
7510
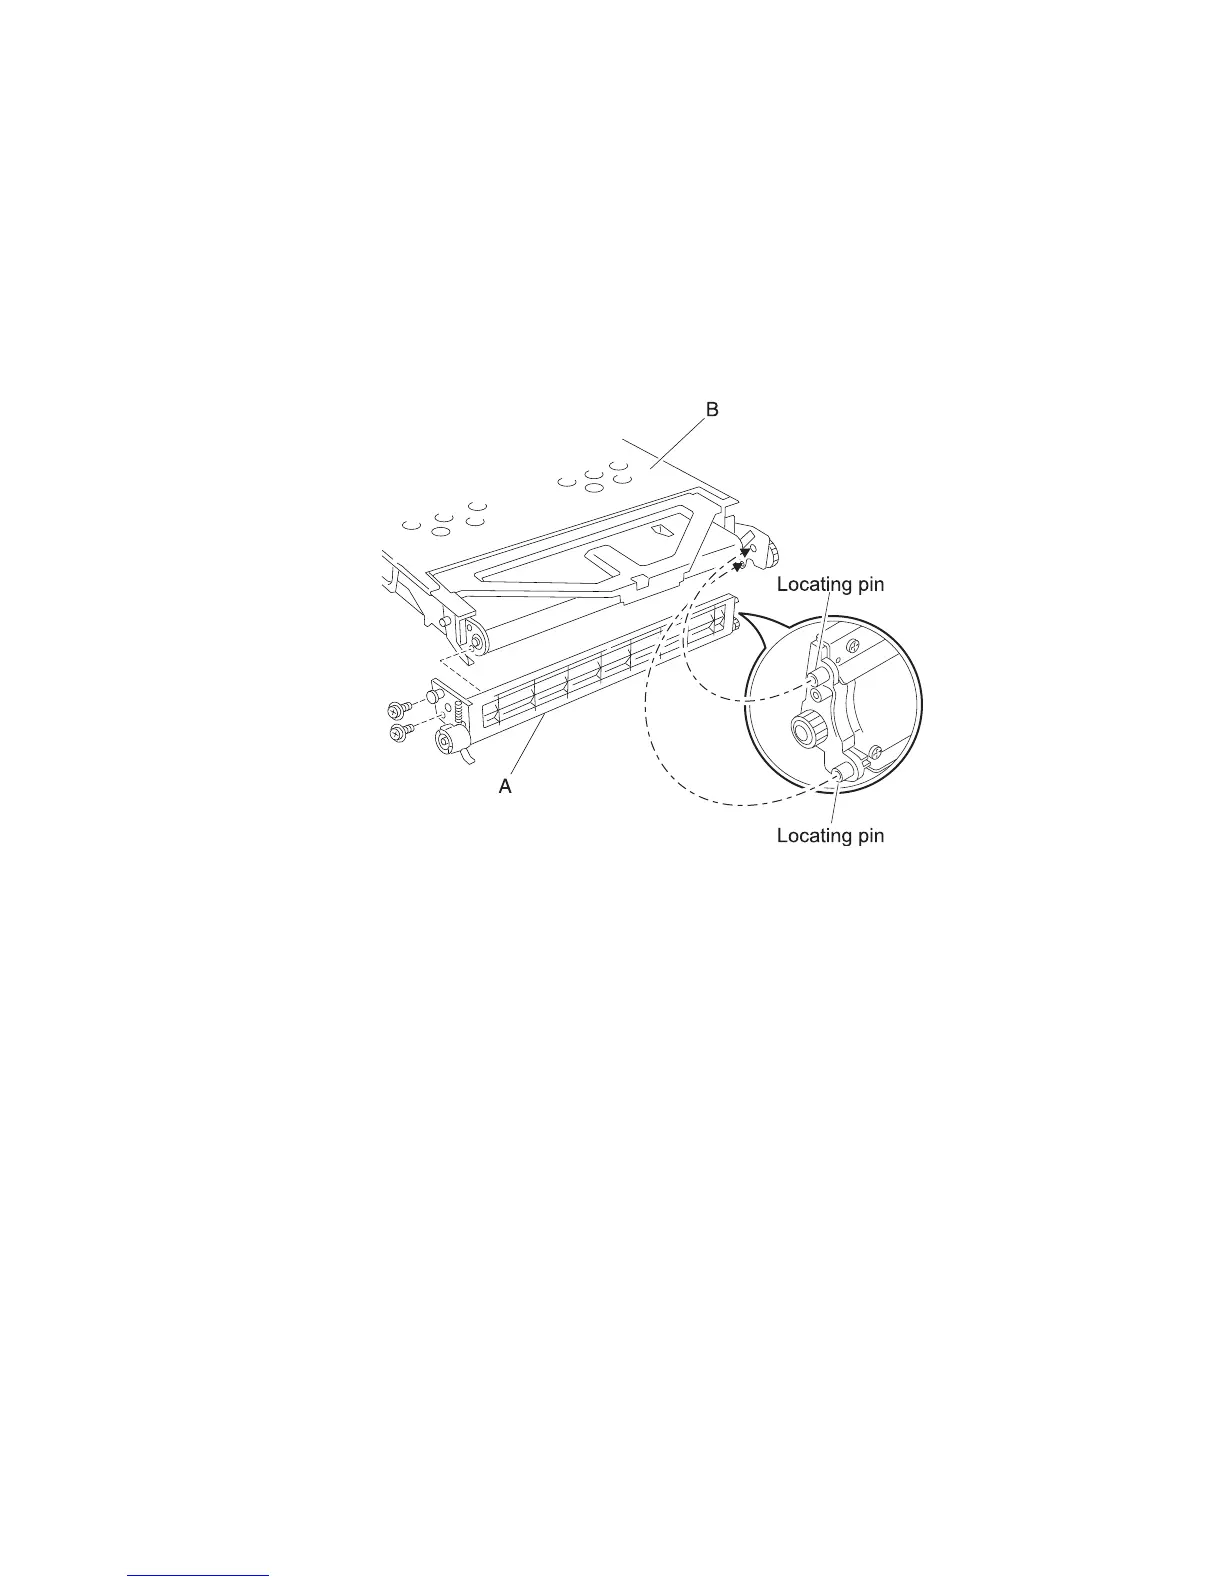
Transfer belt cleaning assembly removal
Warning: When removing the transfer belt unit assembly, do not touch the belt surface, or damage will occur.
Note: It is not required to completely remove the transfer belt unit assembly (B) from the machine. It can be
partially pulled out to provide access to the transfer belt cleaning assembly (A).
1. Remove the transfer belt unit assembly. See “Transfer belt unit assembly removal” on page 4-16.
2. Remove the two screws securing the transfer belt cleaning assembly (A) to the transfer belt unit assembly (B).
3. Remove the transfer belt cleaning assembly (A).
Replacement warning: When reinstalling the transfer belt unit assembly, do not touch the belt surface, or
damage will occur.
Standard media exit shift assembly removal
1. Remove the rear cover assembly. See “Rear cover assembly removal” on page 4-5.
Warning: Ensure that the rear left middle cover is removed before removing the rear left upper cover, or
damage will occur.
2. Remove the rear left middle cover. See “Rear left middle cover removal” on page 4-6.
3. Remove the rear left upper cover. See “Rear left upper cover removal” on page 4-7.
4. Disconnect the two connectors from the standard media exit shift assembly (A).
5. Remove the four screws securing the standard media exit shift assembly (A) to the machine.
6. Remove the standard media exit shift assembly (A) from the machine.
 Loading...