4-156 Service Manual
7510
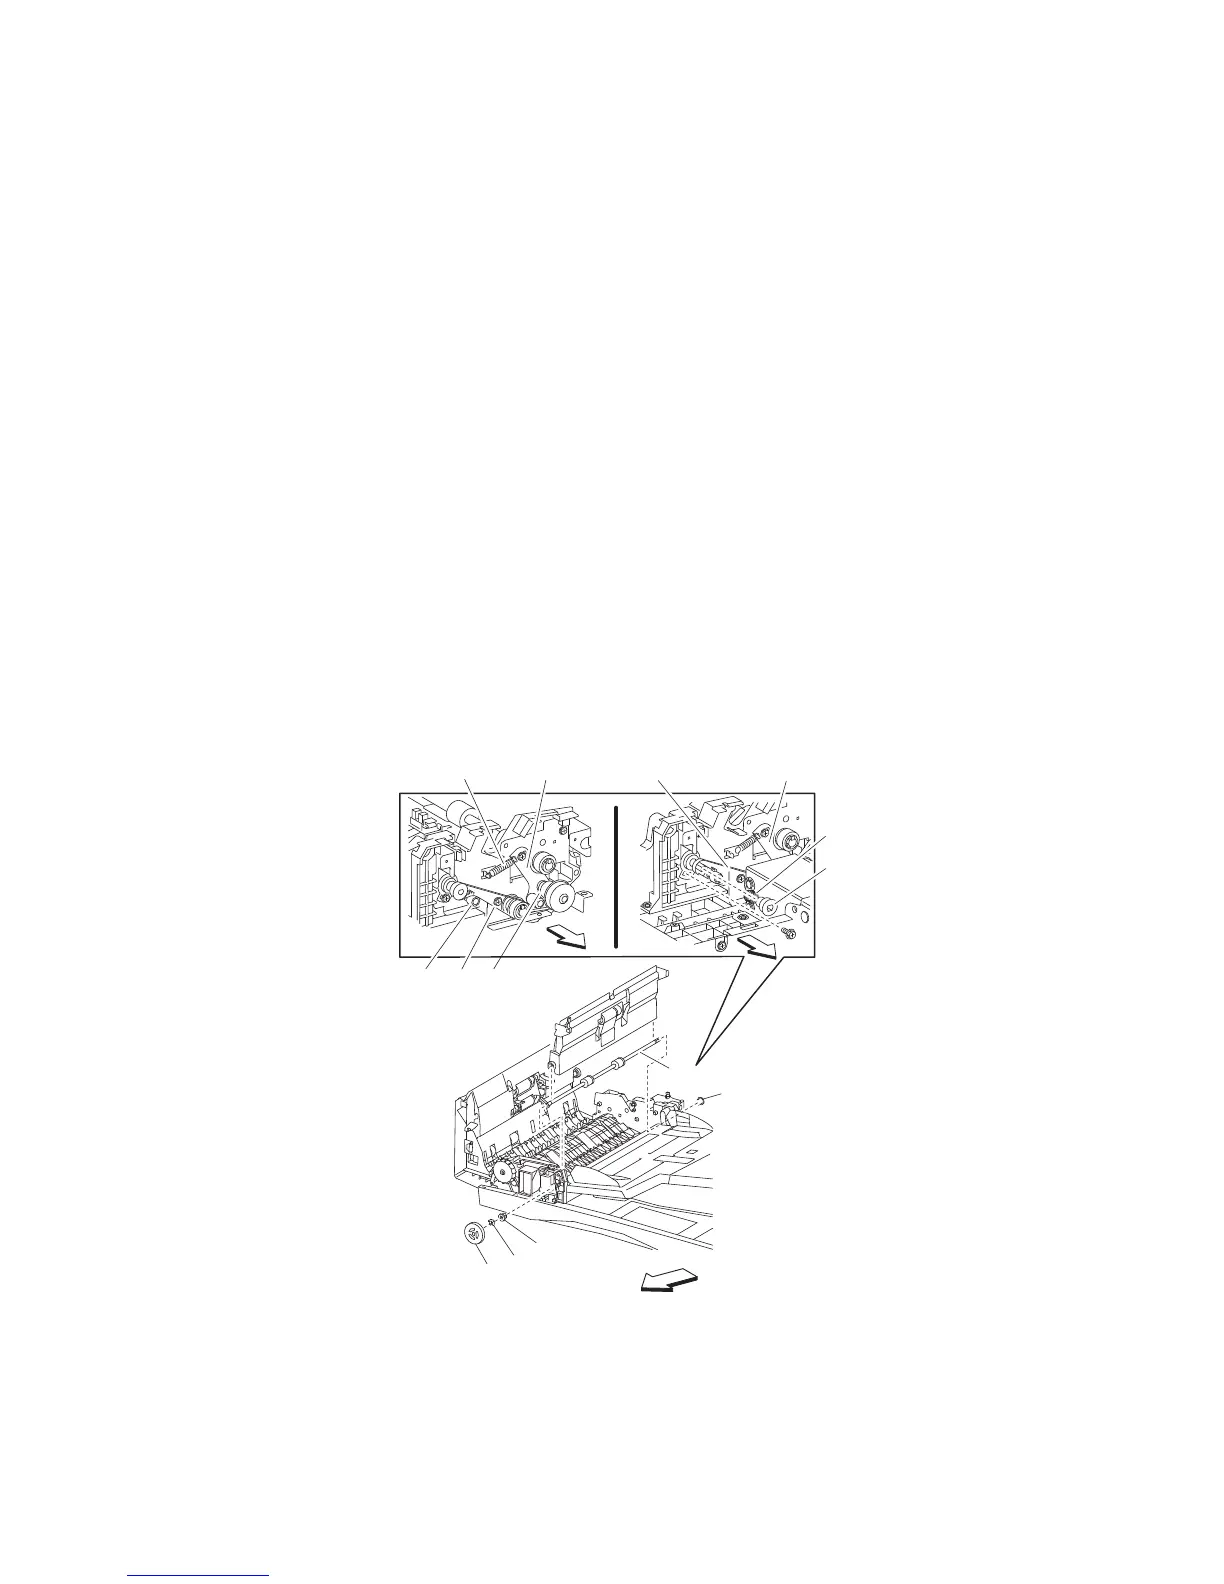
ADF exit roll assembly removal
1. Open the ADF left cover assembly.
2. Remove the ADF front cover assembly. See “ADF front cover assembly removal” on page 4-131.
3. Remove the ADF rear cover. See “ADF rear cover removal” on page 4-131.
4. Remove the ADF registration motor. See “ADF registration motor removal” on page 4-159
5. Remove the ADF feed drive motor assembly. See “ADF feed drive motor assembly removal” on page 4-134.
6. Remove the ADF separation roll guide assembly. See “ADF separation roll guide assembly” on page 4-155.
7. Loosen the screw securing the small tension bracket (A), and loosen the exit roll drive belt tension (B).
8. Loosen the screw securing the tension bracket (C), and loosen the registration secondary belt (D) tension.
9. Remove the registration secondary drive belt (D).
10. Remove the tension spring (E).
11. Remove the exit roll drive belt (B).
12. Loosen the set screw securing the damper (F).
13. Remove the damper (F).
14. Remove the plastic clip securing the bushing 6 mm (G) on the front of the feed assembly.
15. Remove the bushing 6 mm (G).
16. Move the ADF exit roll assembly (H) to the rear.
17. Release the hook securing the exit roll drive pulley 20T (I) to the ADF exit roll assembly (H).
18. Remove the exit roll drive pulley 20T (I).
19. Remove the retainer spring (J).
20. Remove the bushing 6 mm (K).
21. Move the ADF exit roll assembly (H) to the rear and then up.
Note: Ensure that the small tension bracket (A) is applying adequate tension to the exit roll drive belt (B).
22. Remove the ADF exit roll assembly (H).
Front
G
Plastic clip
K
B
A
C
Rear
E
H
I
Rear
B
C
J
D
F
 Loading...