Repair information 4-95
7510
Printhead assembly removal
Warning: When removing the printhead assembly, be careful not to drop it, or damage will occur.
Warning: Always perform color registration adjustment when reinstalling the printhead, NVM initialization, or
developer interlock plate assembly.
1. Detach the finisher if equipped. Refer to the MFP or the Printer Finisher Service Manual.
2. Remove the base machine from the scanner/ADF stand assembly.
3. Remove the rear cover assembly. See “Rear cover assembly removal” on page 4-5.
4. Remove the right cover assembly. See “Right cover assembly removal” on page 4-4.
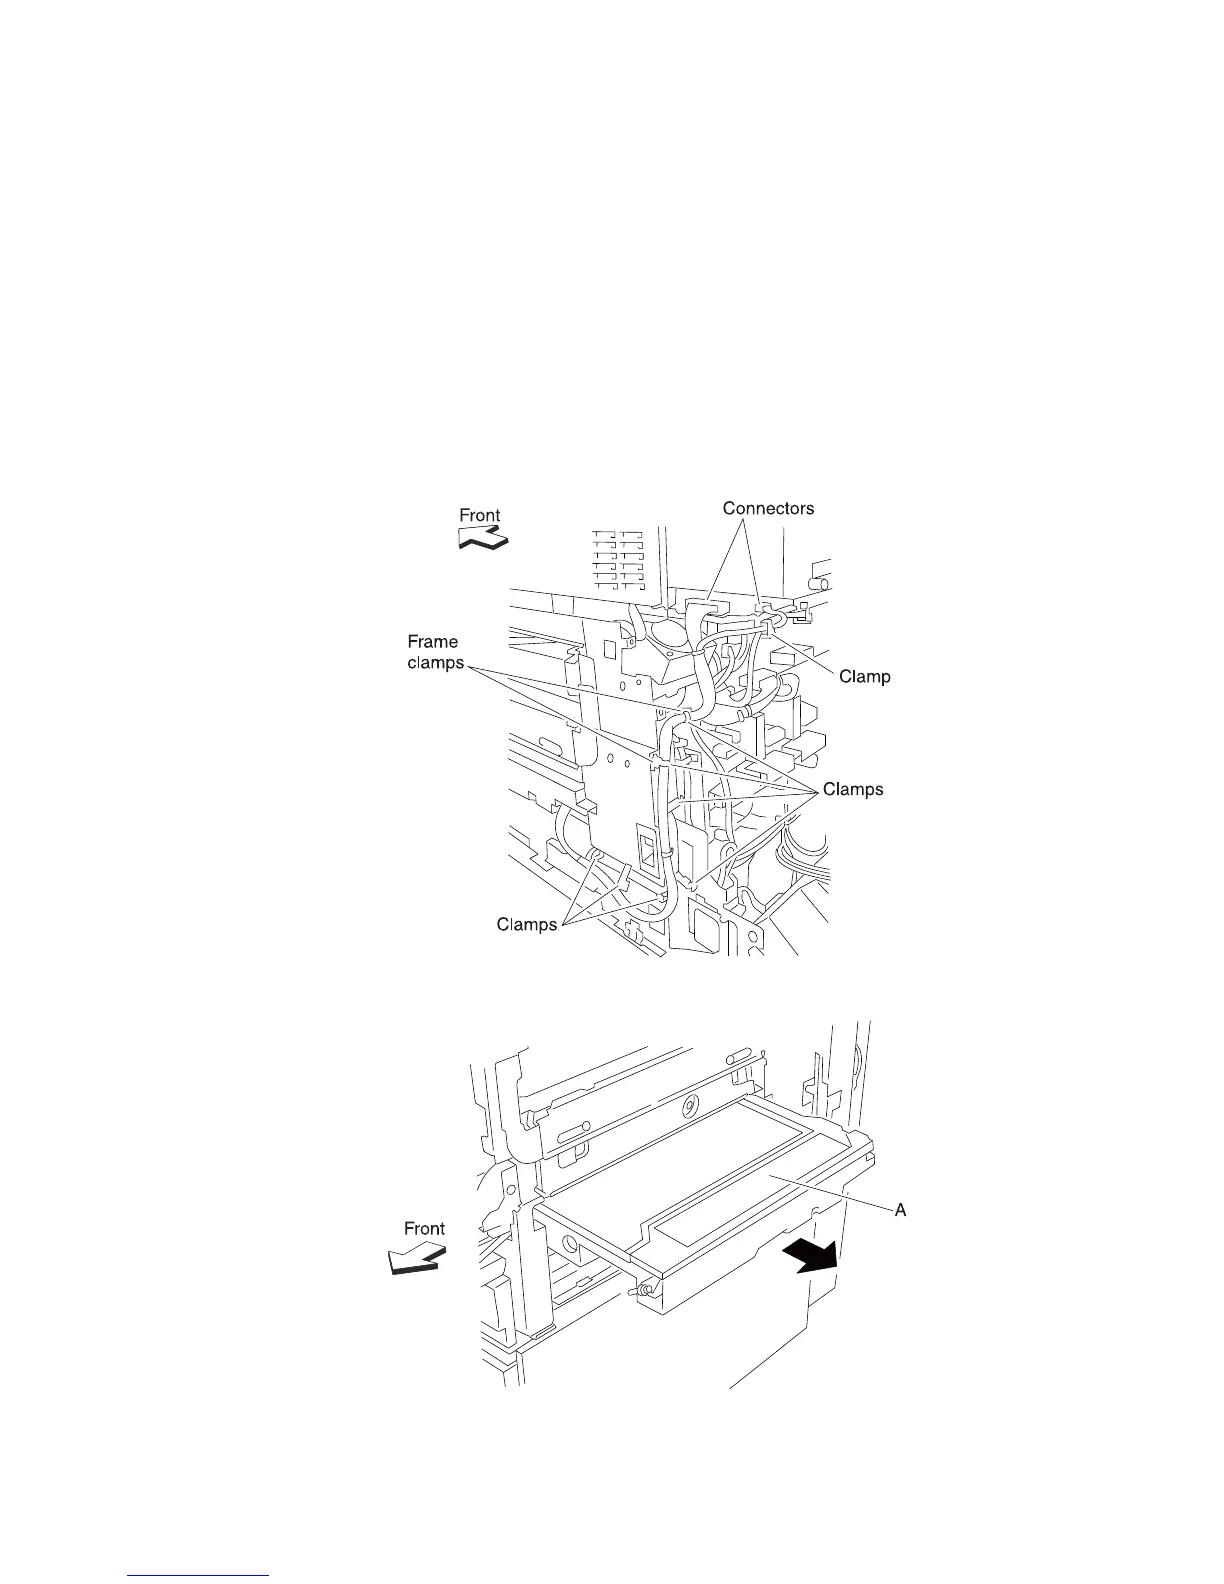
5. Disconnect the two connectors from the printhead assembly (A).
6. Release the two frame clamps from the machine.
7. Release the harness from the clamps.
8. Remove the two screws securing the printhead assembly (A) to the machine.
9. Gently pull the printhead assembly (A) from the machine.
 Loading...