4-94 Service Manual
7510
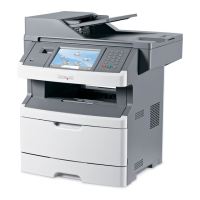
18. Remove the CMYK toner add motor assembly (A).
CMYK transfer HVPS card assembly removal
1. Remove the rear cover assembly. See “Rear cover assembly removal” on page 4-5.
2. Remove the rear upper cooling fan bracket assembly. See “Rear upper cooling fan bracket assembly
removal” on page 4-102.
3. Remove the developer / transfer roll HVPS card assembly. See “Developer / transfer roll HVPS card assembly
removal” on page 4-103.
4. Remove the rear left middle cover. See “Rear left middle cover removal” on page 4-6.
5. Remove the 24V LVPS card bracket assembly. See “24V LVPS card bracket assembly removal” on
page 4-85.
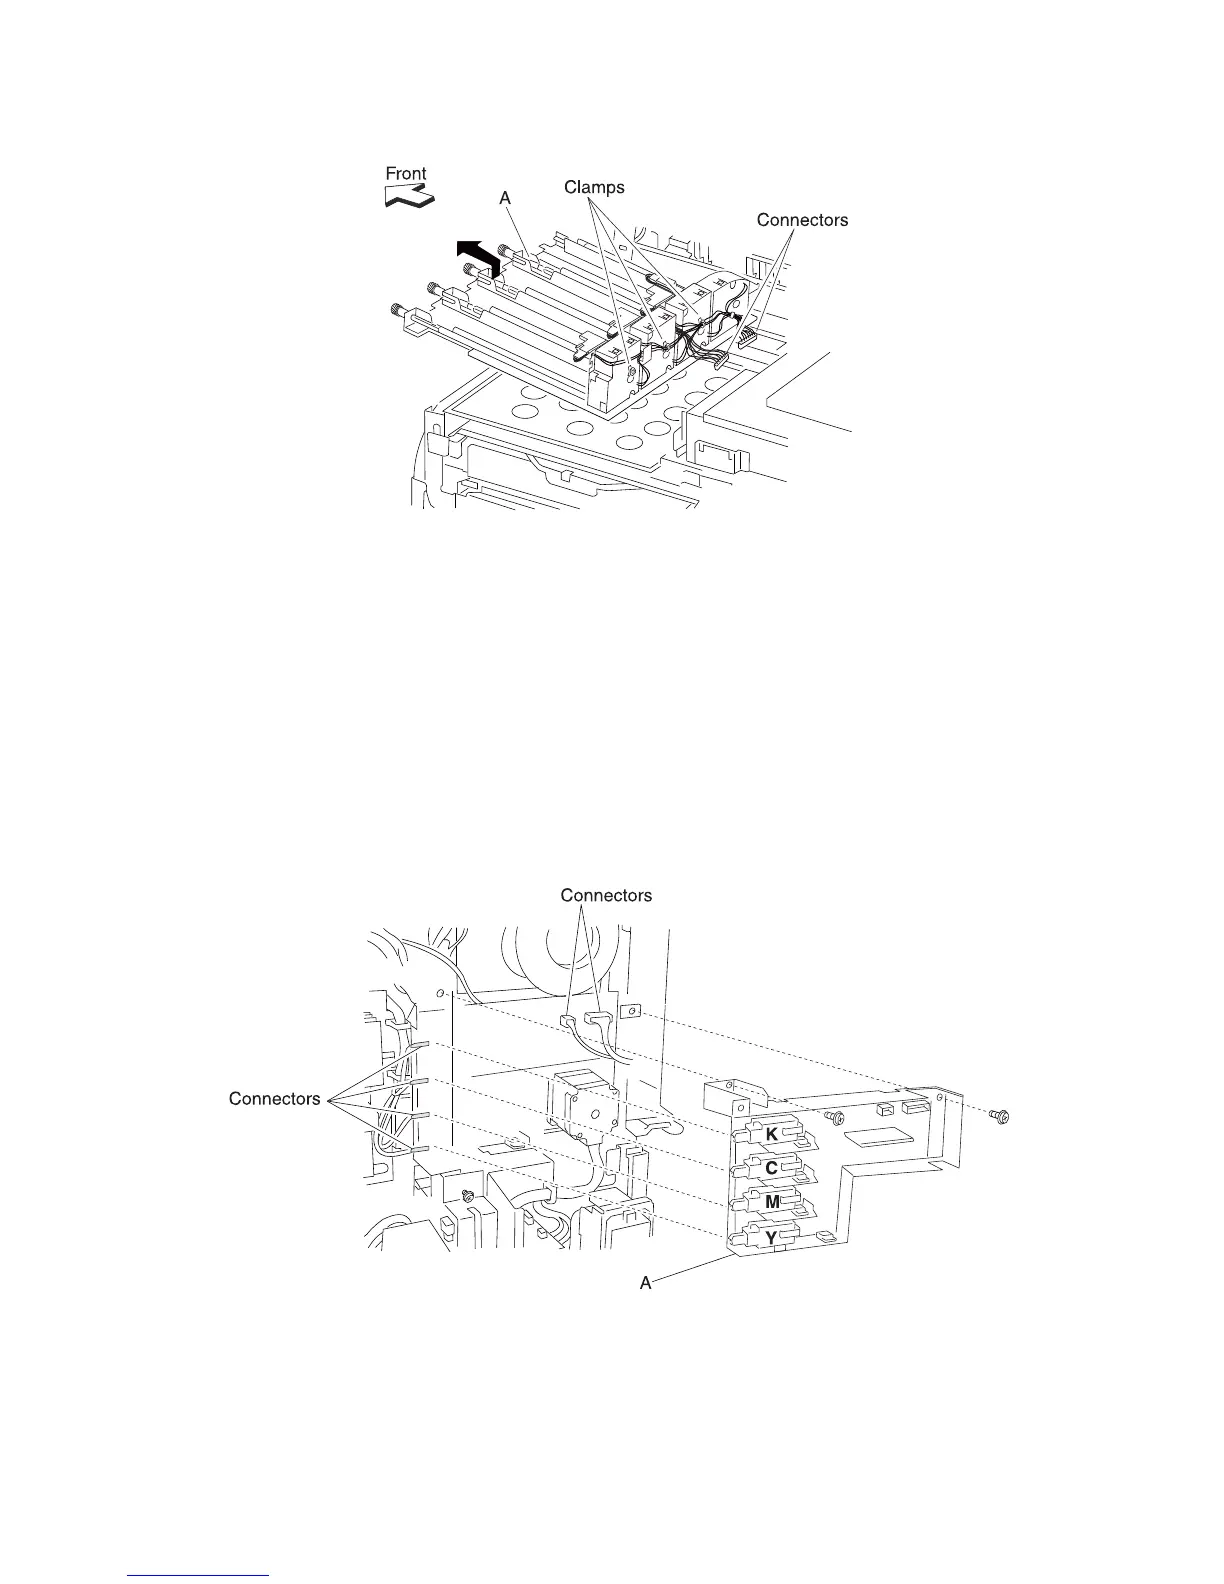
6. Disconnect the two connectors from the CMYK transfer HVPS card assembly (A).
7. Disconnect the four faston connectors from the CMYK transfer HVPS card assembly (A).
8. Remove the two screws securing the CMYK transfer HVPS card assembly (A) to the machine.
9. Remove the CMYK transfer HVPS card assembly (A).
Warning: When reinstalling the CMYK transfer HVPS card assembly (A), ensure that the four high voltage
cables are properly hooked up to the CMYK transfer HVPS card assembly (A) or print quality problems will occur..
 Loading...