Repair information 4-39
7510
Waste toner cartridge cover removal
1. Remove the printer front door assembly. See “Printer front door assembly removal” on page 4-3.
2. Lower the waste toner cartridge cover (A) to its lower-most position.
3. Remove the waste toner cartridge.
4. Remove the front left cover. See “Front left cover removal” on page 4-9.
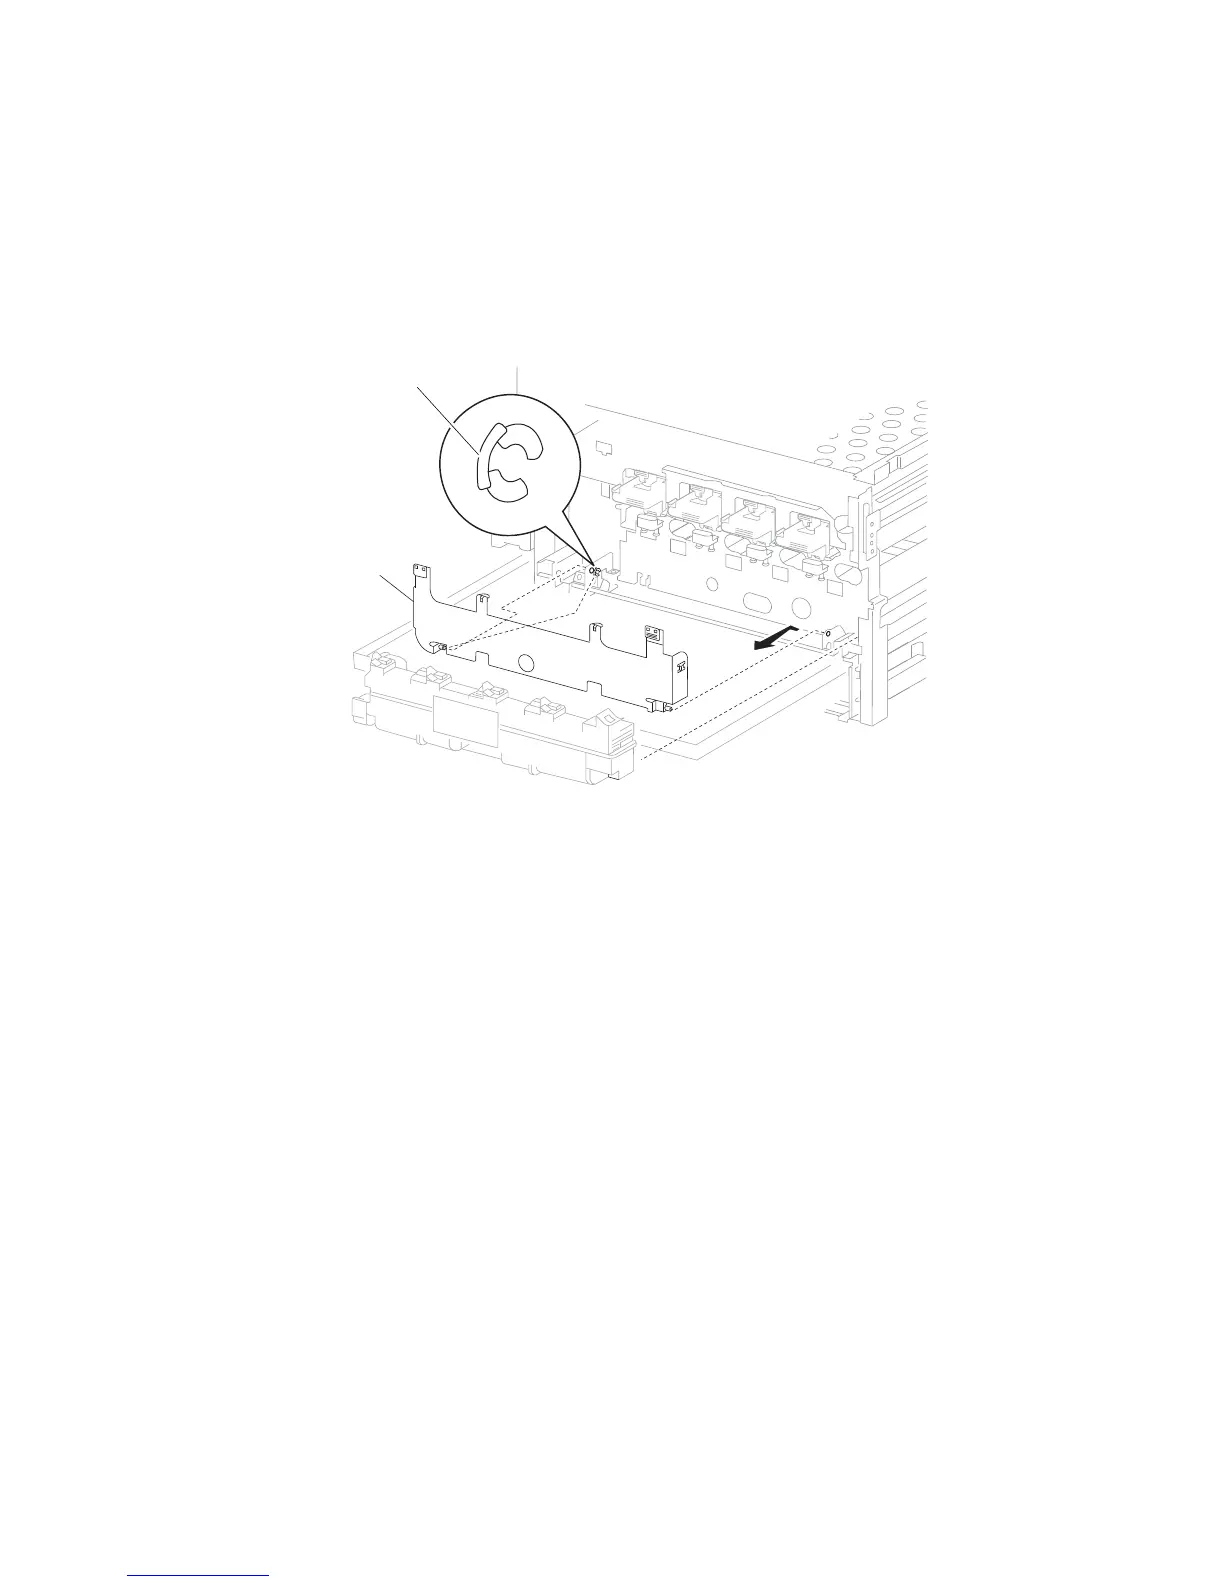
5. Remove the C-clip securing the waste toner cartridge cover (A) to the machine.
6. Move the waste toner cartridge cover (A) to the left.
7. Remove the waste toner cartridge cover (A).
Waste toner cartridge sensor assembly removal
1. Remove the front left cover. See “Front left cover removal” on page 4-9.
2. Remove the waste toner cartridge cover. See “Waste toner cartridge cover removal” on page 4-39.
3. Remove the screw securing the bracket (A) to the machine.
4. Remove the bracket (A).
Note: When removing the waste toner cartridge sensor assembly (B), ensure the plastic bosses are not broken
off when they insert into the brackets.
Note: If removing the developer units, the waste toner cartridge sensor assembly (B) does not need to be
removed from the machine. It may be allowed to gently hang by the harness.
5. Remove the harness from the clamps.
6. Disconnect the connector from the waste toner cartridge sensor assembly (B).
 Loading...