12
Utility mode
12-68 CS193/CS173/CS163
11 Type in the e-mail address (up to 320 characters), and then touch [OK].
The e-mail address is set.
If the e-mail address exceeds 101 characters, [Detail] appears in the User Registration screen. Touch
[Details] to display the E-Mail Address Details screen and the entire e-mail address.
12 To use the account track function, touch [Account Name].
– [Account Name] appears only if "Account Track" on the General Settings screen been set to "ON".
The Account Name screen appears.
13 Touch the button for the desired account, and then touch [OK].
– Before an account name can be selected, accounts must have been registered.
For details on registering accounts, refer to "Account Track Registration" on page 12-73.
The account is set.
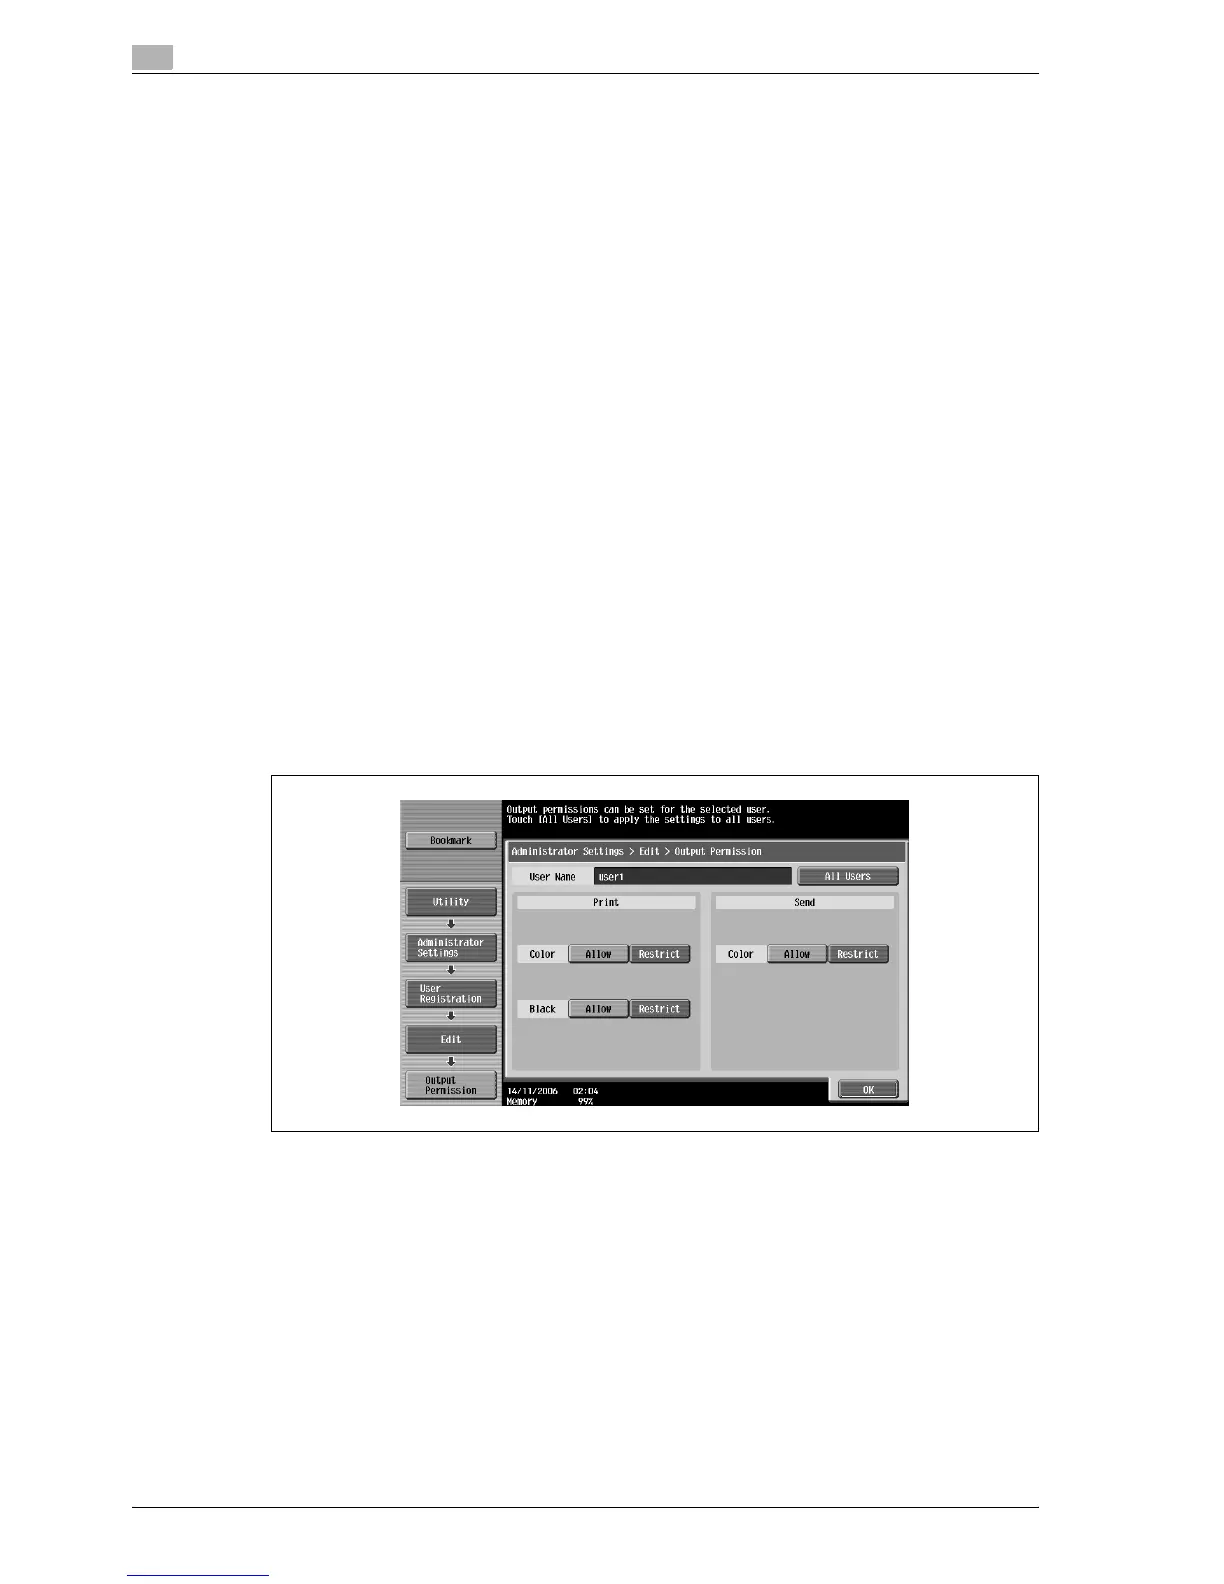
14 Touch [Output Permission].
The Output Permission screen appears.
15 Touch a button under "Print" or "Send" to specify the desired settings.
– To permit printing by the user, touch [Allow].
– To prohibit printing by the user, touch [Restrict].
– Touch [All Users] to apply the settings in the current screen to all registered users. Touch [All Users],
touch [OK], and then touch [OK] in the next screen that appears in order to display a message and
apply the settings to all users. At this time, do not turn off the machine with the main power switch.
– If color printing is restricted, printing is not possible with the "Auto Color", "Full Color", "2 Color" or
"Single Color" settings.
– If black printing is restricted, printing is not possible with the "Auto Color" or "Black" setting.
– If both color and black printing are restricted, the message "Copying is prohibited." appears, even
if authentication was completed correctly.
– If "Color" is set to "Restrict" under "Send", color scanning is not possible.
16 Touch [OK].
The output permissions are set.
17 Touch [Max. Allowance Set].
The Max. Allowance Set screen appears.