134
Chapter3 DIP Switch on Intelligent Tap
F3SG-SR
User’s Manual
Setting with Intelligent Tap
3-5. DIP Switch on Intelligent Tap
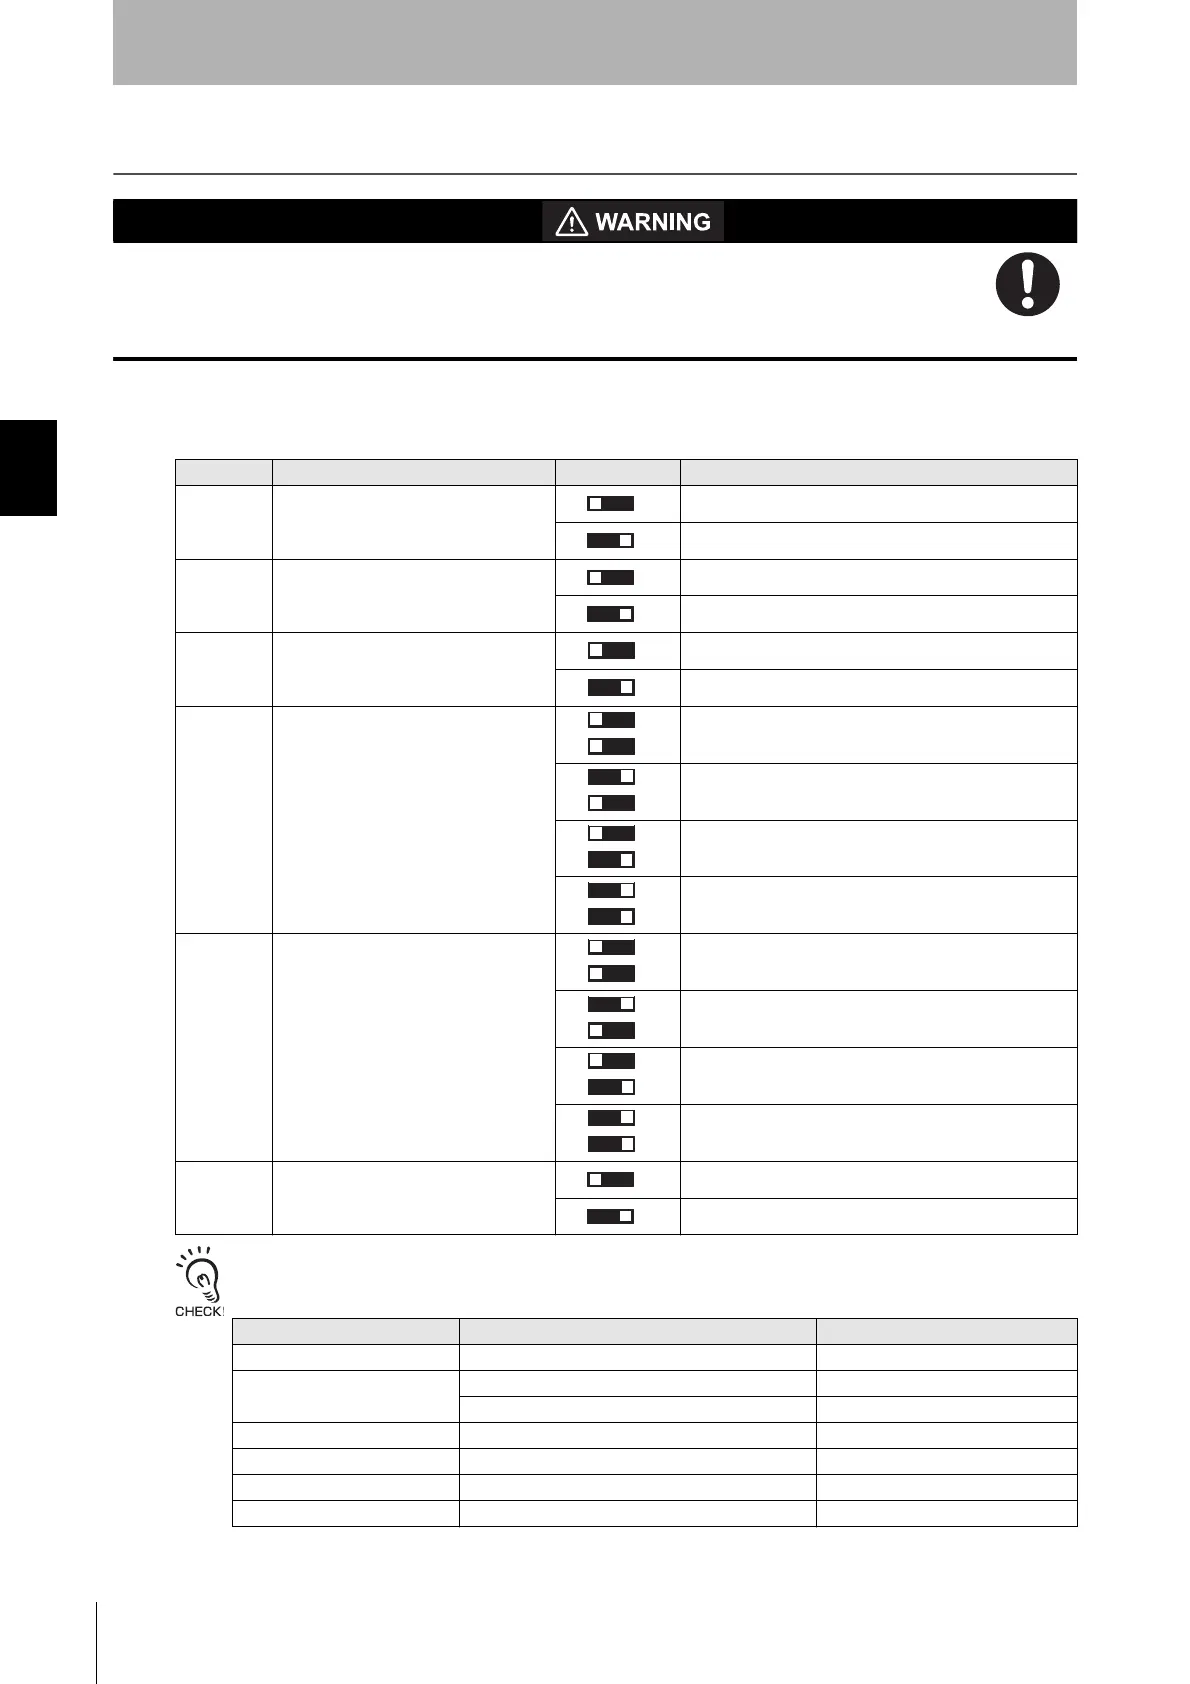
Make sure the Responsible Person tests the operation of the F3SG-SR after setting with the DIP
Switch on the F39-SGIT-IL3 to verify that the F3SG-SR operates as intended. Make sure to stop
the machine until the test is complete. Unintended settings may cause a person to go
undetected, resulting in serious injury.
The table below lists the positions and assigned functions of the DIP Switches on the Intelligent Tap.
: Indicates a switch position.
When the DIP Switch Position 1 is set at ON (Lock), Position 2 at ON (DIP Switch Enabled) and Positions 3 to 8 at OFF*,
the functions assigned to the Positions 3 to 8 operates according to the settings of the OFF positions and the following
functions are set as described in the table below.
*Referto 2-1. Combination of FunctionsforsettingstobeaffectedwhenanyofPositions3to8issetatON.
Position Function Setting Description
1 Lock/Unlock
Unlock
Lock (factory default setting)
2 DIP Switch Enable/Disable
DIP Switch Disabled (factory default setting)
DIP Switch Enabled
3 EDM
EDM Disabled (factory default setting)
EDM Enabled
4, 5 Interlock/Pre-Reset
Auto Reset (factory default setting)
Pre-Reset
Manual Reset (Start/Restart Interlock)
Auto Reset (same as Auto Reset (factory default
setting))
6, 7
Fixed Blanking/
Floating Blanking
Blanking Disabled (factory default setting)
Fixed Blanking Enabled
Floating Blanking Enabled
Blanking Disabled (same as Blanking Disabled
(factory default setting))
8 Operating Range Selection
Long (factory default setting)
Short
Item Function Setting
PSDI PSDI Disable
Muting Muting Enable
Zone setting All beams
Teach-in Teach-in Input Enable Teach-in by Push Switch
Area Beam Indicator Output operation mode of Area Beam Indicator Block/Unblock Information
Warning Zone Warning Zone Disable
Reduced Resolution Reduced Resolution Disable
1ON
1ON
2ON
2ON
3ON
3ON
4ON
5ON
4ON
5ON
5ON
4ON
4ON
5ON
6ON
7ON
7ON
6ON
6ON
7ON
6ON
7ON
8ON
8ON

 Loading...