Chapter 3: FRU Removal and Replacement Procedures
Replacing Array or Expansion Module Hard Drives
196 Quantum DXi6900 G1 User’s Guide
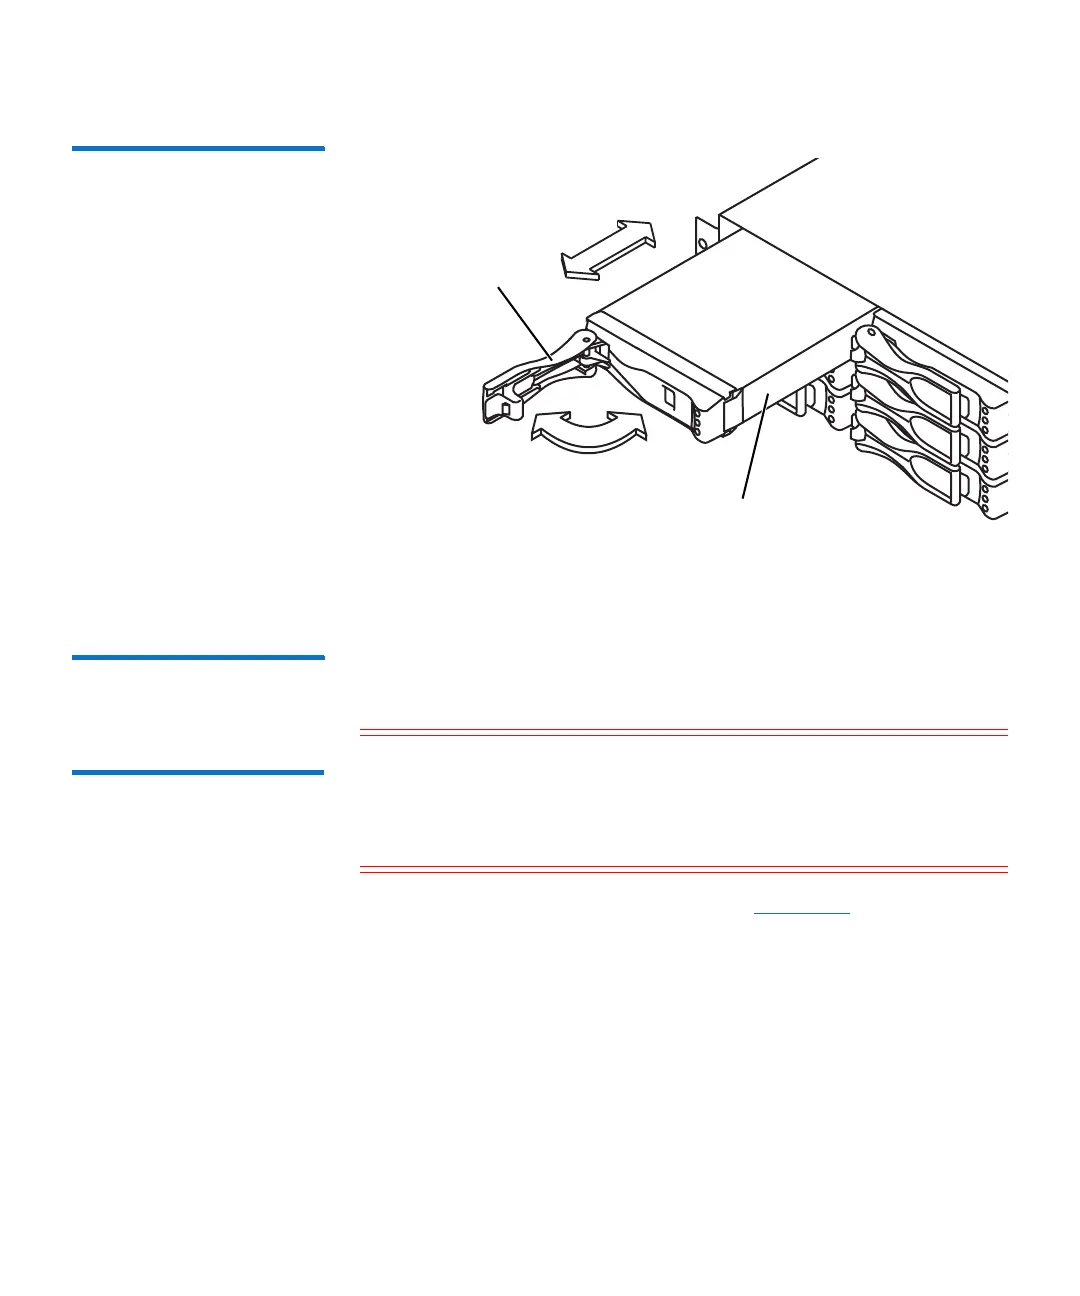
Figure 120 Removing and
Installing an Array or
Expansion Hard Drive
Installing a
Replacement Drive in
an Array or Expansion
Module
To install the replacement hard drive in a DXi6900 G1 Array module
(RBOD) or Expansion module (EBOD):
Caution: When installing a hard drive, ensure that the adjacent
drives are fully installed. Inserting a hard-drive carrier and
attempting to lock its handle next to a partially installed
carrier can damage the partially installed carrier's shield
spring and make it unusable.
1 Open the hard-drive carrier handle (see Figure 120)..
2 Insert the hard-drive carrier into the hard-drive slot until the carrier
connects with the backplane.
3 Close the hard-drive carrier handle to lock the hard drive in place.
• It may take up to 30 seconds for the system to detect that a
failed drive was removed and a new drive was inserted.
• The activity indicator for all drives in the Array module or
Expansion module will blink green while the drive is rebuilding.
Hard drive handle
Hard drive carrier

 Loading...


