Chapter 3: FRU Removal and Replacement Procedures
Replacing an Expansion Module ESM Canister
216 Quantum DXi6900 G1 User’s Guide
Identifying a Failed Expansion Module ESM
The DXi6900 G1 contains 0–13 Expansion modules (EBODs). Each
Expansion module contains two ESM canisters (A and B).
To identify the failed Expansion module ESM canister:
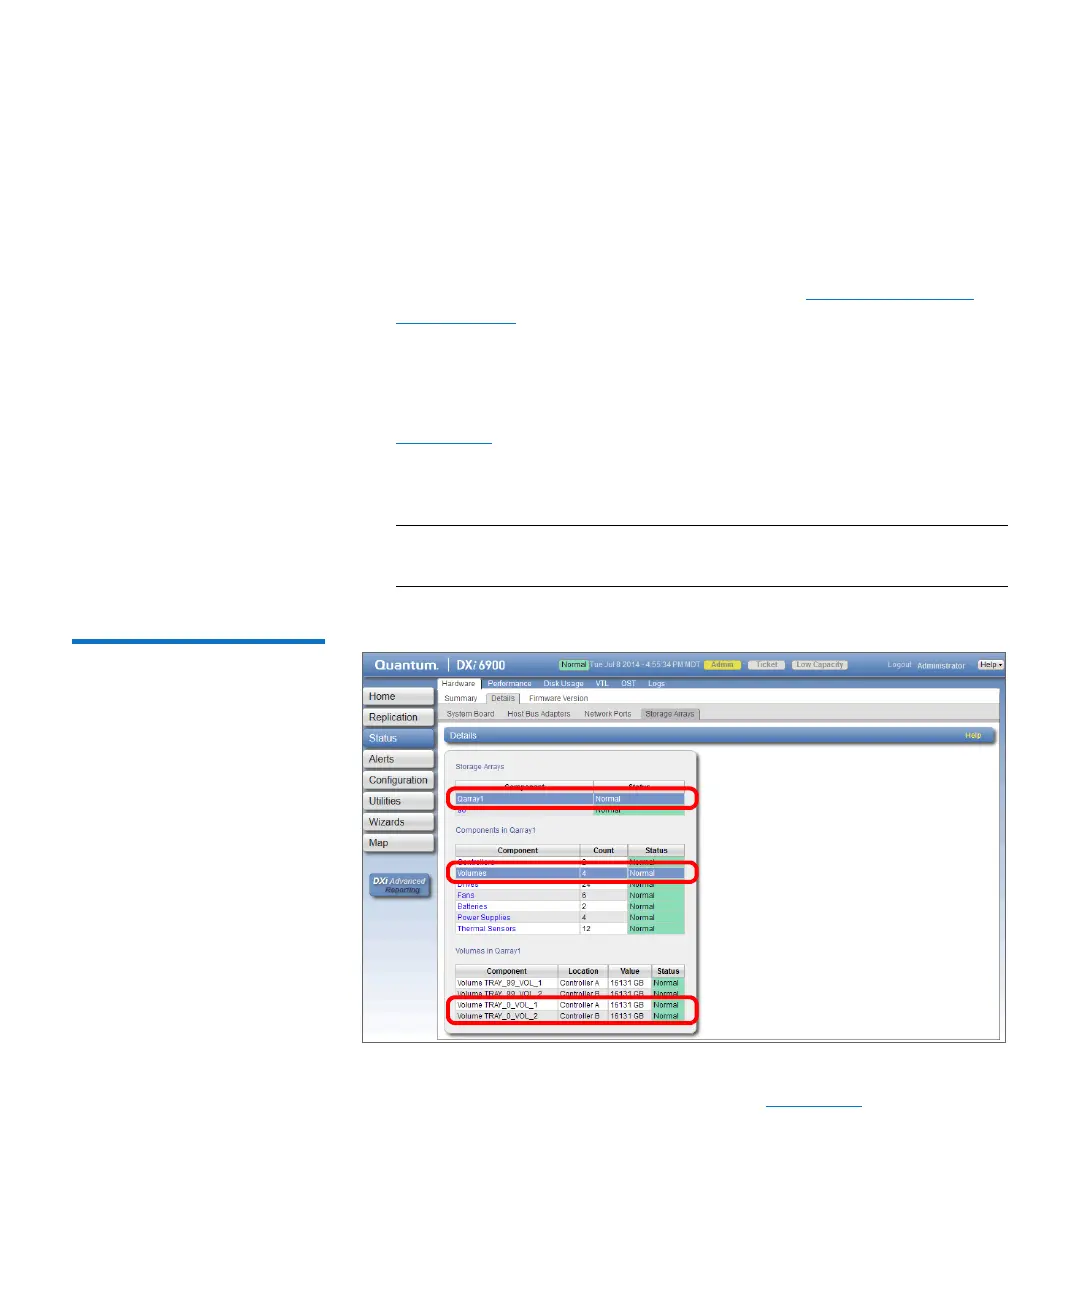
1 Access the remote management console (see Accessing Remote
Management on page 25).
2 Navigate to the Status > Hardware > Details > Storage Arrays
page.
3 Note the status of the volumes in each Array module (see
Figure 137).
Tray_0 corresponds to the Expansion module (EBOD) connected to
an Array module (RBOD). Tray_99 corresponds to the Array module.
Note: Qarray1 corresponds to RBOD 1 and Qarray2 corresponds
to RBOD 2.
Figure 137 Checking
Expansion Module ESM Status
4 Locate the failed ESM canister on the back of the Expansion module
by viewing the Service Action LEDs (see
Figure 138).
• Service Action Required - This LED is lit when the component
has failed, but it is not yet in a state to be replaced.

 Loading...


