EasyManuals Logo

SATO CT4-LX User Manual

SATO CT4-LX
564 pages
To Next Page IconTo Next Page
To Previous Page IconTo Previous Page
Page #146 background imageLoading...
Page #146 background image
Registering Print Settings as Media Profiles (When Using Multiple Types of Media)
146
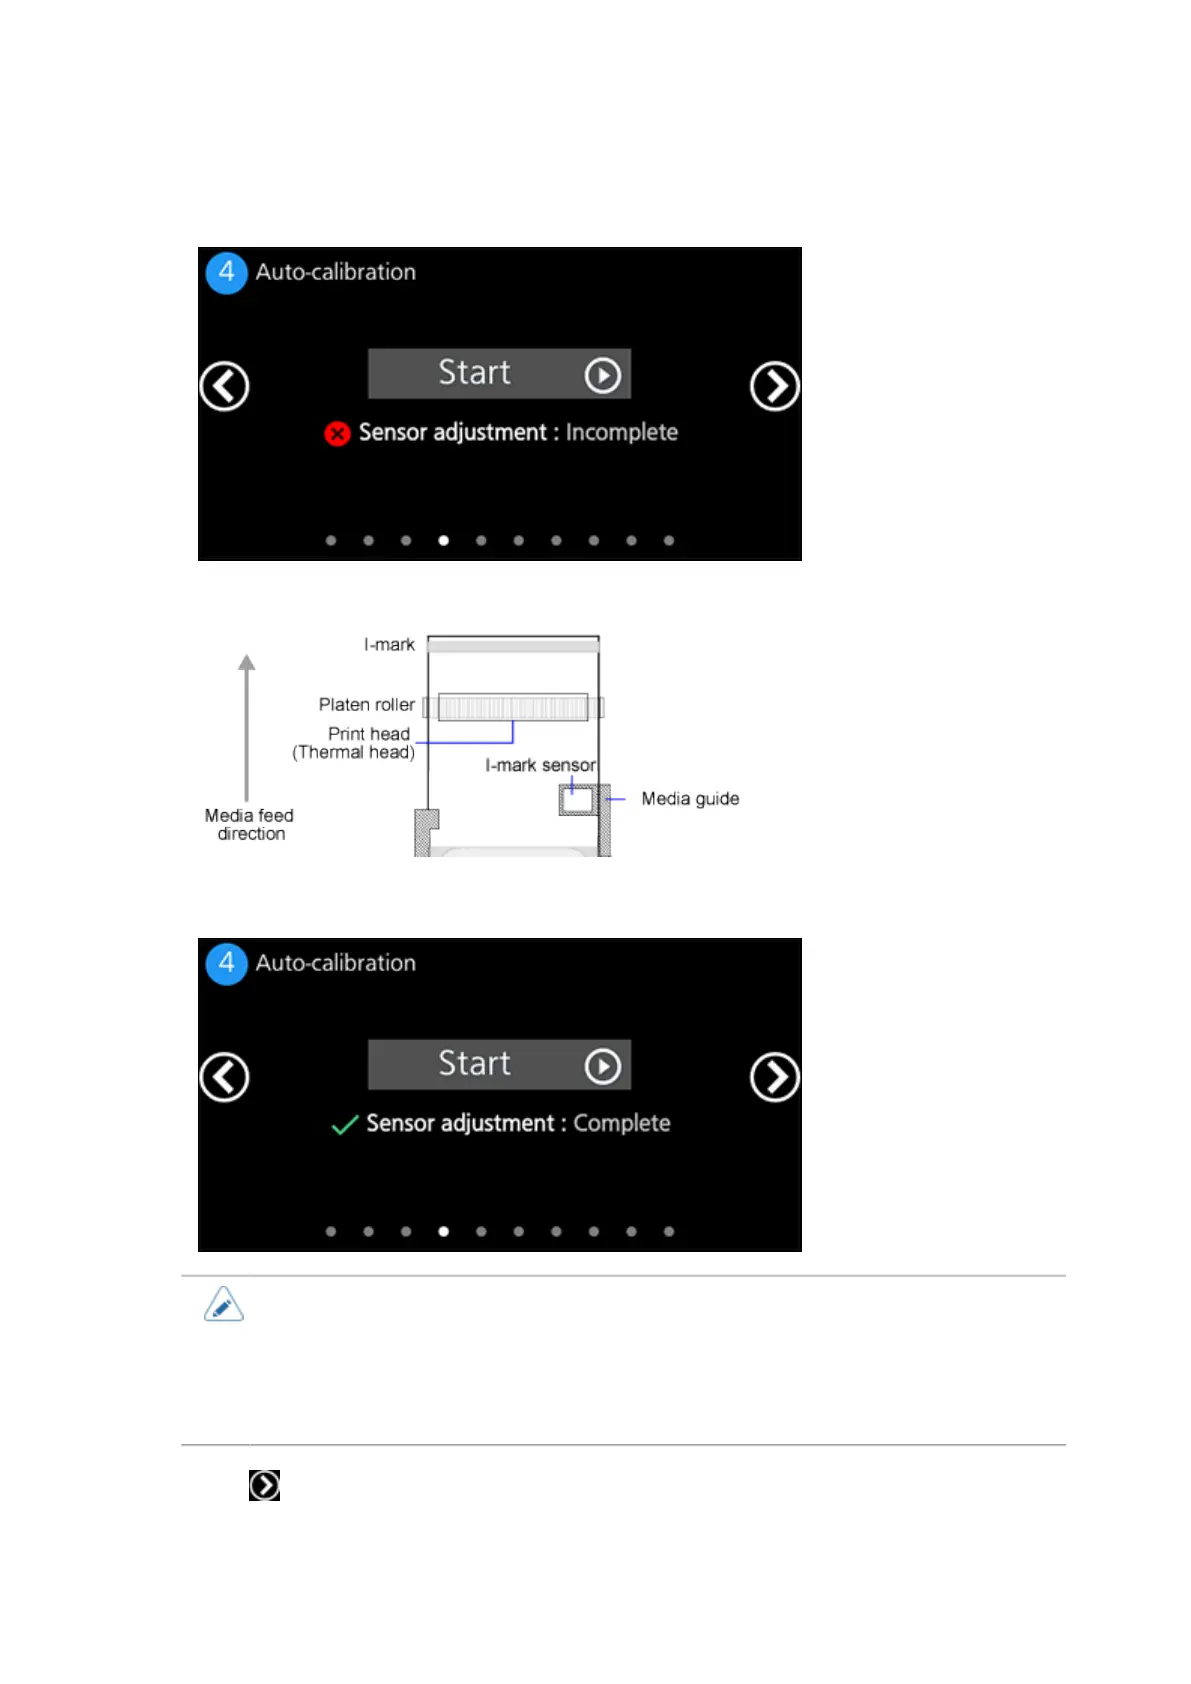
9. Tap [Start] and execute automatic sensor adjustment according to the on-screen
instructions.
Remove the label from the liner and set the liner so the I-mark is not above the I-mark sensor.
For media without liners, such as wristbands or journal paper, load the media as is.
When the sensor adjustment is complete, the [Sensor adjustment] value changes to [Complete].
• This is displayed only if you have selected [Gap] or [I-Mark] for the sensor type.
• The results of executing automatic sensor calibration are reflected in the setting items
under [Printing] > [Advanced] > [Calibrate].
• If you do not execute automatic sensor calibration, the product's currently set values
are registered.
10.
Tap or slide the screen to the left.

Table of Contents

Questions and Answers:

Question and Answer IconNeed help?

Do you have a question about the SATO CT4-LX and is the answer not in the manual?

SATO CT4-LX Specifications

General IconGeneral
Print MethodThermal Transfer / Direct Thermal
Print Resolution203 dpi
Max Print Width4.09 inches (104 mm)
Media TypeRoll, Fan-fold
Media Thickness0.0025 to 0.008 inches (0.0635 to 0.2032 mm)
Ribbon Width0.98 inches (25 mm) to 4.09 inches (104 mm)
Ribbon Length984 feet
ConnectivityUSB, Ethernet, Bluetooth
Supported Barcode TypesPDF417, QR Code
Power Requirements100-240 VAC, 50/60 Hz

Related product manuals