2.
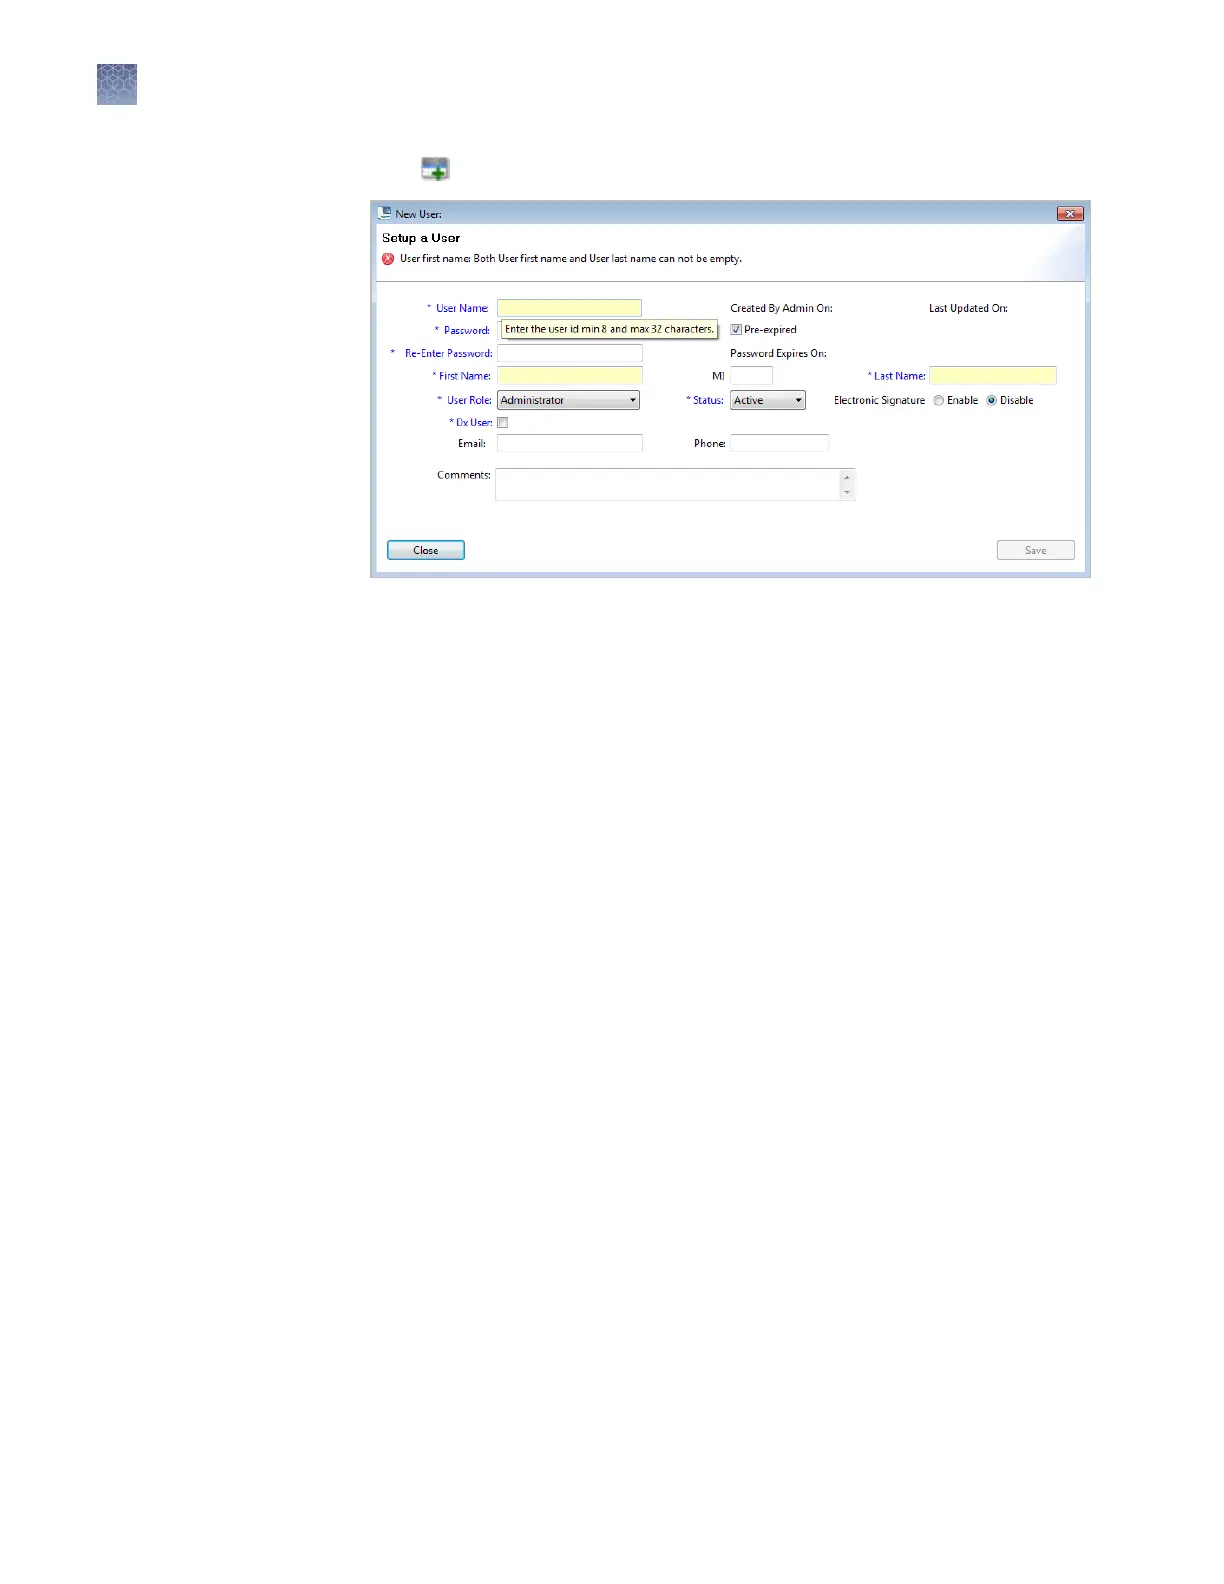
Click Create to display the New User dialog box.
3.
Enter User Name, Password, First Name, MI (middle initial – optional) and Last
Name. Click a eld to display the eld limits, which are specied in Security
seings.
Not
e: First Name, MI (middle initial), and Last Name are used to create User
Full Name, which is displayed as the name of the logged-in user.
Note: You cannot change the User Name after you save the user account.
4.
Select Pre-expired to require the user account to specify a new password at rst
log in. The Password Expires On date is specied in Security seings.
5.
Select the user role (described in “Create or edit a user role“ on page 197) and the
electronic signature state (determines if a user account has permission to
electronically sign objects). Leave the status set to Active.
Note: The Dx User function is not supported.
6.
(Optional) Enter email (for information only), phone, and comments.
7.
Click Save.
If the Save buon is dimmed, it indicates an invalid entry in a eld. Click a eld
to display the limits for the eld, then enter a valid entry.
The Users screen displays the following information for each user account:
• User
• F
ull Name
• Dx User (not supported in research
use only mode.)
• Role
• Status
• Password Expired (true=yes,
false=no)
• Last Modified On
• Created Date
• Password Change Date (by either
user or administrator)
• Email (for records only)
• Phone
• Comments
Chapter 8 Use Security
, Audit, and E-Sig functions (SAE Module)
Administrators
8
196
3500/3500xL Genetic Analyzer User Guide—Data Collection Software v3.1