CAPINTEC, INC. CAPTUS
®
3000
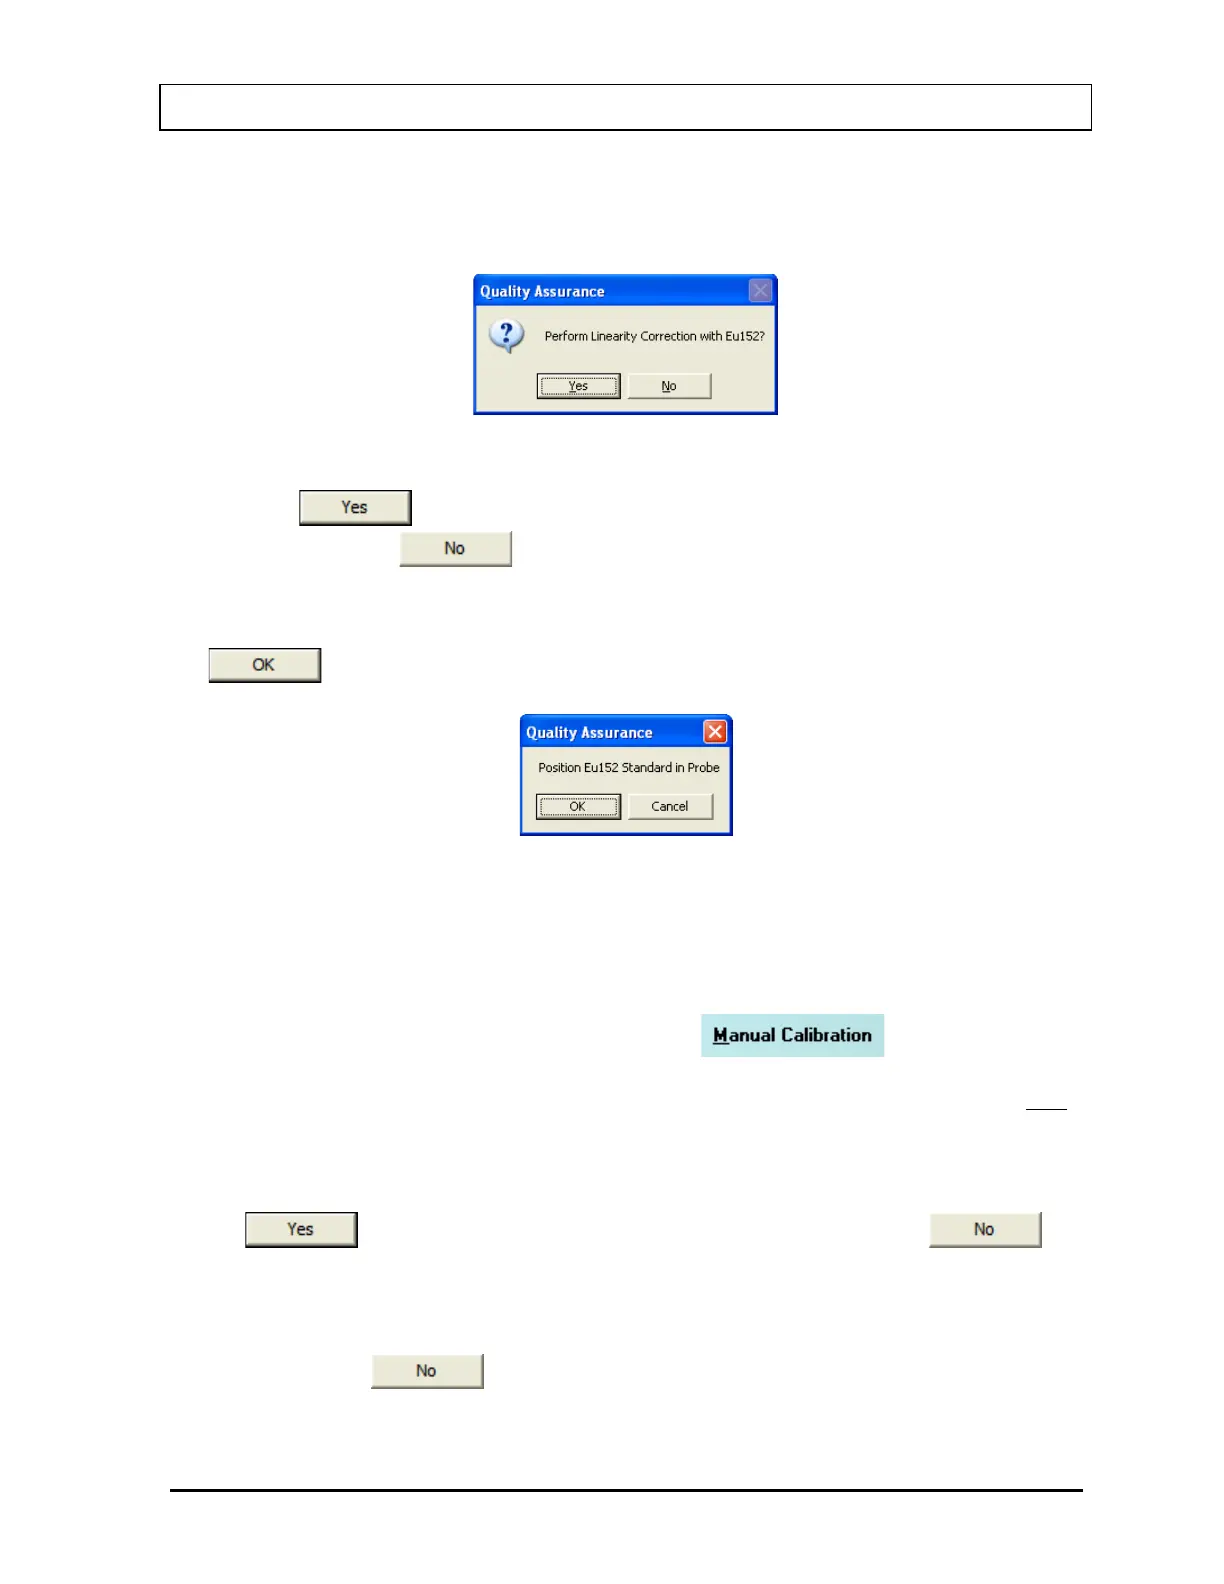
8. Next, the screen appears as shown in Figure 5-6, prompting you to perform Linearity
Correction using Eu152. This step, though optional, is highly recommended for fine-
tuning your system.
Figure 5-6
9. Click the button or press the Y key to proceed with further calibration.
Otherwise click the button or press the N key to stop here.
10. If you are continuing with Eu152, the screen appears as shown in Figure 5-7. Place the
Eu152 source in the selected detector in the same position as Cs137 and click the
button.
Figure 5-7
After the count collection is over, the system is fully calibrated. Complete results are
displayed in the lower half of the screen and all the data is automatically stored in the
system.
Note: If the calibration is not successful, click the button or press
Alt+M on the Auto Calibration screen. The MCA module is started. Refer to
CHAPTER 13: MCA. If this does not correct the problem, contact Capintec’s only
Authorized Service Center for service.
11. If the calibration was successful, Eu152 Linearity Correction results appear on the screen
and the software prompts you to perform Constancy Test as shown in Figure 5-8. Click
the button or press the Y key to proceed. Otherwise, click the
button or press the N key to exit the Auto Calibration procedure.
Note: If Cs137 efficiency has never been measured in your system, do not perform
Constancy Test at this time, because the test needs the Detector Efficiency value.
Click the button or press the N key and perform the Constancy Test
as described in the CONSTANCY TEST section in this chapter.
July 14 QUALITY ASSURANCE 5-7