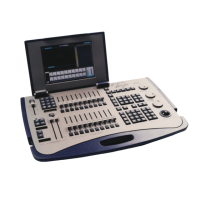
Setting Up Spark
Spark
4-2
Setting Up Spark
1. Connect the alphanumeric keyboard and the monitors to the appropriate ports
on the back panel.
2. Connect the DMX and (if present) S-Mix leads to the output ports.
3. Plug the power cable into a power source.
4. Press and hold the [CE] and [CLEAR] keys while switching on the console.
5. Release the [CE] and [CLEAR] keys. Spark goes through its boot up process
and finally displays the main Service Tools menu.
6. The next step is configuring Spark.
Configuring Spark
You must tell Spark how many moving lights, dimmers and channels, and scrollers you
are running. The instructions below treat this subject at its simplest level. For more
information see Chapter 19 System Configuration.
1. Looking at the main Service Tools menu, press F3 Config System.
2. Enter the number of spots in each size category (size refers to the number of DMX
channels used by the device), number of channels, dimmers, and scrollers that
you will be running.
3. Press F6 Enter & exit.
4. Press F6 Store configuration.
5. Switch off Spark.
6. Switch on Spark.
7. When the main Service Tools menu is displayed, press F1 Cold Start.
Patching
All of the menus have easy to follow prompts that guide you through the various functions.
Patching should be done before recording any memories.
Spark has 4 Patch menus:
• Channel Patch (menu 1) - Soft patch dimmers to channels, assign dimmer curves,
assign proportional patch, exchange dimmers, examine patch assignments,
enable/disable General Master control, patch DMX Input.
• Scroller Patch (menu 20) - Patch scrollers to control channels, determine dark gel
assignments, fine tune gel string placement.
• Mix Output menu (menu 19) – Assign spot numbers, assign DMX output addresses,
define spot profiles.
• Spot Patch (menu 13) - Flips and exchanges the x and y axes of the mirror movement
to create homogeneous beam movement.