6-3
IM 701210-05E
Triggering
6
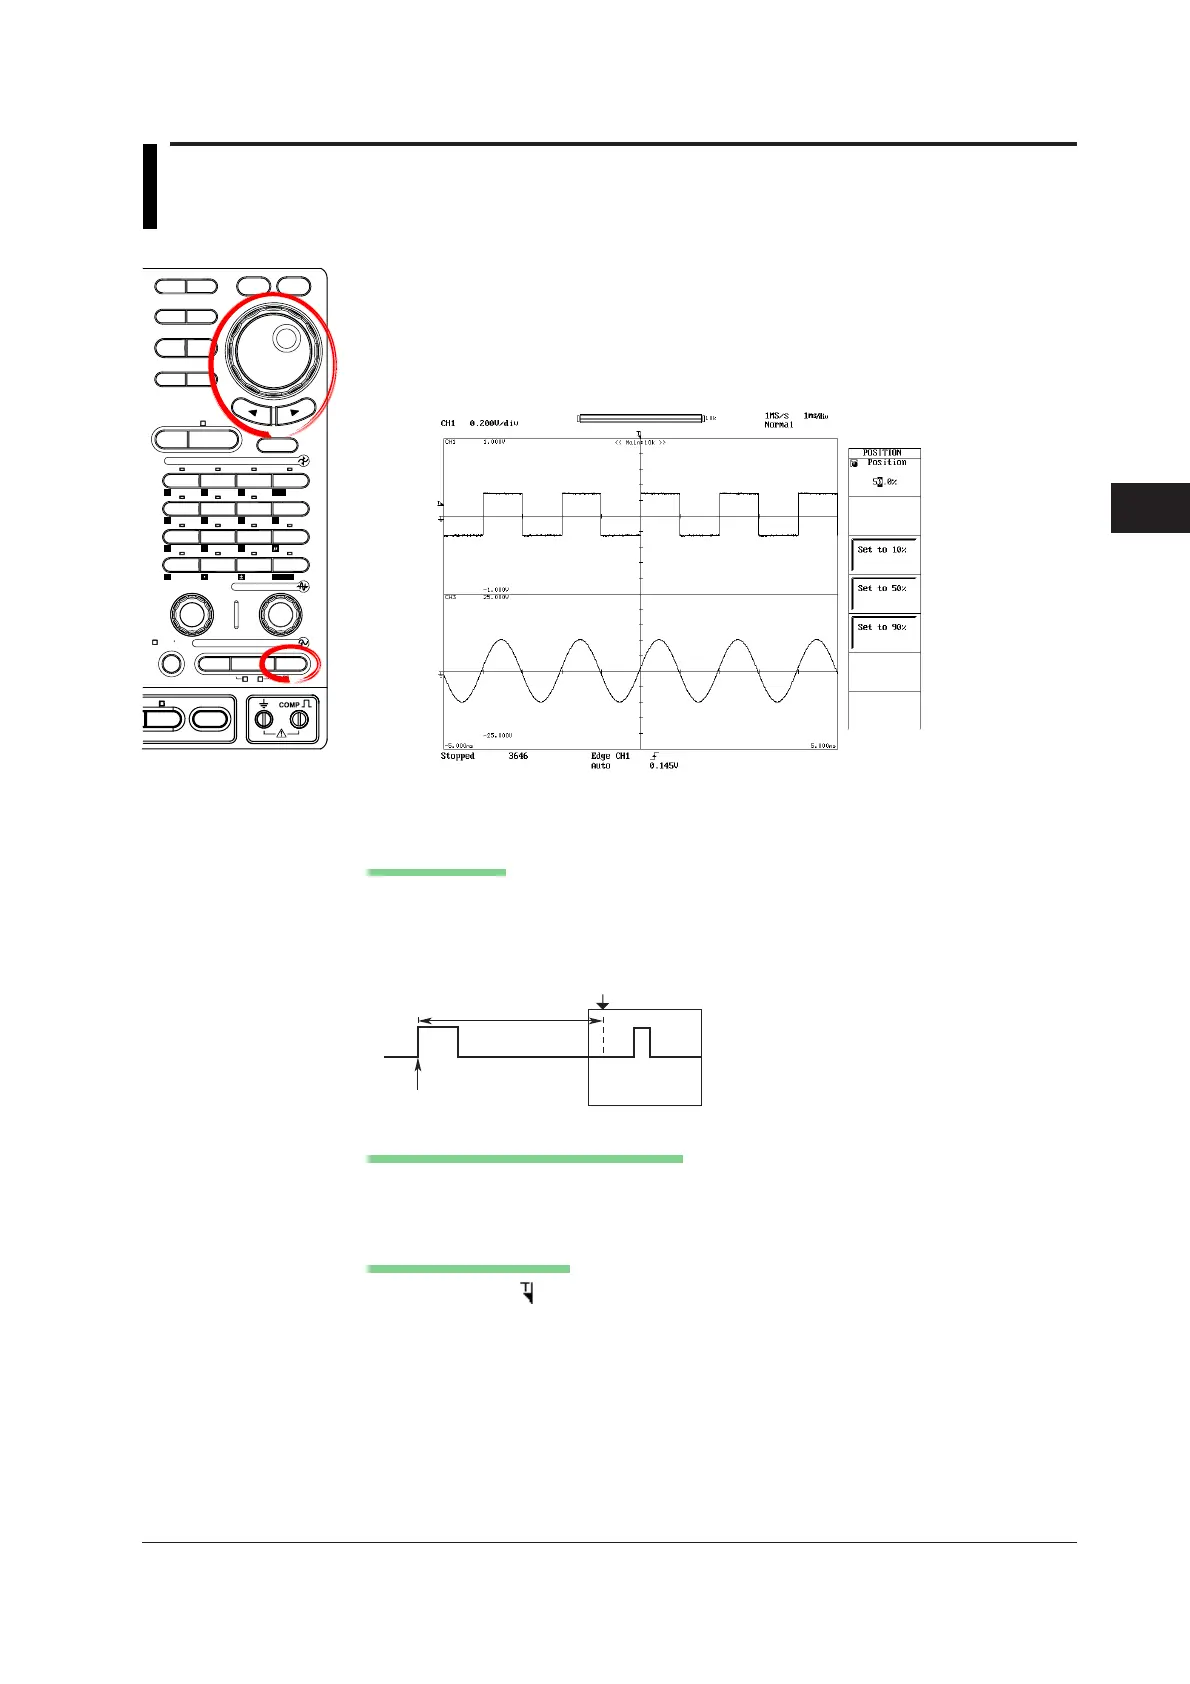
6.2 Setting the Trigger Position
<For a description of this function, refer to page 2-28.>
Procedure
MEASURE
CURSOR RESET SELECT
CH
ALL CH
MODE
POSITION
SIMPLE/ENHANCED
ACQ
START/STOP
SETUP DISPLAY
ZOOM
DUAL
CAPTURE
HISTORY
MATH
1
CH
2
CH
3
CH
4
CH
5
CH
6
CH
7
CH
8
CH
9
CH
10
CH
11
CH
12
CH
13
CH
14
CH
15
CH
16
DELAY
MANUAL TRIG
V/DIV TIME/DIV
TRIGGER
TRIG D
VERTICAL
HORIZONTAL
CAL
X-Y
SEARCH
7
DSP 1
8 9
DSP 2
654
1
0
23
ENTER
m
DSP 6DSP 5
LOGIC A
LOGIC B
EVENT
DSP 3 DSP 4
EXP
GO/NO-GO
ACTION
FILE
SHIFT
1. Press POSITION.
2. Turn the jog shuttle to set the trigger position.
If you wish to select 10%, 50%, or 90%, you can press the corresponding soft
key.
Pressing RESET resets the position to 50%.
Explanation
Trigger Position
Trigger position = Trigger point + trigger delay
You can select the location of the trigger position on the screen.
If the trigger delay is 0 s, the trigger position and the trigger point match.
Delay
Trigger point
T (Trigger position)
Selectable Range of Trigger Position
With the display record length taken to be 100%, set in the range of 0 to 100% (in 0.1%
steps).
Trigger Position Marker
A position marker ( ) appears at the top of the screen. The marker indicates the trigger
position with respect to the display record length.
 Loading...