16-12
IM 701210-06E
16.4 Setting up the Network Printer
<For a description of this function, refer to page 2-59.>
Procedure
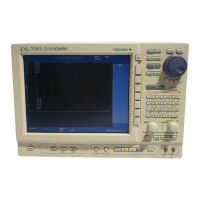
FILE
SHIFT
HELP
MISC
NUM KEY
PROTECT
VOICE
MEMO
IMAGE
SAVE
PRINT
SNAPSHOT CLEAR TRACE
MENU MENU
MEASURE
CURSOR RESET SELECT
CH
ALL CH
MODE
POSITION
SIMPLE/ENHANCED
ACQ
START/STOP
SETUP DISPLAY
ZOOM
DUAL
CAPTURE
HISTORY
MATH
1
CH
2
CH
3
CH
4
CH
5
CH
6
CH
7
CH
8
CH
9
CH
10
CH
11
CH
12
CH
13
CH
14
CH
15
CH
16
DELAY
MANUAL TRIG
V/DIV TIME/DIV
TRIGGER
TRIG D
VERTICAL
HORIZONTAL
CAL
X-Y
SEARCH
7
DSP 1
8 9
DSP 2
654
1
0
23
ENTER
m
DSP 6DSP 5
LOGIC A
LOGIC B
EVENT
DSP 3 DSP 4
EXP
GO/NO-GO
ACTION
FILE
SHIFT
1. Press MISC.
2. Press the Network soft key.
3. Press the Net Print Setup soft key. The Net Print setup menu appears.
Setting the LPR Server
4. Use the jog shuttle and SELECT to select LPR Server.
5. Enter the IP address of the printer server according to the procedure given in
section 4.2. If you are using DNS, you can specify the printer server by name.
Setting the Printer Name
6. Use the jog shuttle and SELECT to select LPR Name.
7. Enter the printer name according to the procedure given in section 4.2.
Note
For keyboard (soft keyboard) operation, see section 4.2, “Entering Values and Strings.”
Printing the Screen Image Data
8. Print the screen image data according to the procedure given in section 12.4,
“Printing the Screen Image Data on a Network Printer.”
Note
• To use this function, configure the TCP/IP settings beforehand according to section 16.2,
“Setting up the TCP/IP.”
• Output is possible to printers or printer servers that support the TCP/IP protocol.
• This function cannot be used when using the FTP server function or the Web server
function, or when performing file operations.
 Loading...