9-4
IM 701210-05E
9.2 Selecting the Recorder Mode
<For a description of this function, refer to page 2-43.>
Procedure
When the recorder mode is changed by following the procedure in this section, the
measured data is cleared. Be sure to save data that you need before changing the
recorder mode. For the procedure of saving the data, see chapter 13 in the User’s
Manual Part 2.
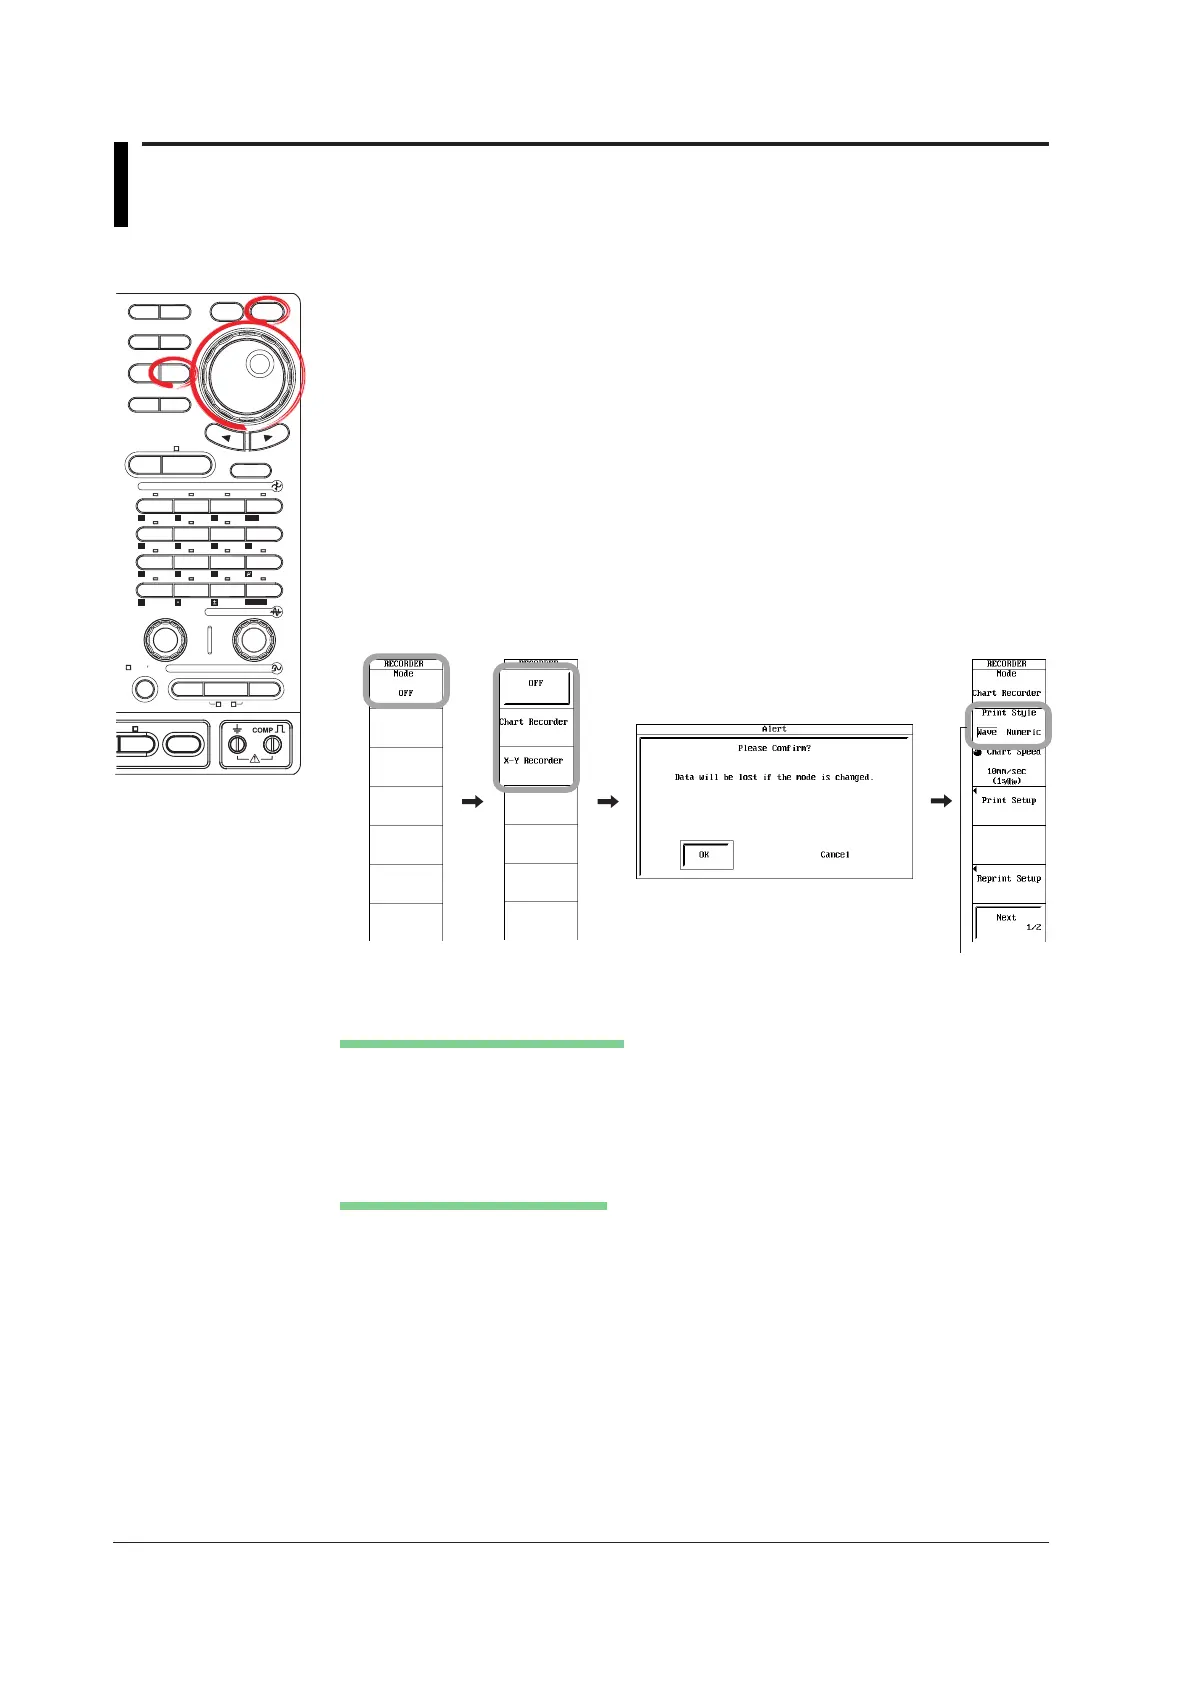
1. Press RECORDER.
2. Press the Mode soft key to display the recorder mode selection menu.
3. Press the Chart Recorder or X-Y Recorder soft key.
If the recorder mode is changed to a mode different from the mode up to then or
if a recorder mode is selected from the OFF setting, an alert dialog box appears.
4. If an alert dialog box appears, use the jog shuttle and SELECT to select OK.
If Chart Recorder is selected, proceed to step 5.
5. Press the Print Style soft key to select Wave (recorder T-Y waveforms) or
Numeric (record numeric values).
Only when Chart Recorder is selected
Then, configure the respective recorder mode.
When Chart Recorder Is Selected
When Wave (Record T-Y Waveforms) Is Selected
Continue with the procedures described in sections 9.3 to 9.5.
When Numeric (Record Numeric Values) Is Selected
Continue with the procedures described in section 9.6.
When X-Y Recorder Is Selected
Continue with the procedures described in section 9.7.
MEASURE
CURSOR RESET SELECT
CH
ALL CH
MODE
POSITION
SIMPLE/ENHANCED
ACQ
START/STOP
SETUP DISPLAY
ZOOM
RECORDER
HISTORY
MATH
1
CH
2
CH
3
CH
4
CH
5
CH
6
CH
7
CH
8
CH
9
CH
10
CH
11
CH
12
CH
13
CH
14
CH
15
CH
16
DELAY
MANUAL TRIG
V/DIV TIME/DIV
TRIGGER
TRIG D
VERTICAL
HORIZONTAL
CAL
X-Y
SEARCH
7
DSP 1
8 9
DSP 2
654
1
0
23
ENTER
m
DSP 6DSP 5
LOGIC A
LOGIC B
EVENT
DSP 3 DSP 4
EXP
GO/NO-GO
ACTION
FILE
SHIFT
DUAL
CAPTURE
 Loading...