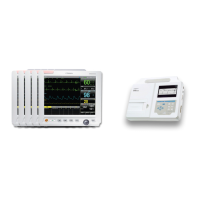
NIBP Monitoring
11-7
(4) PR: pulse rate (unit of 1/min, bpm).
(5) Bar graph: proportional to the pulse intensity. Bar graph can reflect the filling state of blood.
(6) PI: available for Masimo SpO
2
and Comen SpO
2.
(7) Value of SpO
2
difference (ΔSpO
2
).
(8) SpO
2
sensitivity.
(9) Bar graph (Signal Identification and Quality) (For Masimo and Comen SpO
2
): Proportional to the pulse intensity.
Bar graph can reflect the filling state of blood.
When the signal quality is low, the accuracy of SpO
2
measurement maybe compromised. And “SpO
2
low signal”
would be displayed.
11.5 Low Perfusion Accuracy Test
This monitor can measure low perfusion and the recommended method of determining the low perfusion accuracy
of the monitor is to conduct this test with a CO-oximeter on adult volunteers whose SpO
2
ranges from 70% to 100%.
The accuracy index is obtained according to statistical distribution, and only about 2/3 of the estimated values are
expected to fall within the estimated values of CO-oximeter.
11.6 Monitoring Steps
11.6.1 Comen SpO
2
Measurement Steps
1) Choose an appropriate SpO
2
sensor according to the patient type.
2) Insert the SpO
2
cable connector into the SpO
2
interface of the monitor.
3) Fix the sensor to an appropriate position on the patient. Please refer to "
Section11.7 Placement of SpO
2
Sensor
" for more information.
11.6.2 Masimo SpO
2
& Nellcor SpO
2
Measurement Steps
1) Choose an appropriate SpO
2
sensor according to the module type and patient type.
2) Connect the SpO
2
extension cable to the SpO
2
sensor.
3) Insert the other end of the SpO
2
extension cable into the SpO
2
interface of the monitor.
4) Fix the sensor to an appropriate position on the patient. Please refer to "
Section 11.7 Placement of SpO
2
Sensor
" for more information.