NIBP Monitoring
11-9
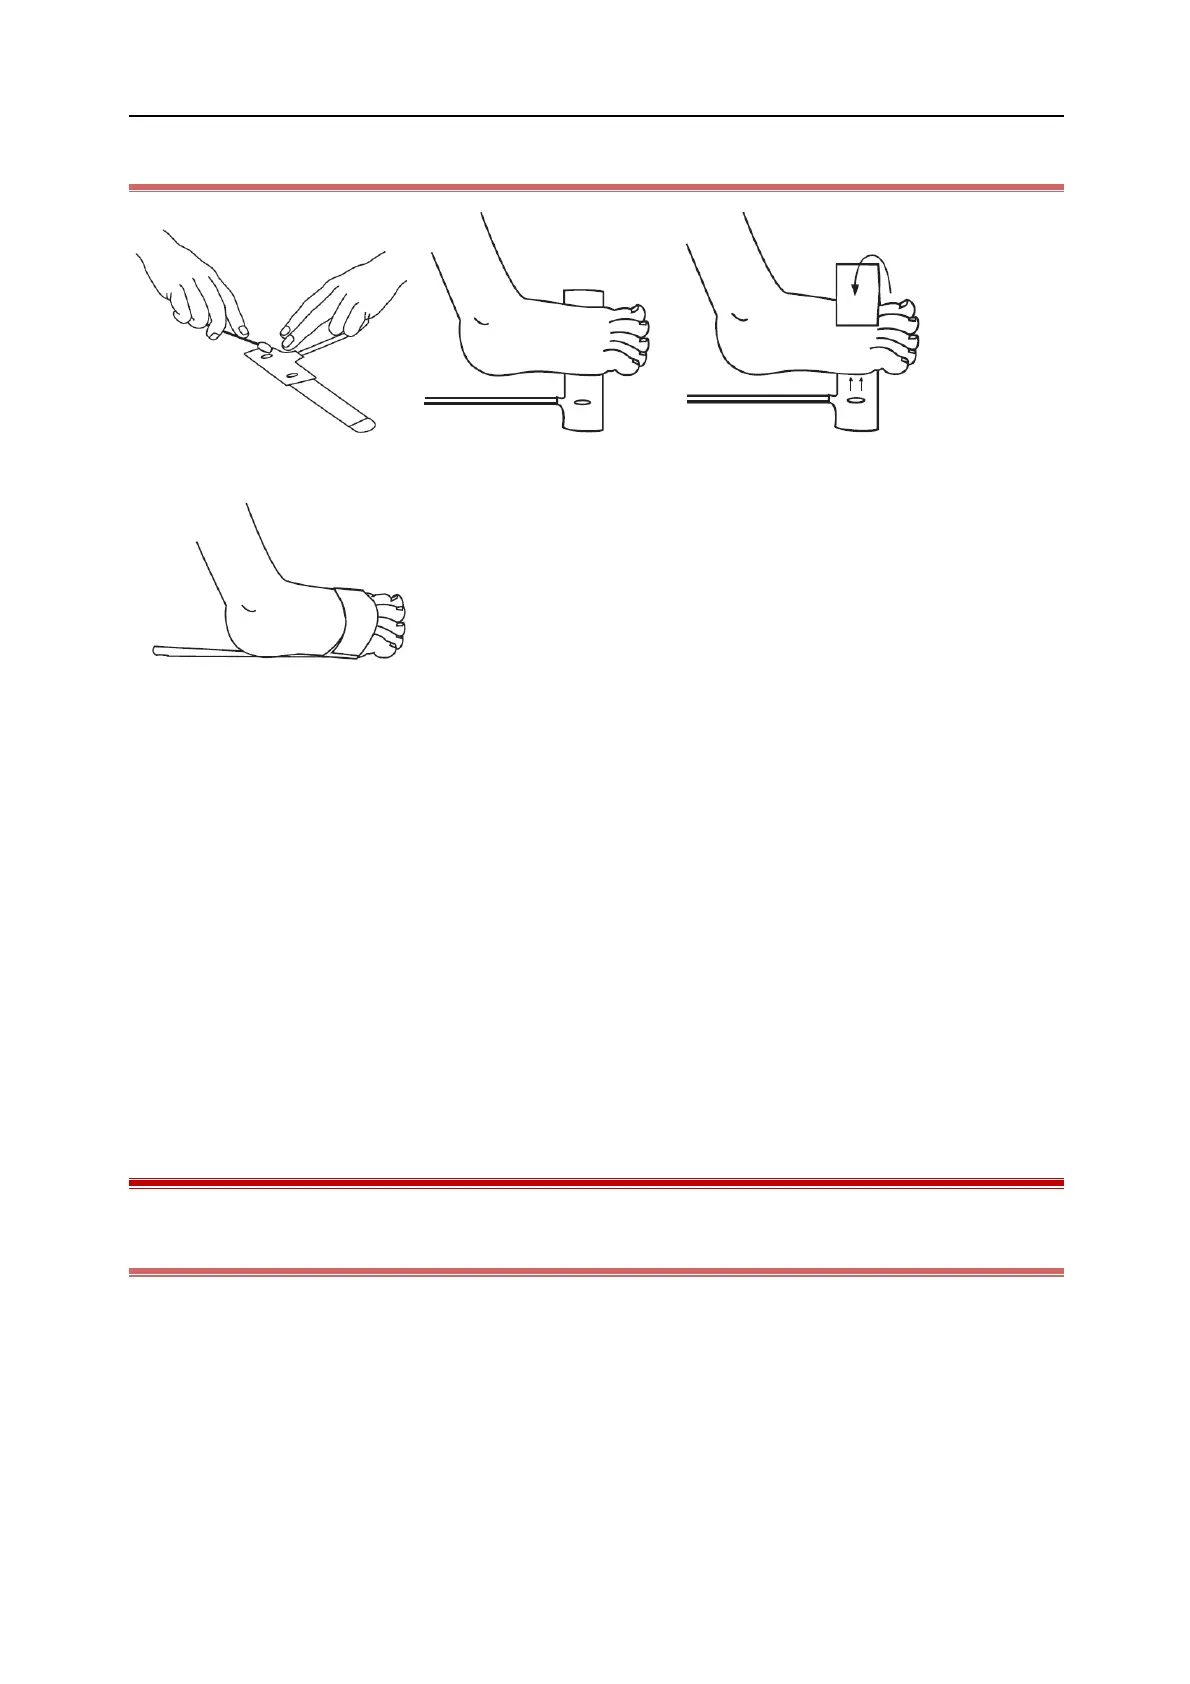
11.7.3 Placement of a Disposable SpO
2
Sensor
1) For fragile skin, the stickiness of the medical grade adhesive can be diminished or eliminated by daubing the
adhesive areas with a cotton ball or with gauze (Refer to Fig. 1).
2) Direct the sensor cable so that it either points away from the patient or runs along the bottom of the foot.
Apply the detector onto the fleshy part of the lateral aspect of the sole of the foot aligned with the fourth toe.
Alternatively, the detector may be applied to the top of the foot (not shown). Complete coverage of the
detector window is needed to ensure accurate data (Refer to Fig. 2).
3) Wrap the adhesive/foam wrap around the foot and ensure that the emitter window (red star) aligns directly
opposite of the detector (Refer to Fig. 3). Be careful to maintain proper alignment of the detector and emitter
windows while attaching adhesive/foam wrap to secure the sensor.
4) Verify correct positioning and reposition if necessary (Refer to Fig. 4).
11.8 SpO
2
Setup
11.8.1 Set SpO
2
Alarm
1) Select the SpO
2
parameter area or waveform area to enter [SpO
2
] menu.
2) Select [Alarm] tab.
3) Set the alarm as required.
If you use two SpO
2
modules at the same time, you can set the alarm for ΔSpO
2
.