8A O2 and H2O analysers
Disassembling or replacing the analyser
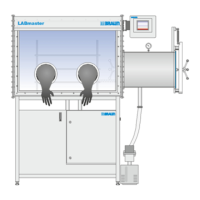
MB-20-G/MB-200G-W_MB-LABmaster_MB-200 MOD_TP700
Operating Manual - V5.0 - 04/2018 - STD
Page
8A - 11
► Put the clamp in place and tighten the screw to close the flange as quickly as pos-
sible.
ð The new analyser is now mounted.
Connect the analyser to the system electronics:
► Expose the analyser at least for 1minute to inert gas before you connect voltage.
► Plug in the RJ45 plug to the analyser’s signal cable.
Return the glovebox to normal operation:
► Activate the analyser on the touch panel.
8A.6 Disassembling or replacing the analyser
If the glovebox is operated with hazardous material, please be aware of the risks during
disassembly.
WARNING
Hazardous materials in the glovebox/enclosure
Risk of environment pollution
► Remove hazardous material from the box.
► Purge the glovebox before you dismantle the analyser.
► Make sure that the used gas is disposed of through a safe in-house exhaust system.
► Unmount the analyser according to the instructions. Wear personal protective equip-
ment (PPE) while doing this.
► Immediately after you have unmounted the analyser, decontaminate it or place it in a
container that can be sealed instantly.
► If required, dispose of used analysers according to all applicable local and national
safety guidelines and laws on potentially contaminated material.
Preparing for removal or replacement
► A blind flange and (for replacement) an analyser should be on hand.
► Stop / de-activate the circulation
If non-hazardous material is used in the glovebox or enclosure, the analyser can be re-
moved or replaced while the glovebox or enclosure is in operation.
► At the touch panel, switch off the analyser.
► Set the box pressure to a value between +1.0 … +5.0 mbar (100 … 500 Pa).
Removing the analyser
► Unplug the analyser’s signal cable.
► Open the DN KF 40 clamp of the used analyser.
► Remove the used analyser.