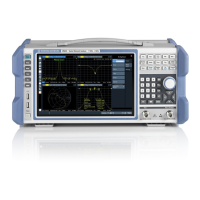
R&S FSL Noise Figure Measurements Option (K30)
1300.2519.12 2.101 E-11
The use of a channel table is mandatory for the Tilt measurement. Because the Cable TV
M
easurements option must know where a channel's power has to be measured and how it has to be
done. Each vertical line represents a channel. The blue ones are digital TV channels, the yellow ones
are analog TV.
Noise Figure Measurements Option (K30)
This section describes measurement examples for the Noise Figure Measurements option (K30). For
further information on measurement examples refer to the Quick Start Guide, chapter 5 "Basic
Measurement Examples", or the Operating Manual on CD, chapter "Advanced Measurement
Examples".
This option is available from firmware version 1.50.
Direct Measurements
Direct measurements are designed for DUTs without frequency–conversion, e.g. amplifiers. For details
refer also to the Operating Manual on CD, chapter "Instrument Functions", section "Noise Figure
Measurements Option (K30)".
Basic Measurement Example
This section provides step–by–step instructions for working through an ordinary noise figure
measurement. The following steps are described:
1. Setting up the measurement
2. Performing the calibration
3. Performing the main measurement
The gain and noise figure of an amplifier are to be determined in the range from 220 MHz to 320 MHz.
Setting up the measurement
1.
Activate the Noise mode (for details refer to chapter "Instrument Functions", section "Measurement
Mode Selection – MODE Key").
2. Press the Freq Settings softkey to open the Frequency Settings dialog box.
In the Start Freq field, enter 550 MHz.
In the Stop Freq field, enter 560 MHz.
In the Step Freq field, enter 2 MHz.
A measurement at 6 frequency points is performed: 550 MHz, 552 MHz, 554 MHz, ..., 560
MHz.
 Loading...

