11-18
IM 701210-06E
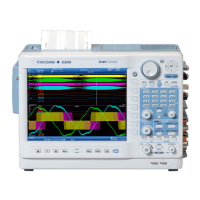
For V (Vertical) Cursors (When Not Displaying the X-Y Waveform)
MEASURE
CURSOR RESET SELECT
CH
ALL CH
MODE
POSITION
SIMPLE/ENHANCED
ACQ
START/STOP
SETUP DISPLAY
ZOOM
DUAL
CAPTURE
HISTORY
MATH
1
CH
2
CH
3
CH
4
CH
5
CH
6
CH
7
CH
8
CH
9
CH
10
CH
11
CH
12
CH
13
CH
14
CH
15
CH
16
DELAY
MANUAL TRIG
V/DIV TIME/DIV
TRIGGER
TRIG D
VERTICAL
HORIZONTAL
CAL
X-Y
SEARCH
7
DSP 1
8 9
DSP 2
654
1
0
23
ENTER
m
DSP 6DSP 5
LOGIC A
LOGIC B
EVENT
DSP 3 DSP 4
EXP
GO/NO-GO
ACTION
FILE
SHIFT
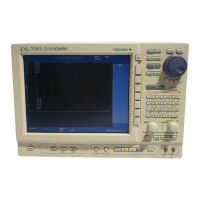
1. Press CURSOR.
Selecting the Cursor Type
2. Press the Type soft key. The cursor type selection menu appears.
3. Press the Vertical soft key.
Selecting the Waveform to Be Measured
4. Press the Trace soft key. The trace selection menu appears.
5. Press the soft key corresponding to the desired waveform to select the
waveform to be measured.
If you set the waveform to be measured to All, LogicA, LogicB, or LogicA &
LogicB, proceed to step 6. If not, proceed to step 9.
Setting the Logic (When Trace Is Set to All, LogicA, LogicB, or LogicA & LogicB)
6. Press the Logic Setup soft key. The logic setup menu appears.
• Selecting the Notation of Cursor Measurement Values
7. Use the jog shuttle and SELECT to set Format to Binary or Hexa.
Note
The notation selected in step 7 applies to the notation of the numeric monitor display that is
shown on the right side of the screen. For the procedure of displaying the numeric monitor,
see section 8.13.
• Selecting the Read Direction of Bit Data
8. Use the jog shuttle and SELECT to set Order to A1->A8 or B1->B8.
Moving the Cursor
6. Press the Cursor1/Cursor2 soft key to set the jog shuttle control to Cursor1.
7. Turn the jog shuttle to move Cursor1.
8. Likewise, move Cursor2. If the jog shuttle control is set to both Cursor1 and
Cursor2, both cursors are moved.
DSP1 to DSP6 are optional.
Logic Setup appears
only when Trace is
set to the following:
All, LogicA, LogicB,
or LogicA & LogicB
11.5 Measuring Waveforms Using Cursors
 Loading...
