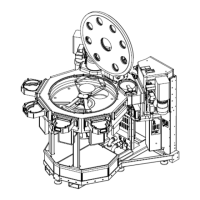
9. Maintenance and Repair Marathon Express
O-Ring Removal/Replacement/Cleaning Part Number: 605914 Rev. B
Lockout / Tagout
Workingwithenergizedequipmentmaycausesuddenmovementorelectricalshockand
mayresultindeathorseriousinjury.
l
Allenergymustberemovedfromtheequipmentperthefacility’s
Lockout/Tagoutprocedurebeforeservicing.
l
Iflocalproceduresarenotavailable,followtheprocedureforLockout/Tagoutin
OSHA Standard 29CFR 1910.147.
Maintenance Procedure
Step Action
1.
HOMEtherobotthenturnoffanddisconnectallpower,communications,andairconnectionsas
detailedin"Shut-down"onpage1.
2.
Removal Procedure:
a. Usingthepick,prytheoldo-ringoutoftheo-ringgroovestartingattheplungehole.
b. Onceasectionoftheo-ringisfreeofthegroove,gentlyremovetherestoftheo-ringbyhand,
beingcarefulnottodamageorscratchtheo-ringorthesealarea.
NOTE: Useonlyatoolmadeofbrass,plastic,orsimilarsoftmaterial.TheO-ringgrooveisaluminum
andEXTREMELYsensitivetoANYsmallscratchesleftinthesurface.
3.
Replacement Procedure:
a. Cleantheo-ringsealsurfaceandtheo-ringgroovewithisopropylalcohol,refertoStep4in
"CleaningProcedure"onpage177.
b. Cleantheo-ringwithDIwaterpriortoinstallationinthesystem.
c. Installtheo-ringinthegrooveprovided.Theo-ringgrooveisadoubledove-tailslotwiththe
narrowportionoftheslotatthetop.Theo-ringhastobecompressedinorderforittobeplaced
intothegroove.
d. Oncetheo-ringhasbeenreplacedthesealshouldbecheckedforleaksusingaleak-checker.
Theeasiestmethodforplacingtheo-ringinthegrooveis:
a. Insertasmallportionoftheo-ringintothegrooveatoppositeendsofthering.
b. Insertasmallportionoftheo-ringintothegrooveat90°fromthepointsabove.
c. Presstheo-ringintothegrooveevenlyineach90°segment.Donotstretchtheo-ringtoprevent
excessiveloopingasthebalanceoftheo-ringisinserted.
NOTE: Cleantheo-ringbywipingdownwithDIwateronly.Donotusealcoholorothersolventsas
theymaycausetheo-ringtobecomebrittle.
NOTE: Donotallowtheo-ringtotwistduringinstallation.
182
Copyright © 2023, Brooks Automation, Inc.