CHAPTER 16
Content Management Application (CMA)
DL.3 Digital Light User Manual 271
Archiving User Content
An Archive/Image is a compressed file used to store media files, folders and object files along
with valid identification DMX values. This Content Archive is used to backup User Content that
can be restored to any media server.
Using Local Archives to Prepare Content Offline
You can create a Local Archive of files stored on your hard drive to be deployed to a server at
another time. This lets you work on organizing files for a specific show offline and then upload it
to a server at a later date.
Creating a Local Archive
For CMA Running Windows OS
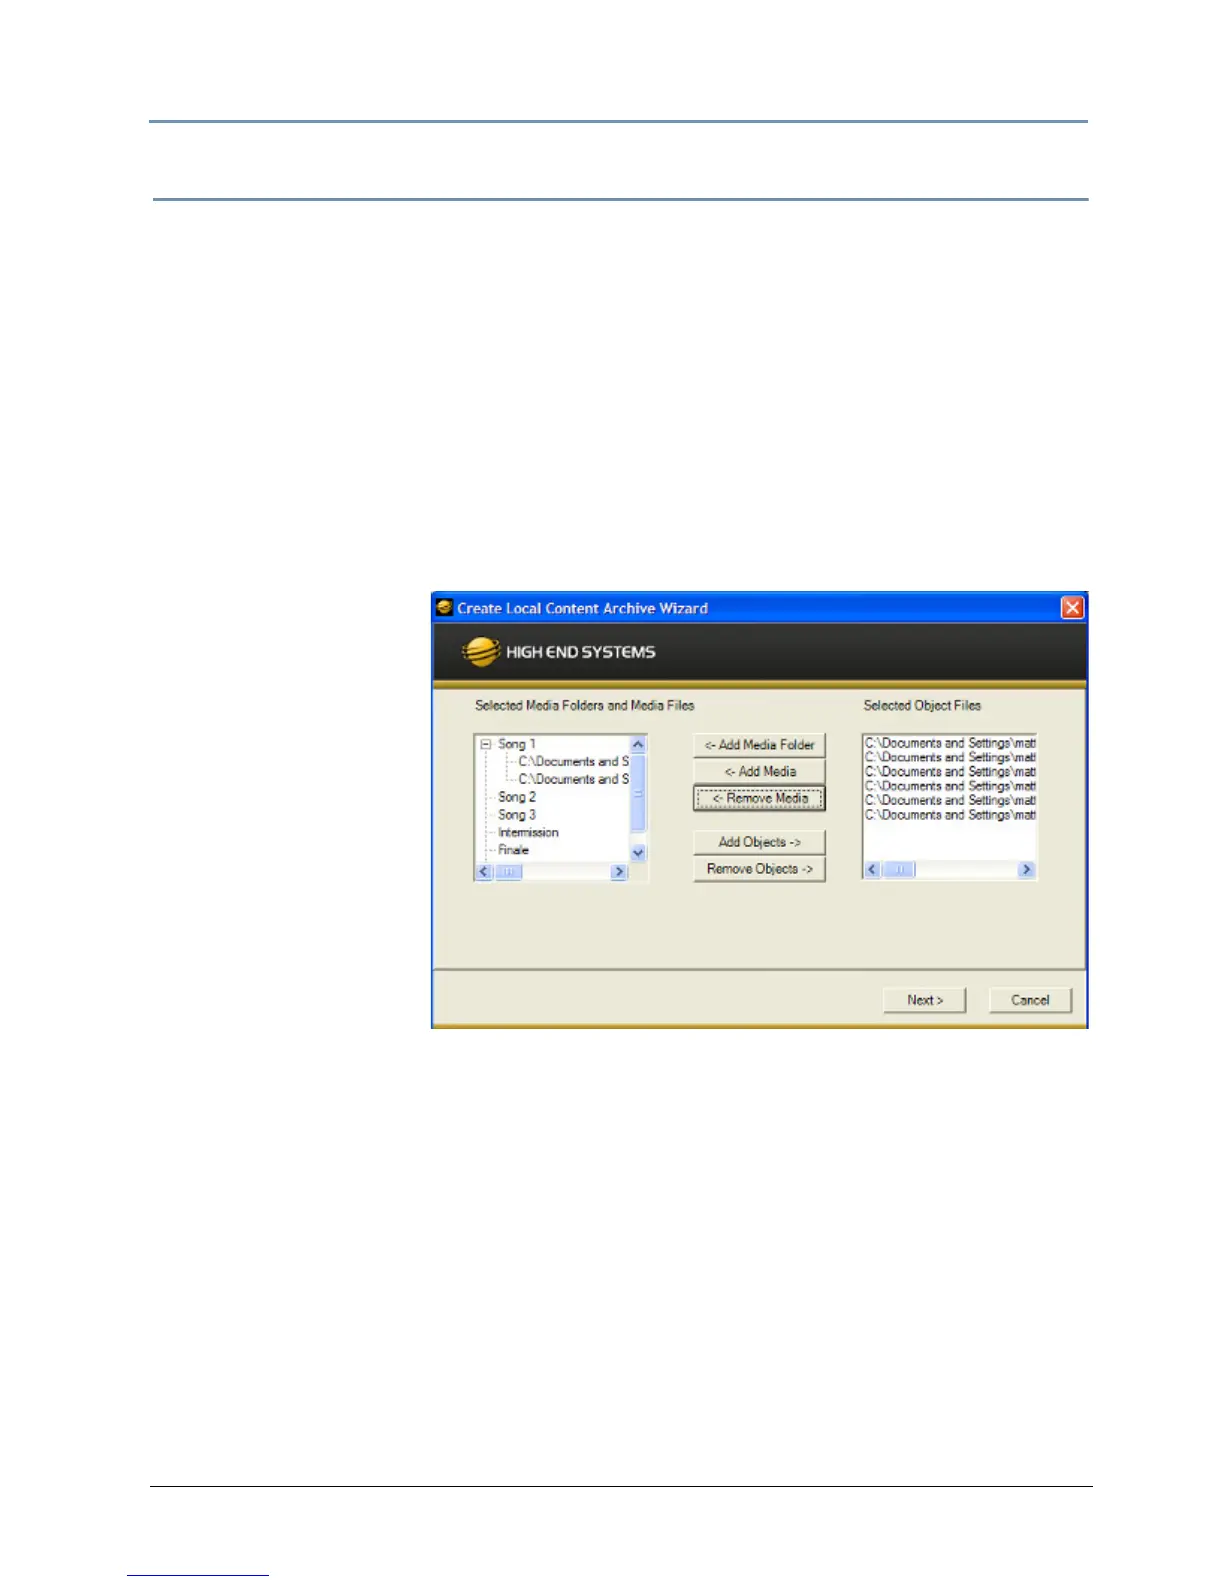
1. Under the File menu,
select Create Local
Archive to launch the
archiving wizard.
2. Click on Add
Media
Folder. This will add a
media folder to the
left-hand column
named “MyMedia0”.
Each successive media
folder will be named
“MyMedia1,
MyMedia2, and so
forth. You can rename
these folders with a
single click on the
folder name.
3. After creating a folder and renaming it (if you wish
), highlight the folder to add media files.
4. Click Ad
d Media. This will bring up a file browser window that will allow you to navigate to
the spot on your hard drive containing the media you want to add. You can add single files
or multiple files. To add multiple files, hold down shift and select multiple media files with
your mouse.
5. Click Add Obje
cts if you wish to add custom 3-D objects to the archive. This will again
bring up a file browser window to navigate to your 3-D objects. Any 3-D objects added will
appear in the right hand column of the wizard. 3-D objects do not get added to folders.
6. Click Ne
xt at the bottom of the wizard. This will take you to another screen where you
choose where to save and what to name your archive.
7. Click Bro
wse to navigate to where you want to save and name your archive.
8. Click Ne
xt. Your archive will then be created.
 Loading...