CHAPTER 2
Setup and Configuration
18 DL.3 Digital Light User Manual
Configuring DL.3 Fixtures
Before programming the DL.3 fixtures from a DMX512 console, configure the fixture by:
• Identifying the DMX So
urce for the fixture.
• Selecting the Protocol and the number of Graphic Objects to determine the DMX channel
footprint this fixture will utilize.
• Selecting a Fixture ID number to identify this fixture on the DL.3 fixture link (required if
you will be synchronizing output between fixtures).
• Assigning a valid Start Channel (the first channel in the unique range of DMX channels
designated by the console for this fixture).
You can configure fixtures directly using the DL.
3 menu system or remotely using the Content
Management Application (CMA).
Setup Configuration Using the Menu System
All setup parameters are located on the DL.3
fixture’s menu DMX Screen. Fo
r detailed
information on using the D
L.3 Menu System,
see Chapter 3: The Digital Light Menu System on
page 23.
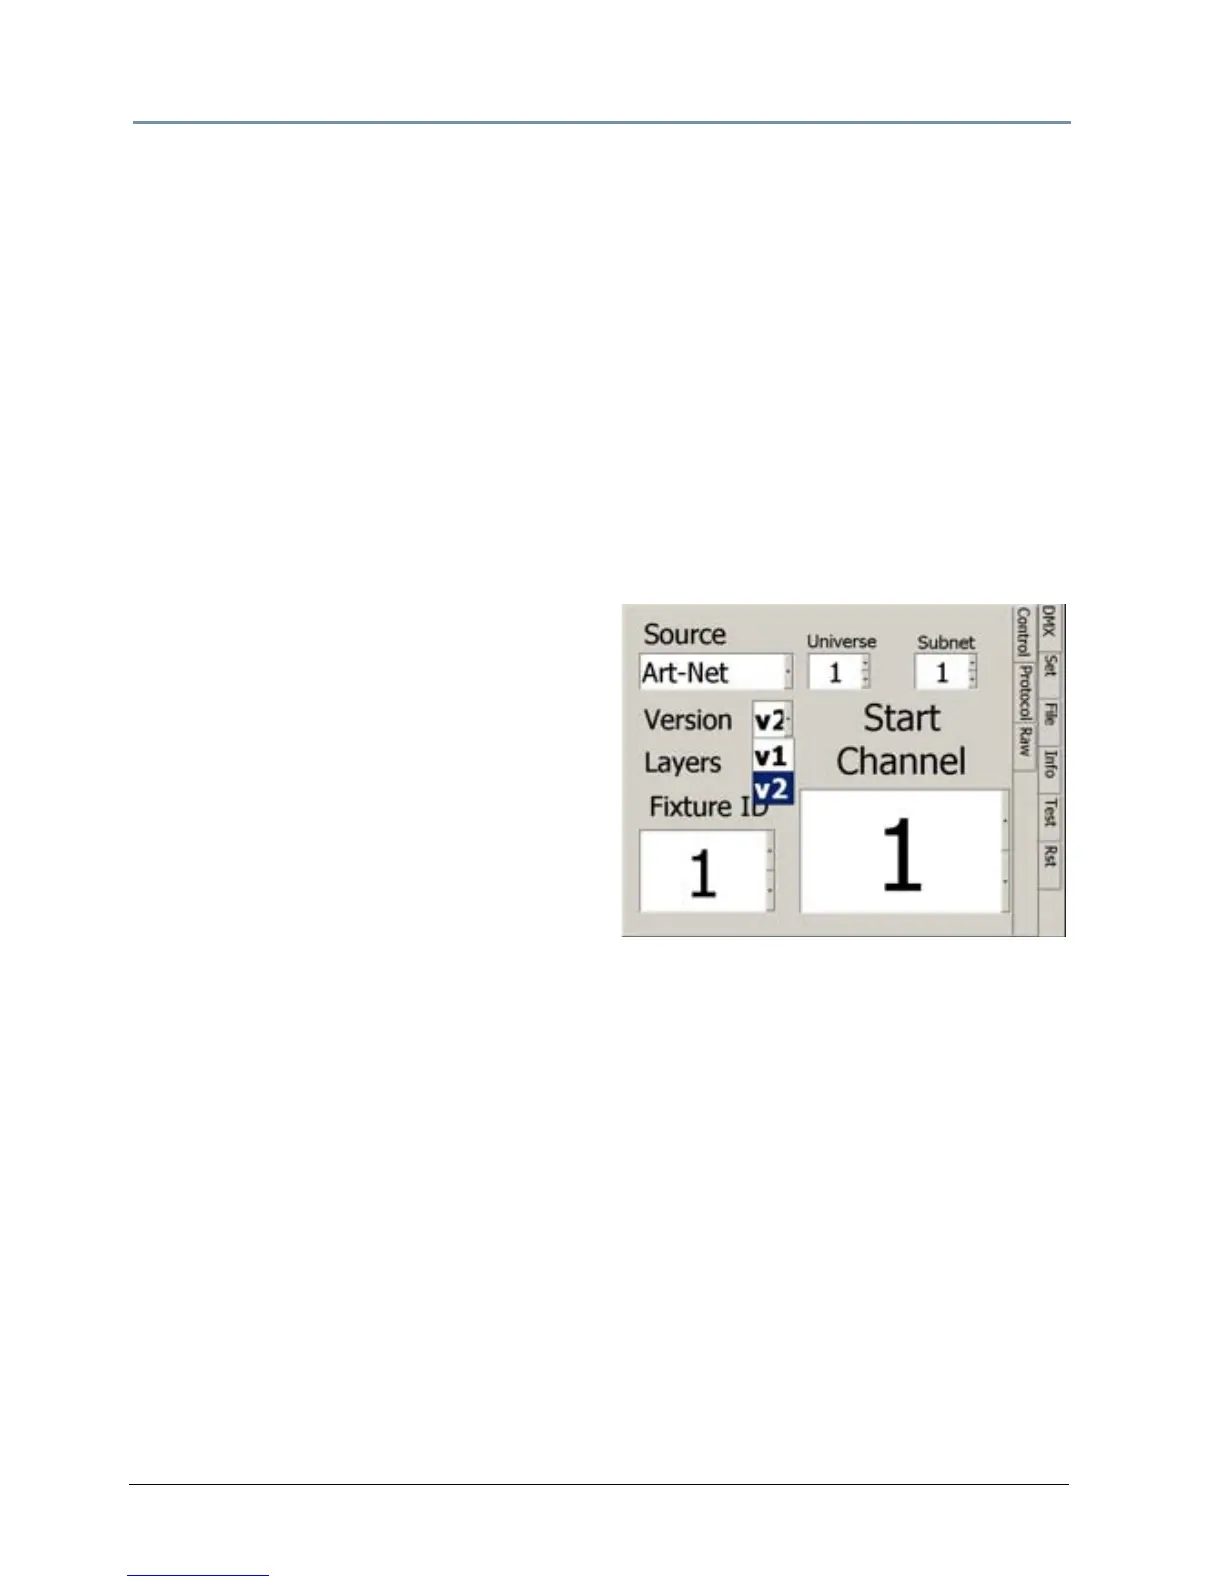
Select a Source
1. DMX Source defines the source of DMX
data:
• DMX512—Data is transmitted over
standard DMX cables.
• Art-Net—Data is transmitted over Ethernet
cables using the Art-Net protocol. Set the number of DMX Universes (and DL.3 Ethernet
Subnetworks containing this fixture from 0–16).
Set the Channel Range
2. Choose a Software Version.
• V1
—Version 1 protocol retains the original DMX protocol footprint and is compatible with
legacy shows.
• V2—Version 2 provides 27 additional channels.
3. Select the number of Graphic Object Layers requi
red for your application. For more
information, see Protocol Options on p
age 59.
DL.3 Start Channel
4. Select a Start Channel in the Start Channel field using the up and down arrows to step
through the numbers 1-512. See DL.3 Channel Range and Valid Sta
rt Channels on page 20.
For more informa
tion, see Determining a DMX Start Channel on page 42.