CHAPTER 17
Maintenance and Troubleshooting
DL.3 Digital Light User Manual 303
Replacing the Lamp
Access the Lamp Module
1. Shut down the fixture and disconnect fro
m power.
2. Allow the projector to cool for at least 45 minutes.
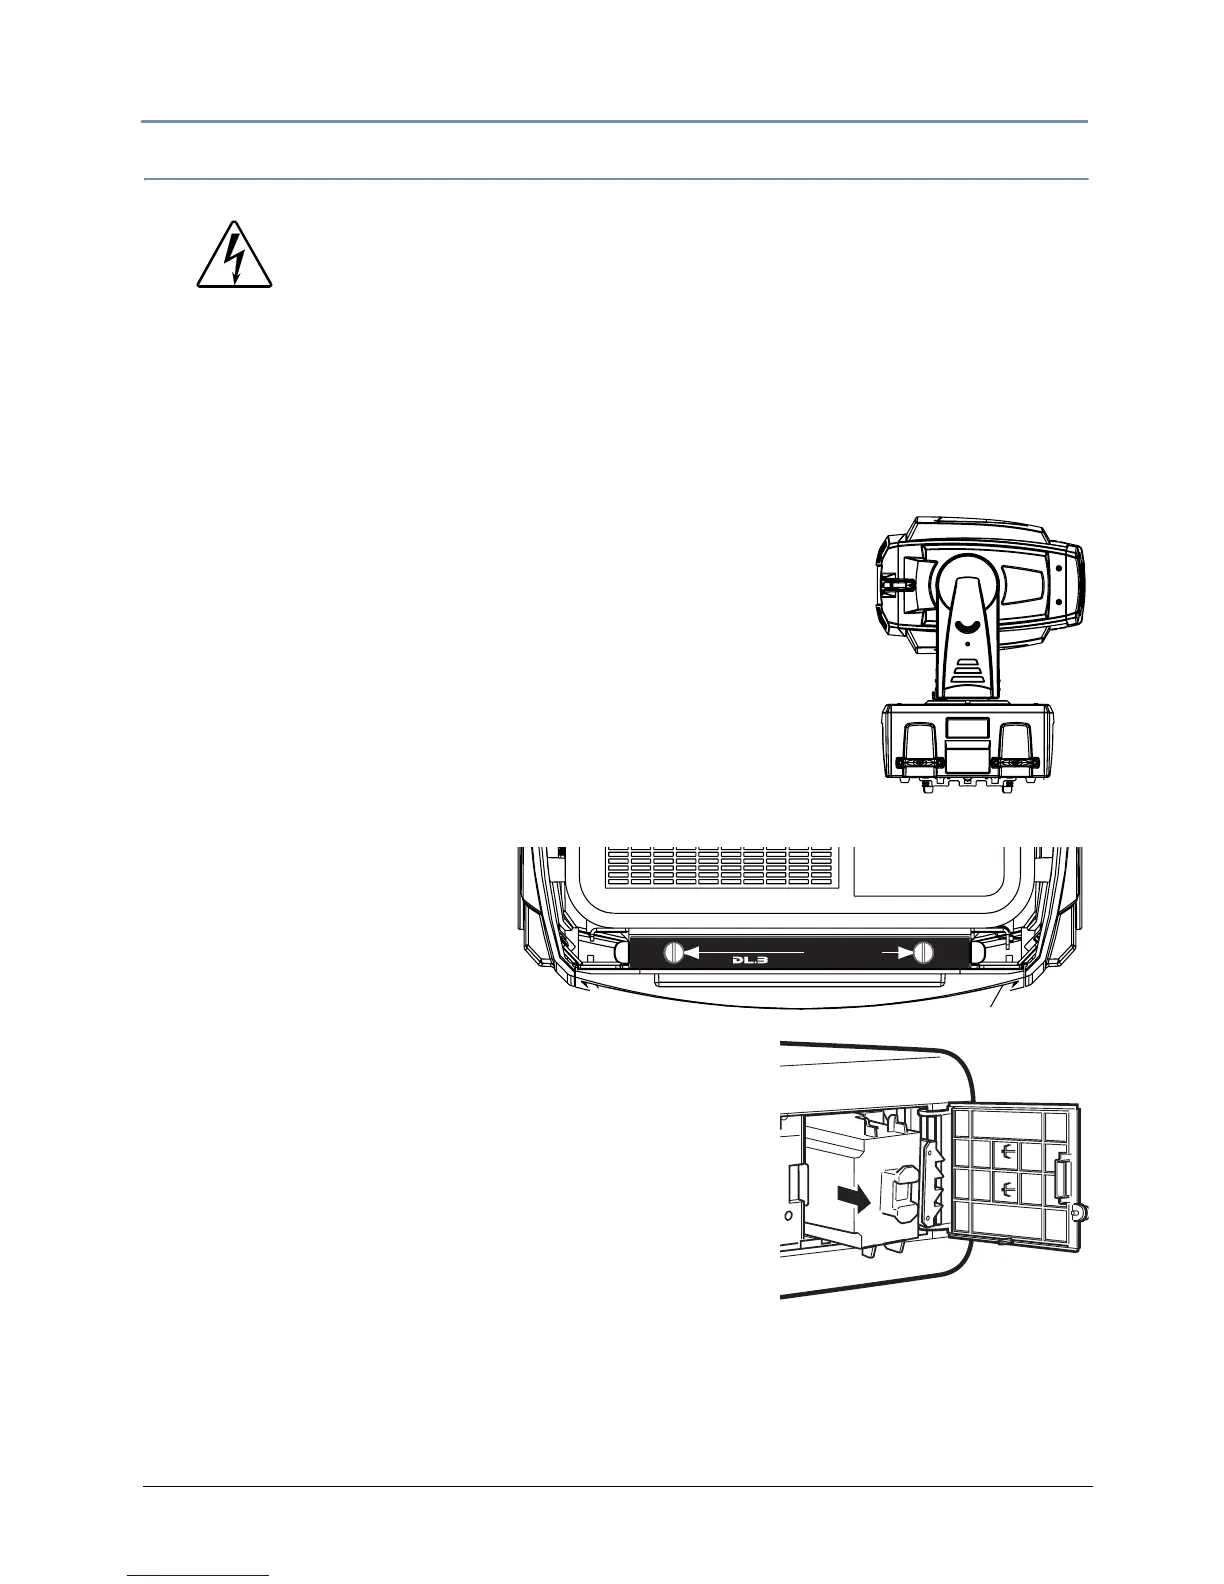
3. Use the tilt lock to secure the unit in position.
4. Unlatch and remove the rear bezel.
5. Disconnect the power cable
6. Loosen the two thumbscrews
holdin
g the projector bracket
and slide the projector out of
the fixture.
7. Loosen the thumbscrew and open the lamp cover.
8. Grasping the handle, pull out the lamp assembly.
9. Replace the lamp assembly, see Related Products and
Accessories on page 4.
10. Close the lamp cover and tighten the two lap cover
sc
rews.
11. Reconnect to power. The fixture will begin to home.
WARNING!
Allow the projector to cool for at least 45 minutes before you open
the
lamp cover. The inside of the projector can become very hot.
Always replace with a lamp assembly of the same type.
Do not drop the lamp module or touch the glass bulb! The glass can
shatter and cause injury.
In the unlikely event that the bulb ruptures, small glass fragments
may be generated
. The lamp module is designed to contain these
fragments, but use caution when removing the lamp module.
1. Disconnect power before servicing
2. Lock head in horizontal position
3. Loosen (2) thumbscrews
4. Pull tray to stop
Pull HerePull Here
LAMP ACCESS INSTRUCTIONS