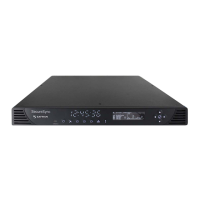
2.1 Installation Overview
This section provides an outline of the steps that need to be performed prior to
putting SecureSync into service. This includes:
Installation: Hardware setup, mechanical installation, physical connections.
Setup: Establish basic access to the unit, so as to allow the use of the web
user interface ("WebUI").
Configuration: Access the Web UI, configure the network, input and output
references, protocols (e.g., NTP), other settings.
The following factors determine which steps need to be taken:
a. Your existing infrastructure and how you plan on integrating SecureSync
into it (for example, integrating it into an existing Ethernet network, or set-
ting-up a standalone installation.)
b. How you would like to setup basic network configuration parameters:
Using the unit's front panel keypad and information display
Using a PC connected to SecureSync via serial cable
Using a PC connected to SecureSync via network cable.
You can connect your PC to SecureSync either…
…directly by means of a dedicated Ethernet cable, or
…indirectly, using your existing Ethernet network (using a net-
work hub).
c. The option cards configuration of your unit: Is your SecureSync equipped
with any option cards, such as additional input references, or additional sig-
nal distribution cards? If so, they need to be configured separately via the
SecureSync Web UI, once the network configuration is complete.
2.1.1 Main Installation Steps
The following list is a recommendation. Deviations are possible, depending on the
actual application and system configuration.
1. Read the Safety instructions: "SAFETY" on page45.
2. Unpack the unit, and take inventory: "Unpacking and Inventory" on the
facing page.
3. Obtain required tools and parts: "Required Tools and Parts" on page44.
4. Mount the unit: ."Mounting the Unit" on page48.
42
CHAPTER 2 • SecureSync 2400 User Manual Rev. 5.2
2.1 Installation Overview