2.9.3.1 Hot Swap Installation
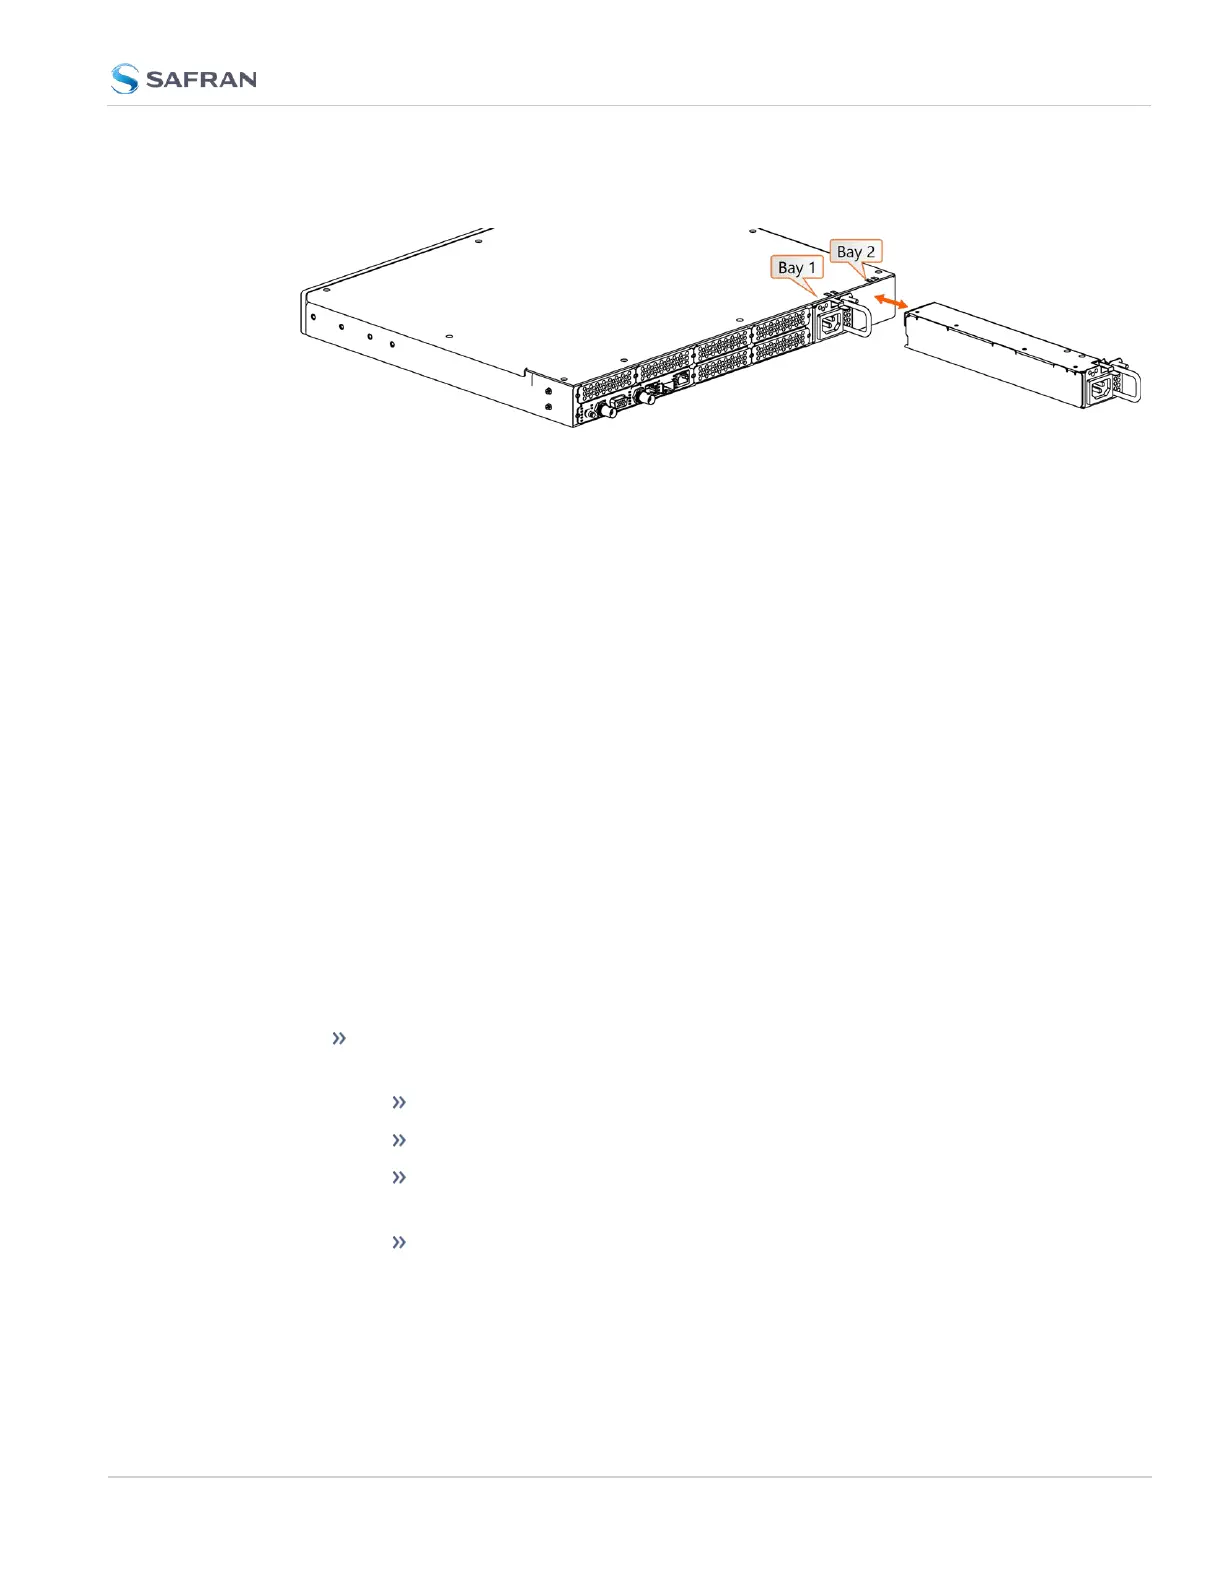
Figure 2-7: Hot Swap Power Supply installation (rear view)
To remove a power supply, first unplug the power input to be removed. (If you
are working with a 12 V
DC
(2-Pin) sled, you will need to remove the ground con-
nection from the post after disconnecting power). Then, press the lever fully
down and pull on the handle.
To install a power supply, first insert the sled until the latch clicks and the rear
panel of the supply is aligned with the rear panel of the SecureSync. (Be sure to
connect power AFTER the sled is fully inserted, and not before). Then, plug in the
power input. (If you are working with a 12 V
DC
(2-Pin) sled, you will also connect
a grounding ring to the external post before connecting power).
2.9.3.2 Hot Swap Monitoring
After installing power supplies, functionality can be confirmed through the Web
UI, CLI, front panel, or via SNMP.
Web UI Hot Swap Monitoring
You can view the status of the power supplies through the Web UI: navigate to
MANAGEMENT > OTHER > Hot Swap:
The Hot Swap Overall Status light at the top right of this page indicates
whether the unit has at least one active, valid power supply.
Green indicates all detected power supplies are valid
The status will show yellow if one power supply is not valid.
Red if there is no single HSPS module working properly (urgent need
for replacement).
Grey if the monitoring on both sleds has been disabled.
In this panel, you can also download (or clear) a file of the most recent mon-
itoring information for both bays.
2.9 Connecting Supply Power
CHAPTER 2 • SecureSync 2400 User Manual Rev. 5.2
57