1.
Navigate to the MANAGEMENT > Network Setup screen.
2.
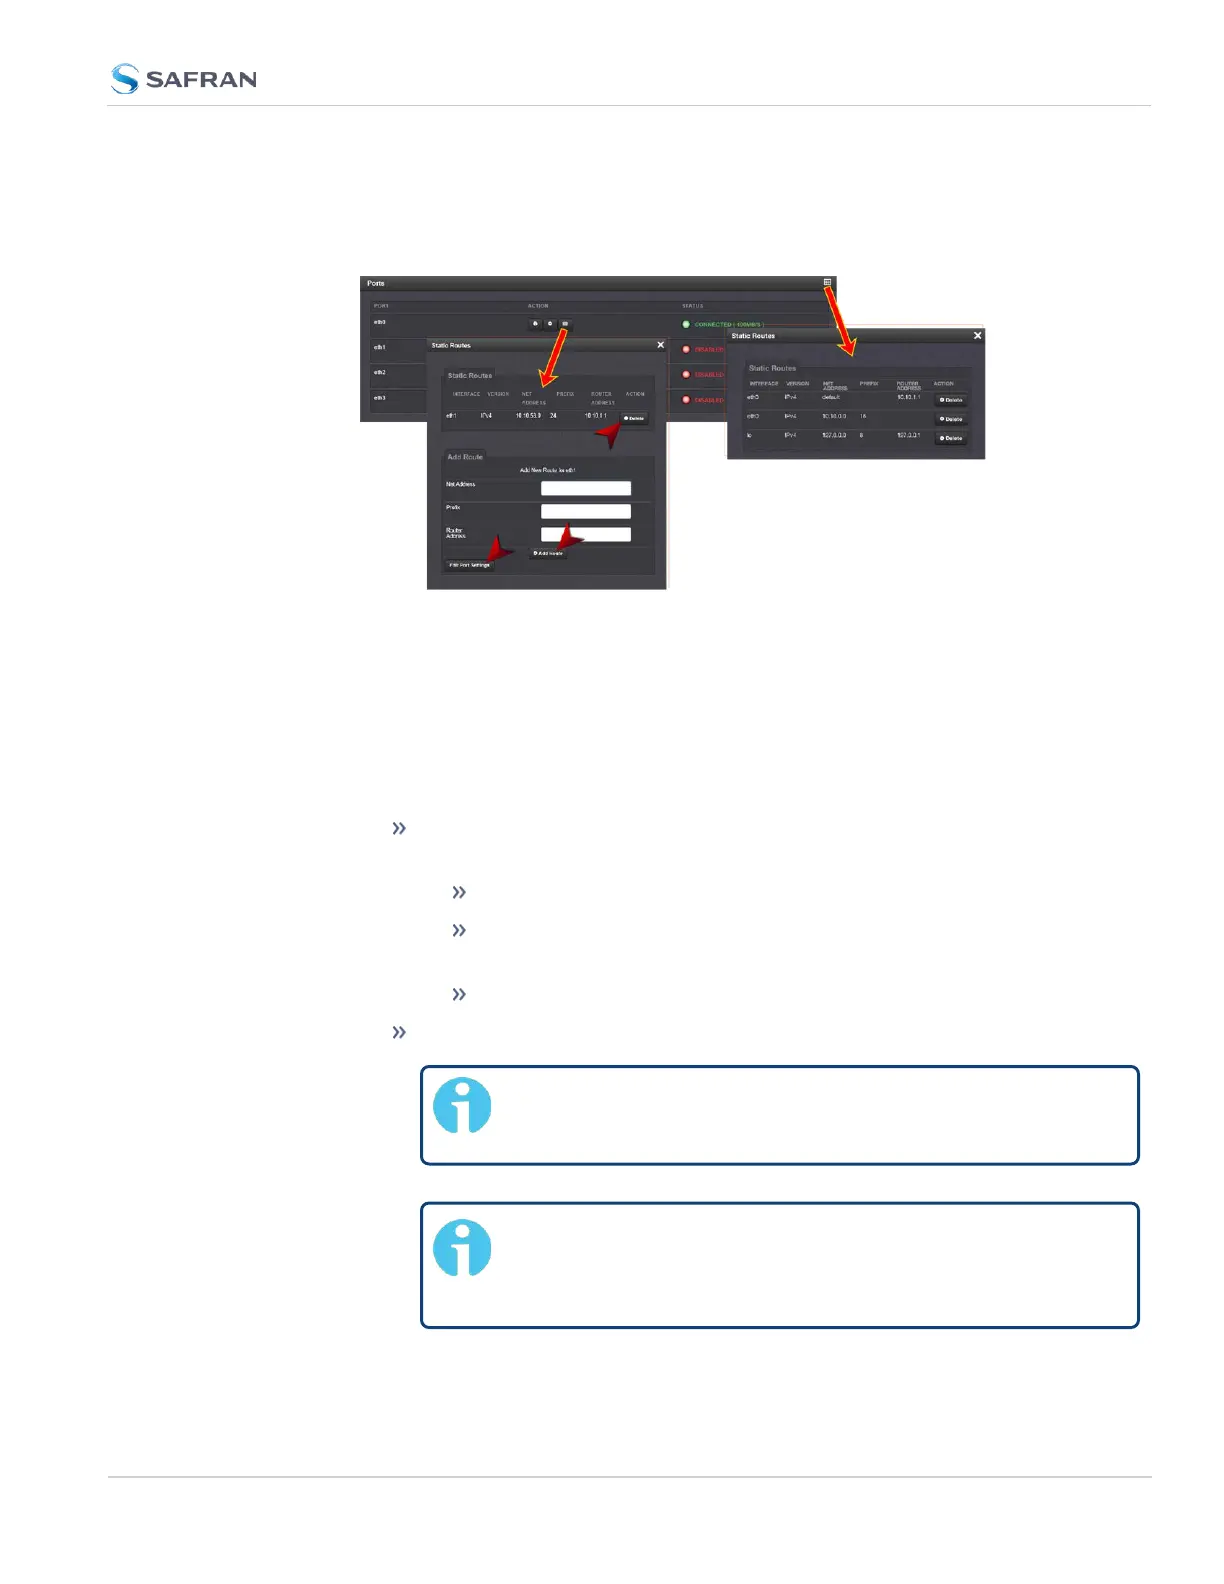
The Ports panel displays the available Ethernet ports, and their connection
status:
3. To view all configured Static Routes for all Ethernet Ports, or delete one or
more Static Routes, click the TABLE icon in the top-right corner.
4. To add a new Route, view or delete an existing Route for a specific Ethernet
Port, locate the Port listing you want to configure, and click the TABLE but-
ton next to it.
The Static Routes window for the chosen Port will open, displaying its Rout-
ing Table, and an Add Route panel.
In the Add Route panel, populate these fields in order to assign a
Static Route to a Port:
Net Address: This is the address/subnet to route to.
Prefix: This is the subnet mask in prefix form e.g., "24". See also
"Subnet Mask Values" on page71.
Router Address: This is where you will go through to get there.
Click the Add Route button at the bottom of the screen.
Note: To set up a static route, the Ethernet connector
must be physically connected to the network.
Note: Do not use the same route for different Ethernet
ports; a route that has been used elsewhere will be rejec-
ted.
2.14 Configure Network Settings
CHAPTER 2 • SecureSync 2400 User Manual Rev. 5.2
79