Bravo-Brava
1
^^^gj
P4A029M11
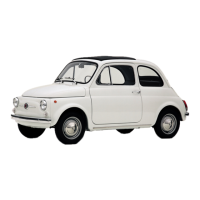
Detail of roof panel trim
4A231
M
Copyright Fiat Auto
^'!! !>/
Bodywork
Interior trim
70.
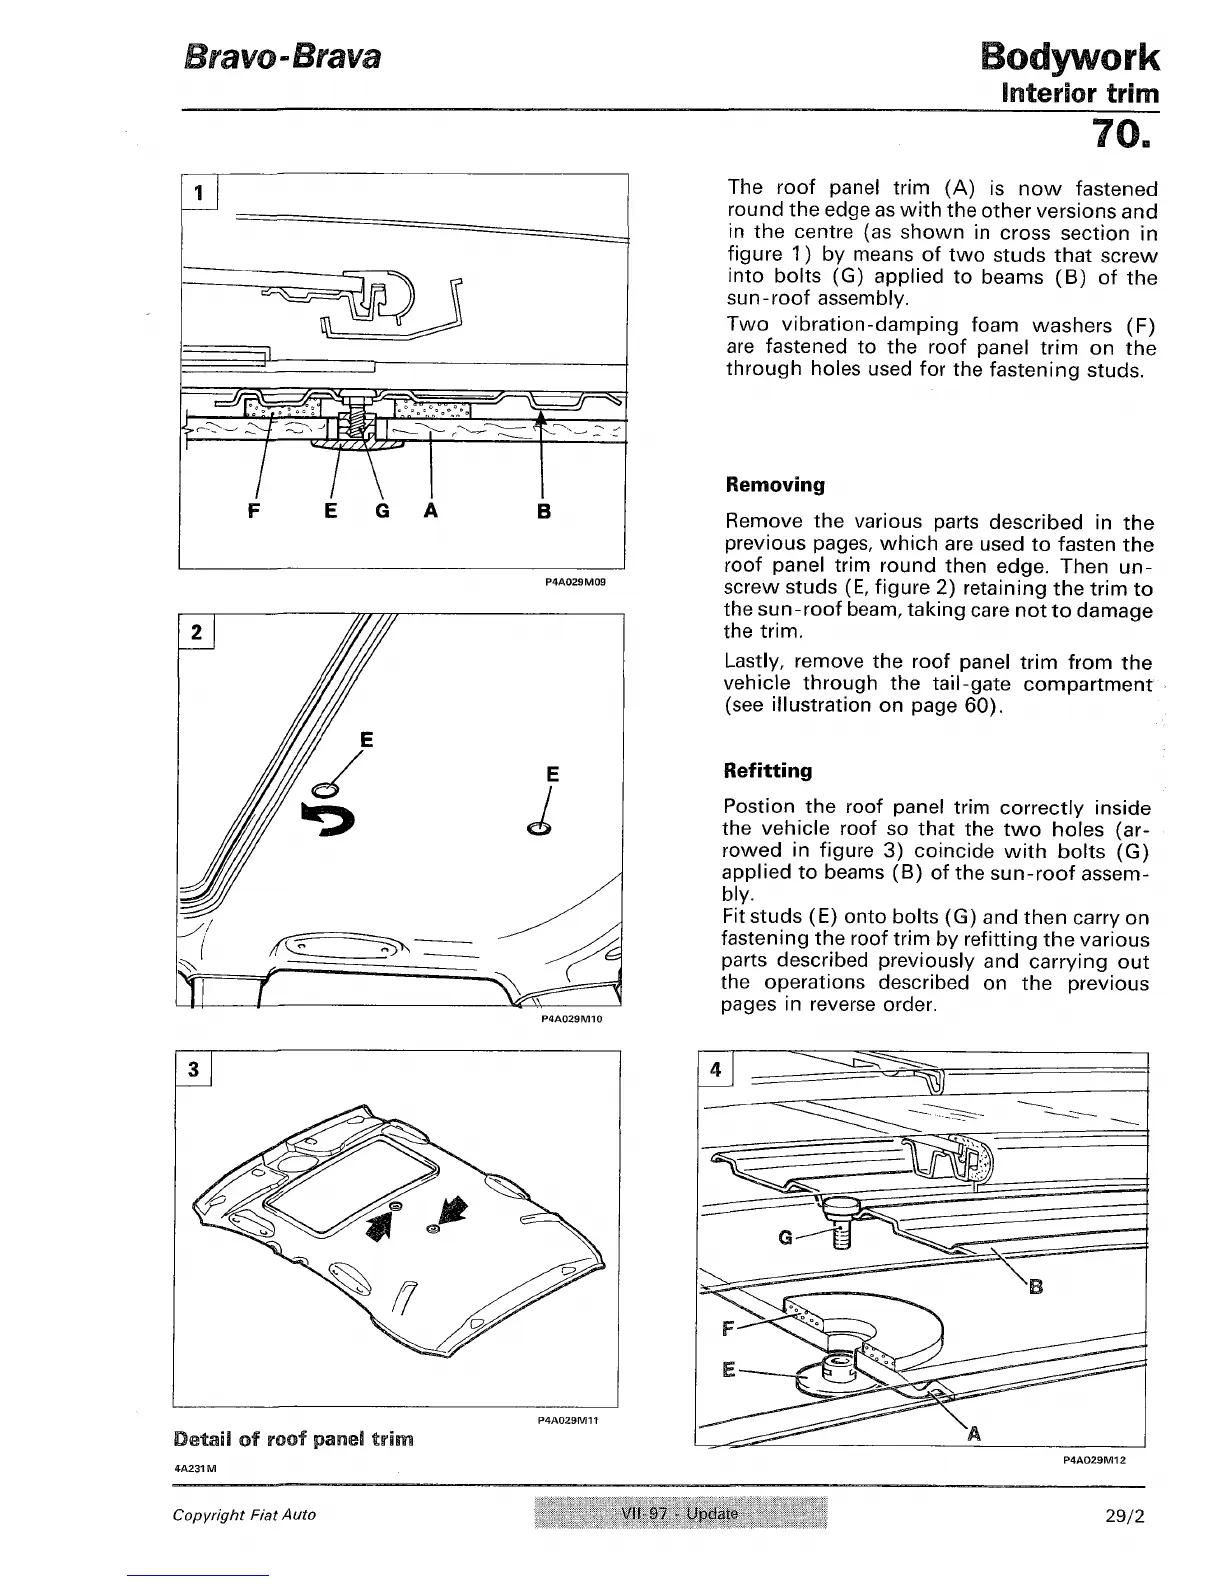
The roof panel trim (A) is now fastened
round the edge as with the other versions and
in the centre (as shown in cross section in
figure 1) by means of two studs that screw
into bolts (G) applied to beams (B) of the
sun-roof assembly.
Two vibration-damping foam washers (F)
are fastened to the roof panel trim on the
through holes used for the fastening studs.
Removing
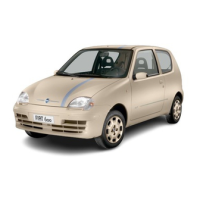
Remove the various parts described in the
previous pages, which are used to fasten the
roof panel trim round then edge. Then un-
screw studs (E, figure 2) retaining the trim to
the sun-roof beam, taking care not to damage
the
trim.
Lastly, remove the roof panel trim from the
vehicle through the tail-gate compartment
(see illustration on page 60).
Refitting
Postion the roof panel trim correctly inside
the vehicle roof so that the two holes (ar-
rowed in figure 3) coincide with bolts (G)
applied to beams (B) of the sun-roof assem-
bly.
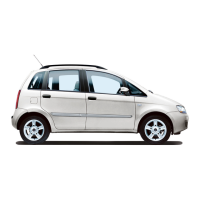
Fit studs (E) onto bolts (G) and then carry on
fastening the roof trim by refitting the various
parts described previously and carrying out
the operations described on the previous
pages in reverse order.
P4A029M12
U>i'
t
:i-
29/2