Bodywork
Interior trim
1
^sggj
Detail of roof panel trim
4A230M
29/1
wavQ'Bmwa
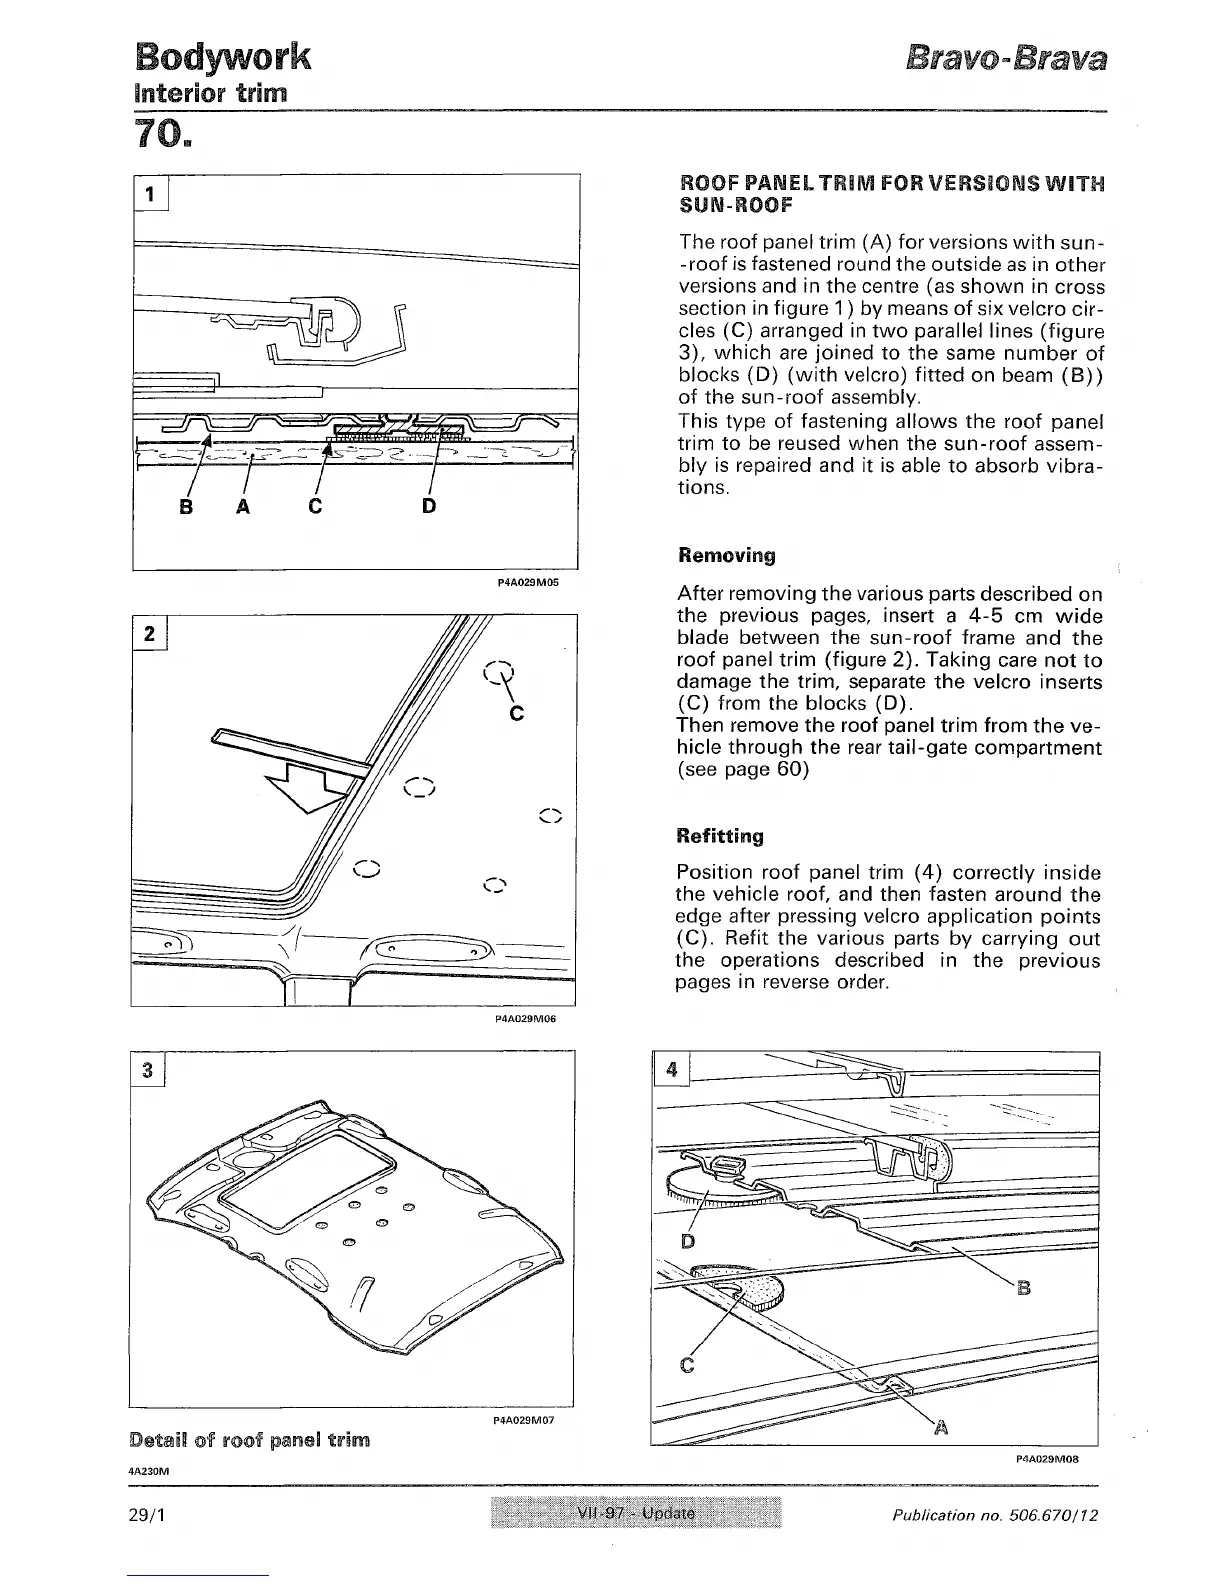
ROOF PAWELTFtltVl FOR VERSIONS WITH
SUN-ROOF
The roof panel trim (A) for versions with sun-
-roof is fastened round the outside as in other
versions and in the centre (as shown in cross
section in figure 1) by means of six velcro cir-
cles (C) arranged in two parallel lines (figure
3),
which are joined to the same number of
blocks (D) (with velcro) fitted on beam (B))
of the sun-roof assembly.
This type of fastening allows the roof panel
trim to be reused when the sun-roof assem-
bly is repaired and it is able to absorb vibra-
tions.
Removing
After removing the various parts described on
the previous pages, insert a 4-5 cm wide
blade between the sun-roof frame and the
roof panel trim (figure 2). Taking care not to
damage the
trim,
separate the velcro inserts
(C) from the blocks (D).
Then remove the roof panel trim from the ve-
hicle through the rear tail-gate compartment
(see page 60)
Refitting
Position roof panel trim (4) correctly inside
the vehicle roof, and then fasten around the
edge after pressing velcro application points
(C).
Refit the various parts by carrying out
the operations described in the previous
pages in reverse order.
Update Publication no. 506.670/12
\I\UQ1 -