OKI Data Infotech Corporation CONFIDENTIAL
Chapter 6 Parts Replacement (Disassembly/Reassembly)
6-27
6.4.5 T-FENCE
<Removal>
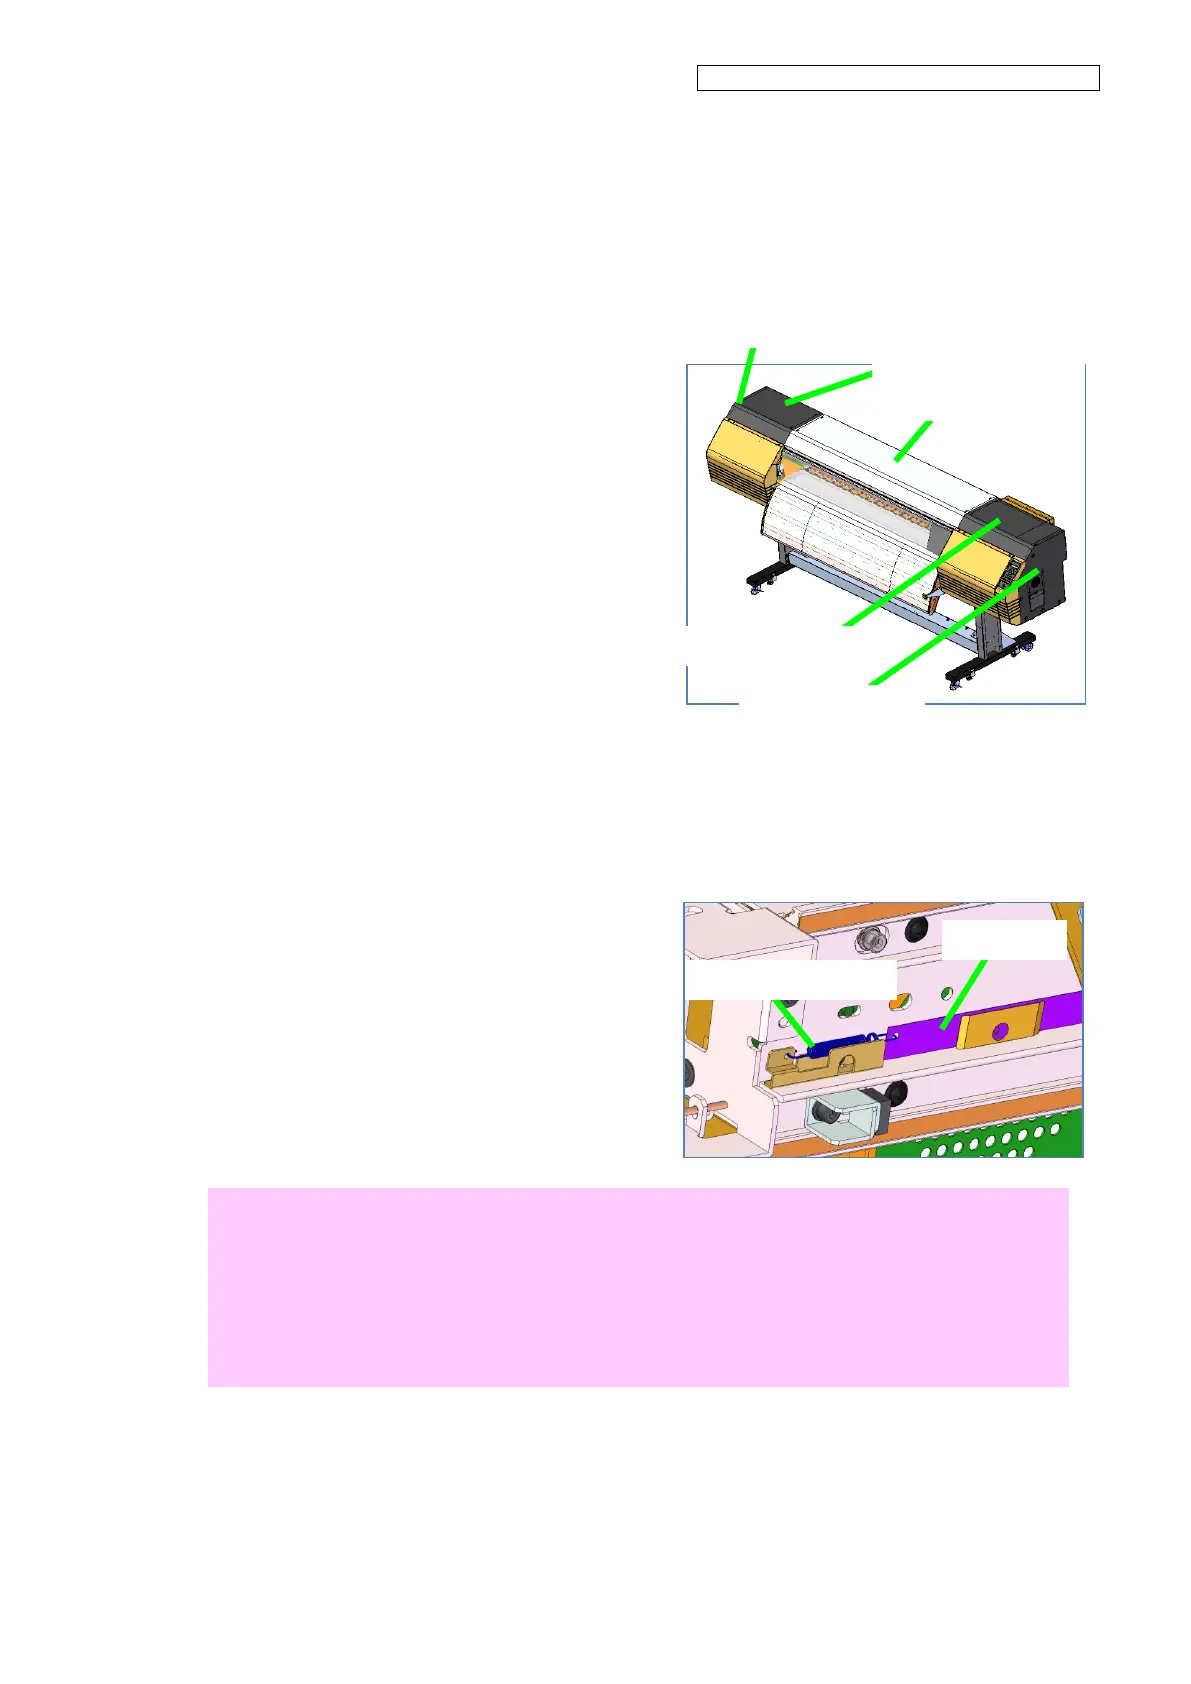
1. Remove the following parts.
- COVER(Y-RAIL)-SR-MW (see 6.3.3)
- COVER(Y-RAIL)-SL-MW (see 6.3.3)
- COVER(Y-RAIL)-64-MW (see 6.3.4)
- COVER(SIDE-L)-MW (see 6.3.6)
- COVER(SIDE-R)-MW (see 6.3.7)
2. Remove the SUS-BELT (see 6.4.2).
3. Remove the Y-ENCODER from the
carriage (see 6.8.6).
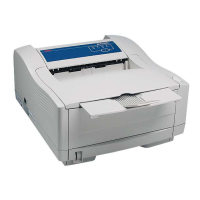
4. Remove the two
SPRING(T-FENCE)MW.
5. Remove the T-FENCE.
Note for installation
Pay attention to the orientation of the T-FENCE when installing it.
(For the old model) The part of the T-FENCE that will be attached comes to the printer left side
(maintenance area side).
(For the new model) The longer side of the black part on the T-FENCE comes to the printer
right side (home position side).
(For both models) The holes on the right and left sides of the T-FENCE (used to attach the
SPRING(T-FENCE)MW) come to the top.