OKI Data Infotech Corporation CONFIDENTIAL
Chapter 6 Parts Replacement (Disassembly/Reassembly)
6-35
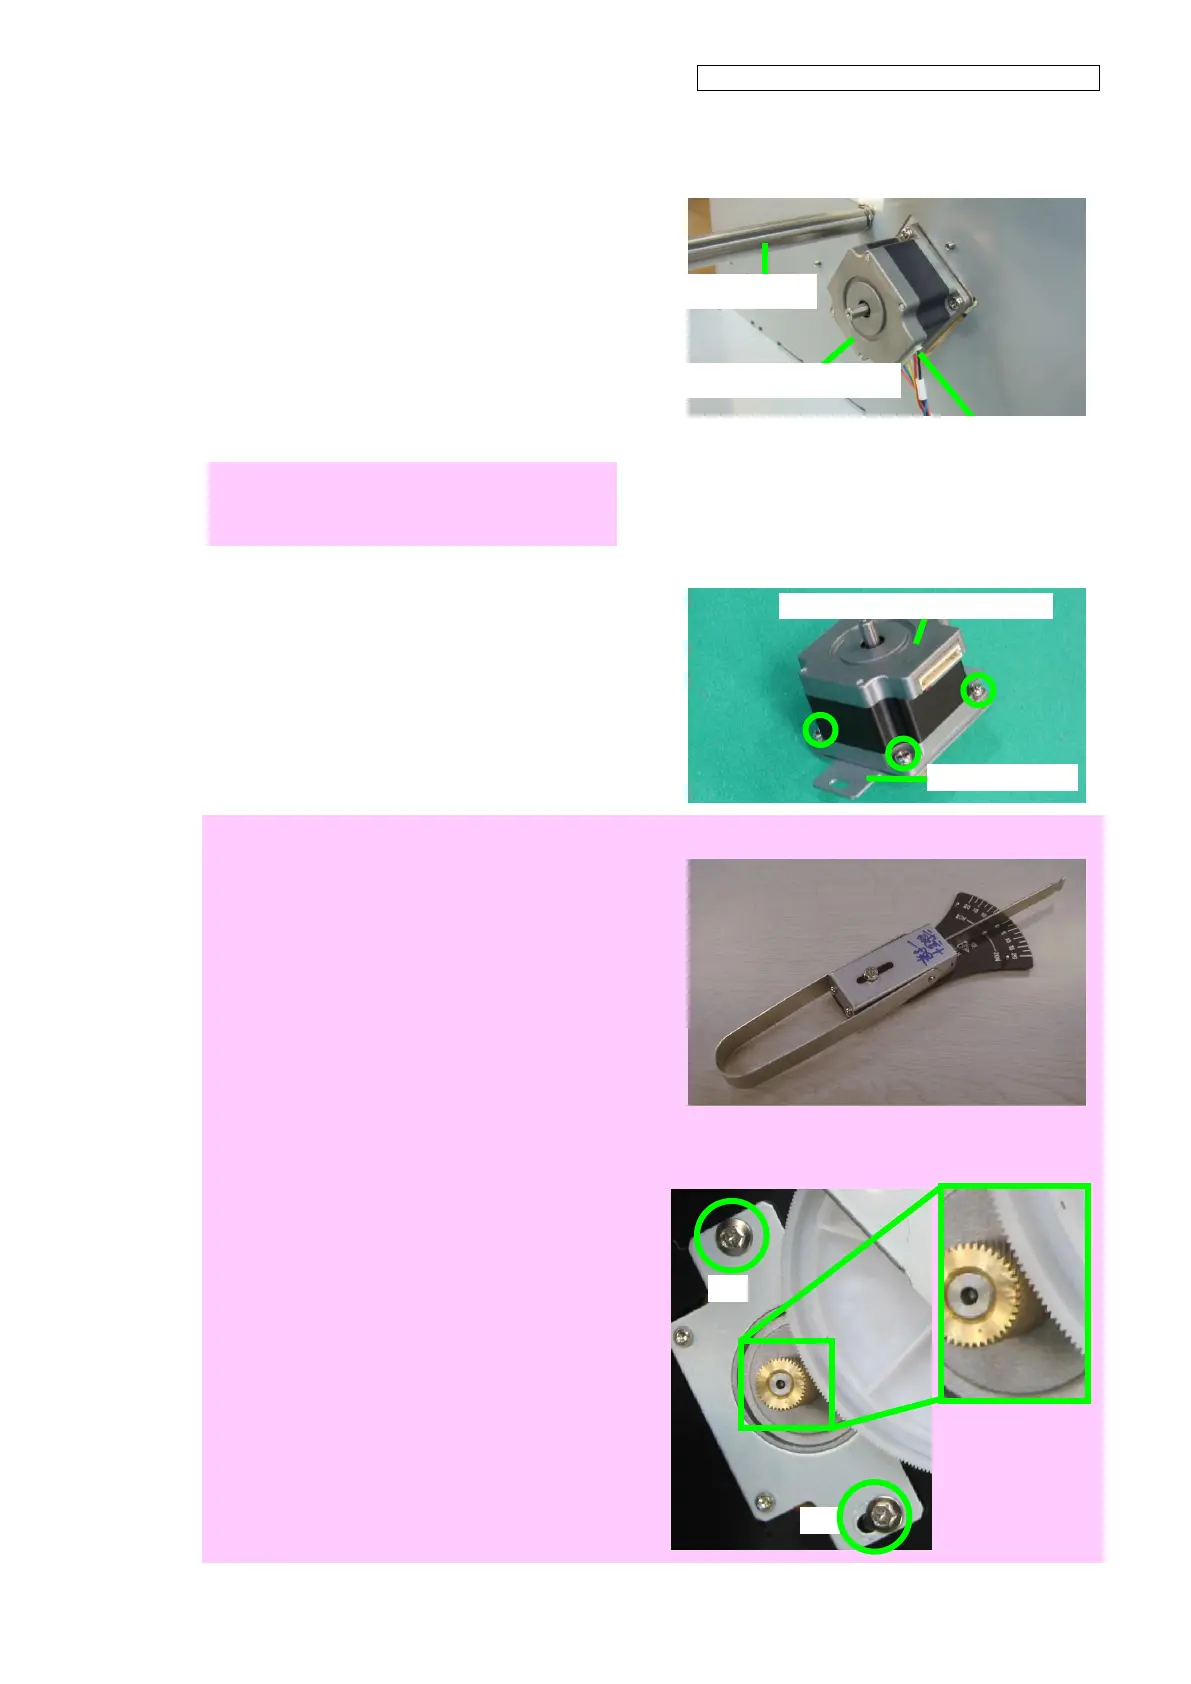
5. Disconnect the X-MOTOR-ASSY cable
connector.
6. Remove the two screws (refer to the
photo at the bottom in step 4) securing
the PLATE(X-MOTOR), and remove the
PLATE(X-MOTOR) and the
X-MOTOR-ASSY (with PINION) (refer to
the photo in step 7).
Note for installation
Install the X-MOTOR-ASSY with the cable
connector facing down.
7. From the PLATE(X-MOTOR) removed in
step 6, remove the
X-MOTOR-ASSY(with PINION) with
fixing four screws.
Notes for installation
Required tools:
- Torque driver
- Fan-shaped tension gauge (0.1 to 20N),
double-side type
Manufacturer: Oba Keiki Seisakusho
Tighten the screws (1) and (2) to the torque of
1.5 N・m (153kg・cm). At this time, the gear
teeth do not contact yet.
X-MOTOR-ASSY(with PINION)
X-MOTOR-ASSY
cable connector
X-MOTOR-ASSY (with PINION)