OKI Data Infotech Corporation CONFIDENTIAL
Chapter 6 Parts Replacement (Disassembly/Reassembly)
6-42
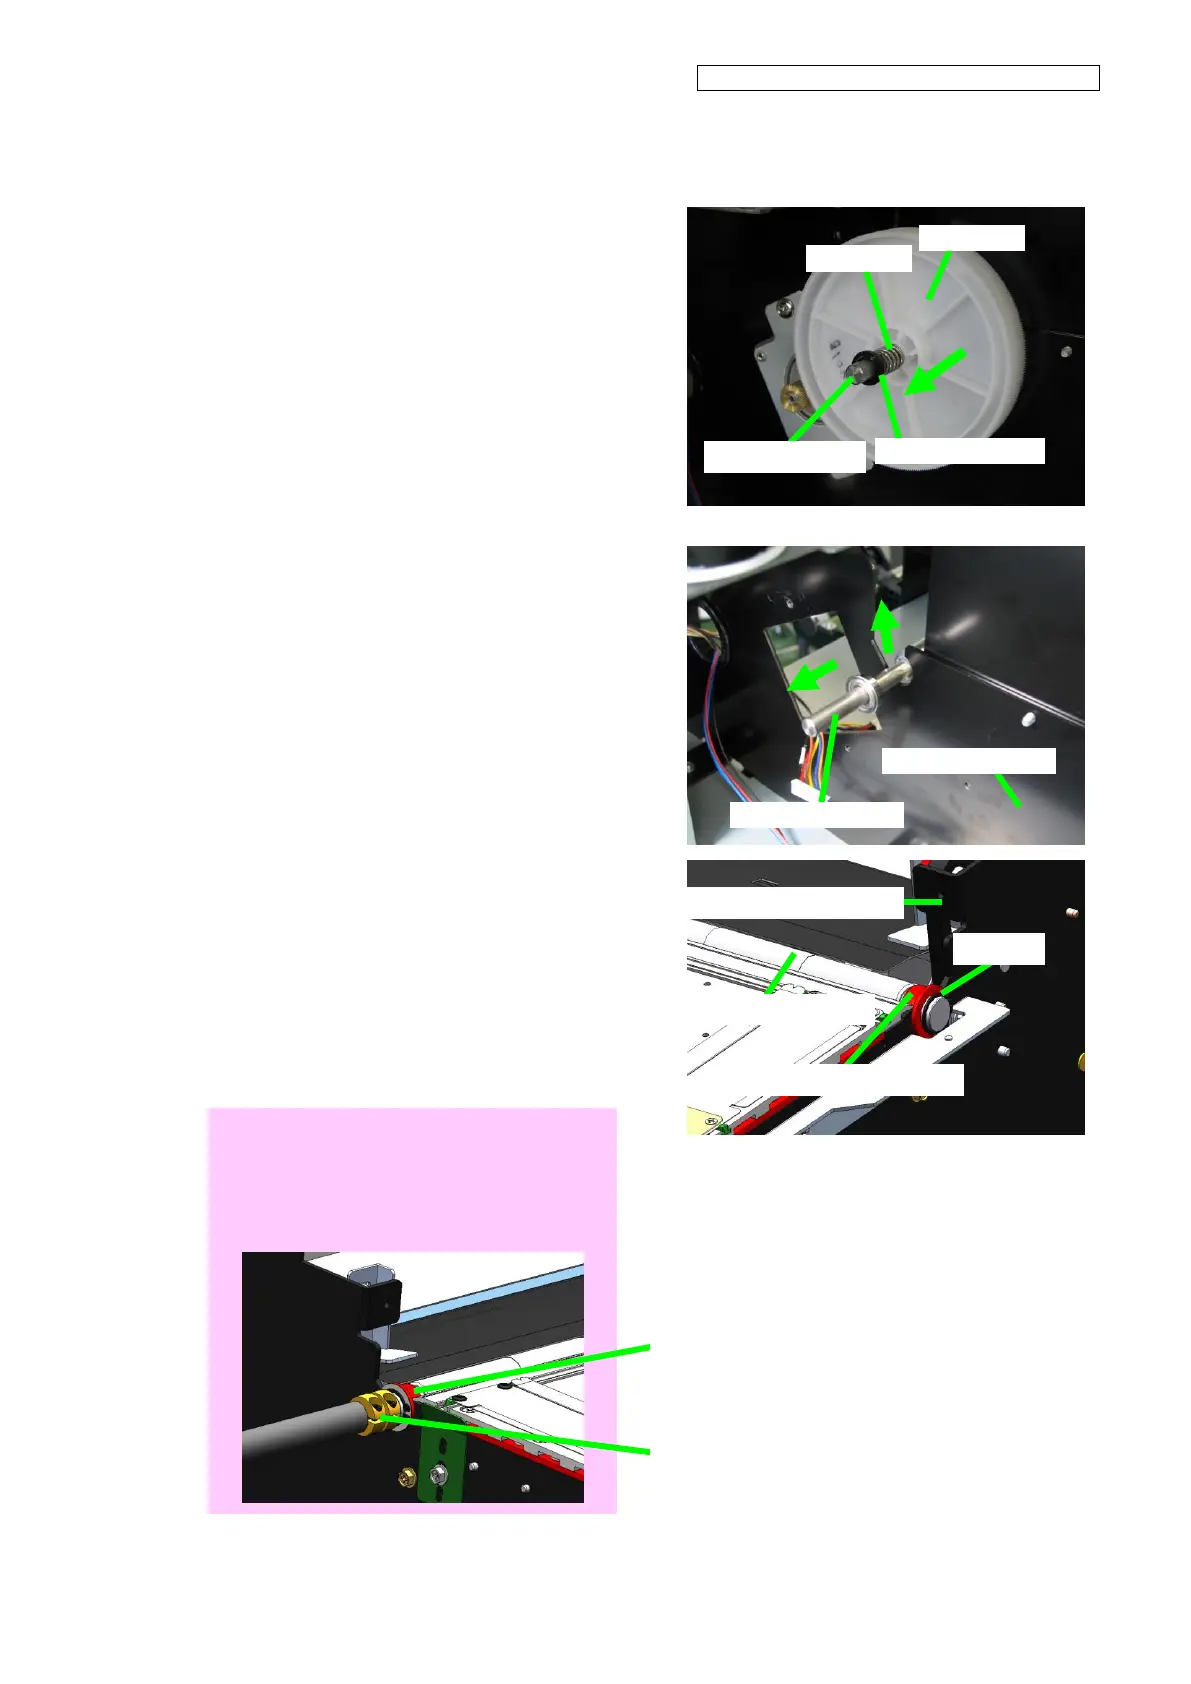
7. Remove:
- SPACER(X-MOTOR); and
- Spring(GR)
from the SHAFT-X-PULLEY.
8. Slide a little the SHAFT-X-PULLEY to the
left.
→ The SHAFT-X-PULLEY can be
removed from the grit roller.
9. Open the C ring at the right extremity of
the GRIT-ROLLER(MW) and slide it to
the left, then slide the OILES Glitron SE
flange bushing to the left (the picture
shows the printer after moving the parts).
→ The unit is not secured to the
PLATE-RIGHT-1-ASSY-MW
anymore.
Note for installation
After installing the C ring to the grit roller, slide
the roller to the right. Then push the grit roller
joint to the right and secure with the screw.
After securing the C ring on both sides,
push the grit roller to the right.
Push the grit roller joint to the right,
then secure it with the screw.
OILES Glitron SE flange bushing