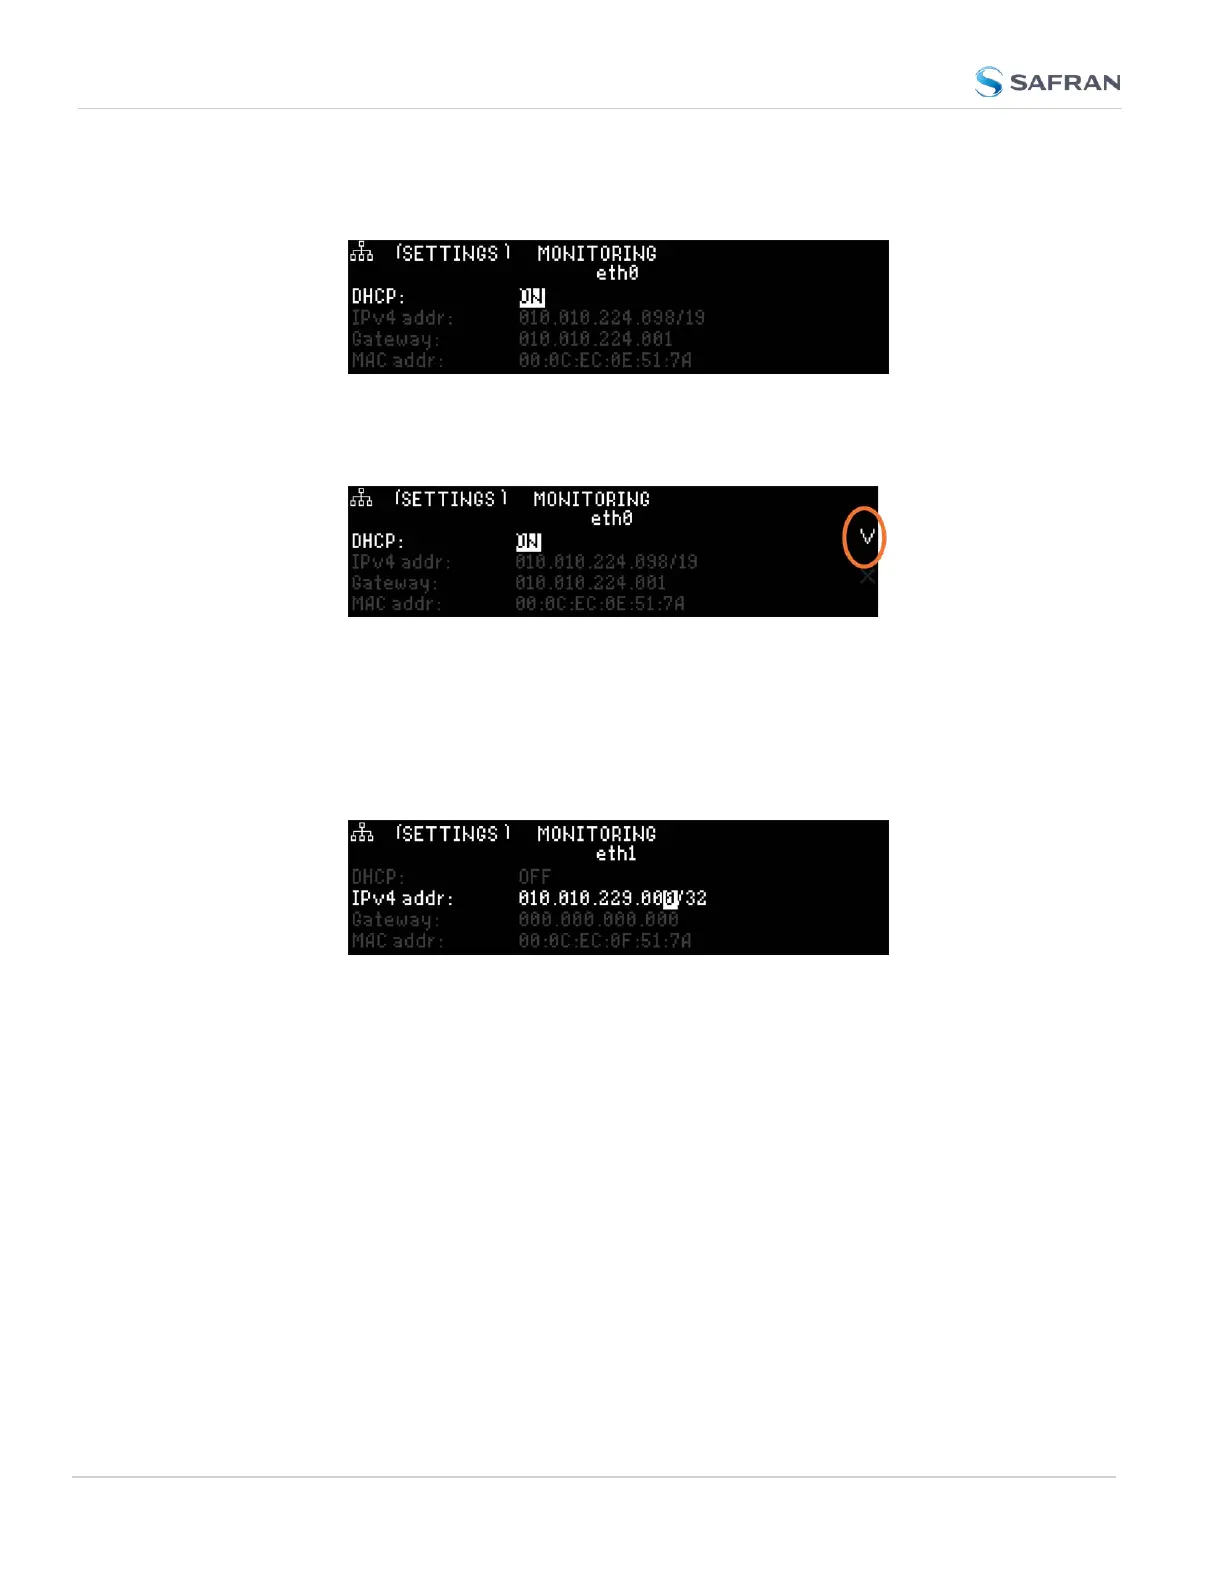
3.
Press down to highlight the current DHCP state [ON or OFF], and press
ENTER to change the setting.
4. Use the arrow keys to select OFF, and press the ENTERkey twice
(once to enter the setting, and once to confirm when the con-
firmation menu appears to the right).
B.
Enter IP Address and Subnet Mask:
1.
Select the IPv4 Address row, press ENTER to allow changes, and
use the up and down arrows to change 000.000.000.000/00 to the
value of the static IP address and subnet mask/network bits to be
assigned (for a list of subnet mask values refer to the table "Subnet
mask values" on page71).
2. Press the ✓ ENTER key once to enter the setting, then again to con-
firm the new setting in the confirmation menu.
C.
Enter the Gateway Address (if required)
1. Highlight the gateway row. Press the ✓ key once to enter the setting.
2. The display will change, allowing you to input an address at
000.000.000.000. Enter the gateway address here. The address
entered must correspond to the same network IP address assigned to
SecureSync.
The remainder of the configuration settings can be performed via the Web UI
(accessed via an external workstation with a web browser such as Firefox
®
or
Chrome
®
). For more information, see "The Web UI HOME Screen" on page34.
68
CHAPTER 2 • SecureSync 2400 User Manual Rev. 5.2
2.12 Setting up an IP Address