11.3.4 Installation
11.3.4.1 Installing the DRIVE-CLiQ cabinet bushing for RJ45 plug
Requirement
WARNING
Risk of injury as a result of foreign bodies in the device
Parts (e.g.: drilling chips, end sleeves) falling into the device can cause short-circuits and
damage the insulation. This can result in severe injury (arcing, loud bang, parts that are ung
out).
• Only perform installation and other work when the devices are current-free.
• Cover the ventilation slots when mounting and installing the control cabinet and remove
the cover before switching on.
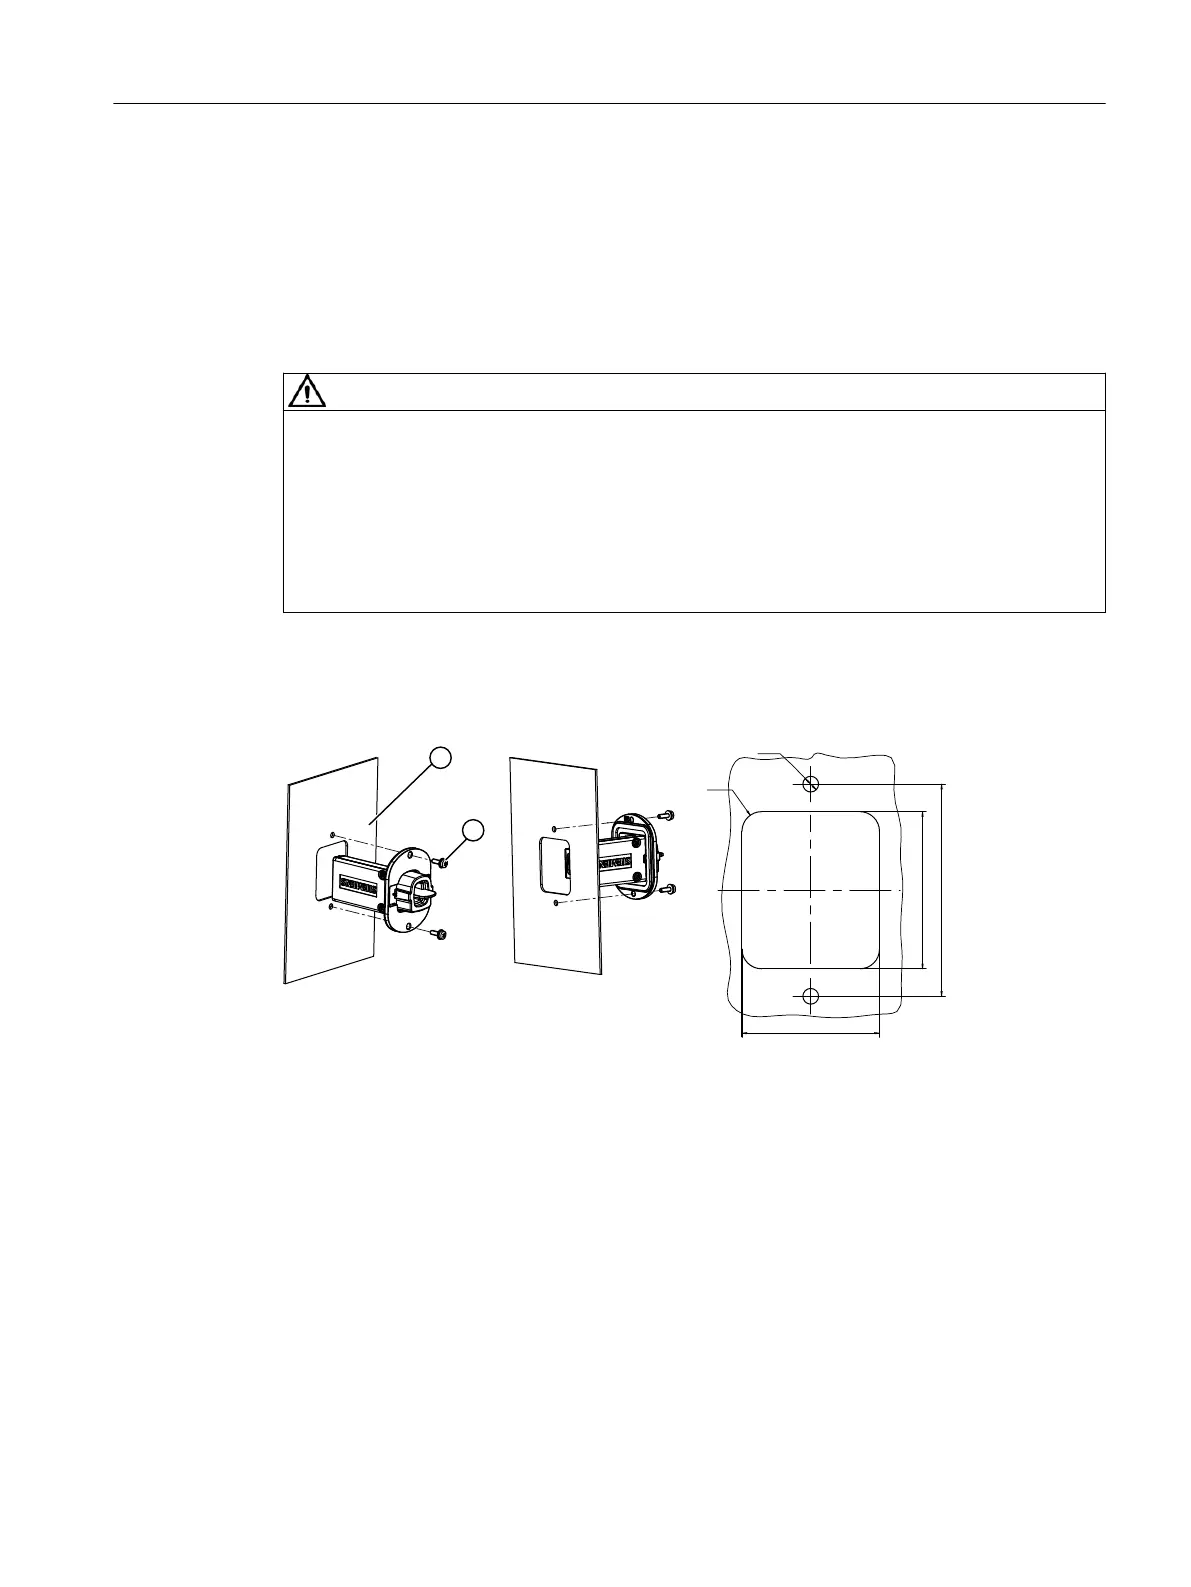
Procedure
Y
X
5
① Outside of the control cabinet
② M3 screw, tightening torque 0.8Nm (7.1lbfin)
Figure11-4 Mounting and cutout in the control cabinet, all dimensions in mm and (inches)
Proceed as follows to install the DRIVE-CLiQ cabinet bushing in the cabinet panel:
1. Prepare the cutout in the control cabinet.
2. Insert the DRIVE-CLiQ cabinet bushing from the outside of the control cabinet through the
cutout in the control cabinet.
3. Attach the DRIVE-CLiQ cabinet bushing to the outside panel using 2 M3 screws and 2 nuts.
– Tightening torque: 0.8Nm (7.1lbfin)
– In order to ensure good electromagnetic compatibility, a good electrical connection must
be established between the DRIVE-CLiQ cabinet gland and the cabinet panel over a large
surface area.
Accessories
11.3DRIVE-CLiQ cabinet bushing
Booksize power units
Equipment Manual, 09/2023, A5E53307519B AA 275
 Loading...