3. Repair Instructions 1/2010 3 - 48
BA-TE-DE08C M.KAY
Dialog+ SW9xx_sm_Chapter 3_1-2010.doc/pdf <100329> yymmdd
B. Braun Avitum AG
Dialog
+
SW 9.xx
6.
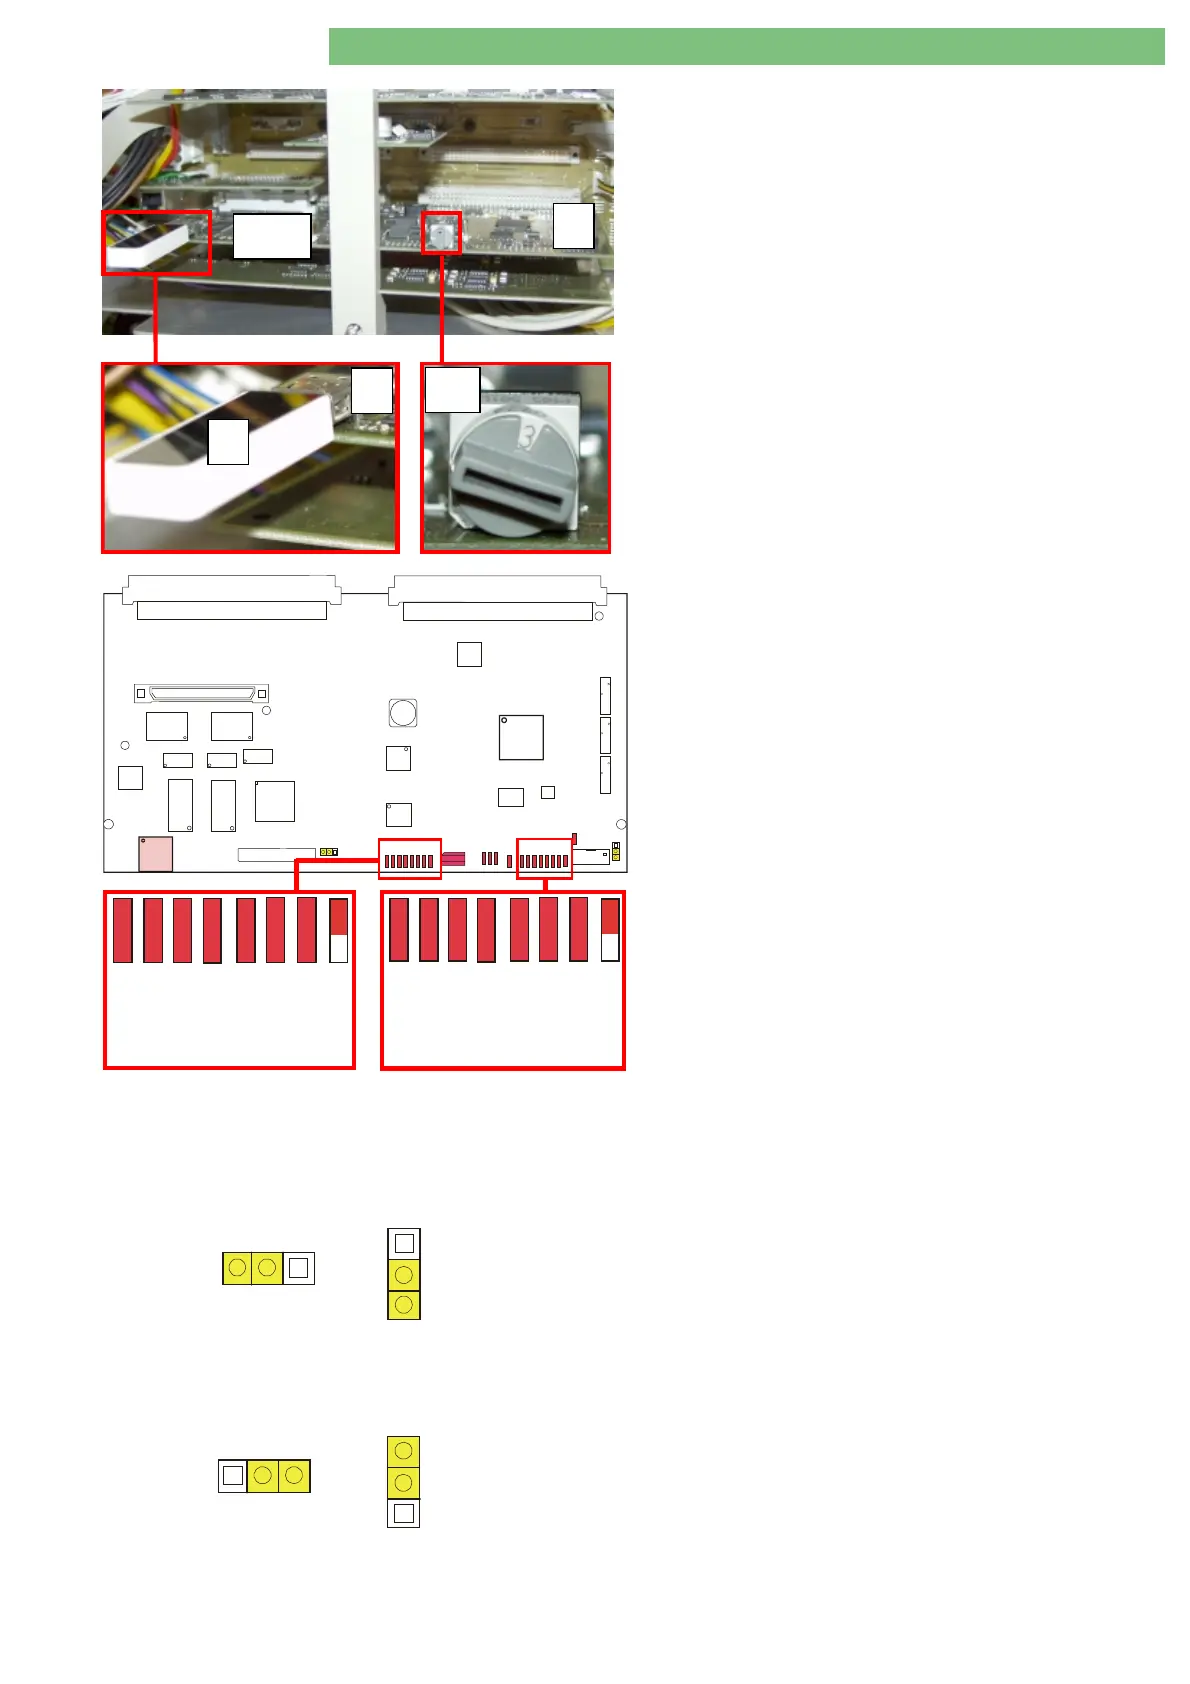
Connect USB stick
A
to USB port
B
(P11) on digital
board
C
.
7.
Turn service switch
S1
to position 3 – SW installation.
8.
Switch on machine.
9.
The USB stick is detected.
P2
P1
P4
S1
P14
P11
P13
JP1
JP2
U56
U55
U43
U39
U35
U36
U33
U28
U53
L33
P7
P6
P5
U7
U27
D13
V10
V7
D14
V8
D15
V11
V9
D16
V12
D17
V13
D18
V14
D19
V15
V17
D20
V16
V18
V5
U30
FPGA
U45
U46
10.
The LLC and LLS software is installed automatically.
Both LLC/LLS LEDs show the installation progress:
LED 0
: Is off if firmware is not updated
LED 1
: Respective software is updated
LED 2
: Checksum and configuration files are loaded
LED 3
: USB stick consistency is verified
LED 4
: Binary files are loaded
LED 5
: Binary images are verified
LED 6
: Flash ROMs are programmed/under verification
11.
A successful software installation is indicated by:
-
LEDs 7
: flashing
- short beep from the SMPS-MC
-
LED 0
: on (only if firmware is updated)
-
LEDs 1 to 6
: on
12.
Switch off machine.
13.
Remove USB stick
A
from the USB port
B
on the digital
board
C
.
Setting for Jumpers JP1 and JP2
Firmware Update not Possible (Protected)
JP1
CWP
SWP
JP2
The firmware for the controller and supervisor is protected by
the jumpers JP1 and JP2. The position for both jumpers are
set to CWP/SWP (controller/supervisor write protect). The
jumpers must be in this position to protect the LLC and LLS
firmware.
Firmware Update Possible (Enabled)
JP1
CWE
SWE
JP2
The installation of the firmware is normally not required
during the installation of LLC and LLS.
If the firmware has to be installed additionally, it will be
indicated in the installation instructions. JP1 and JP2 have to
be set to this position (Default CWE and SWE:
controller/supervisor write enabled). Set the jumpers back to
the CWP/SWP setting after installation.
S1
C
B
A
P11
0
1
234
5
6
7
Supervisor
01234
5
6
7
Controller