3. Configuration
The Lens overview is displayed.
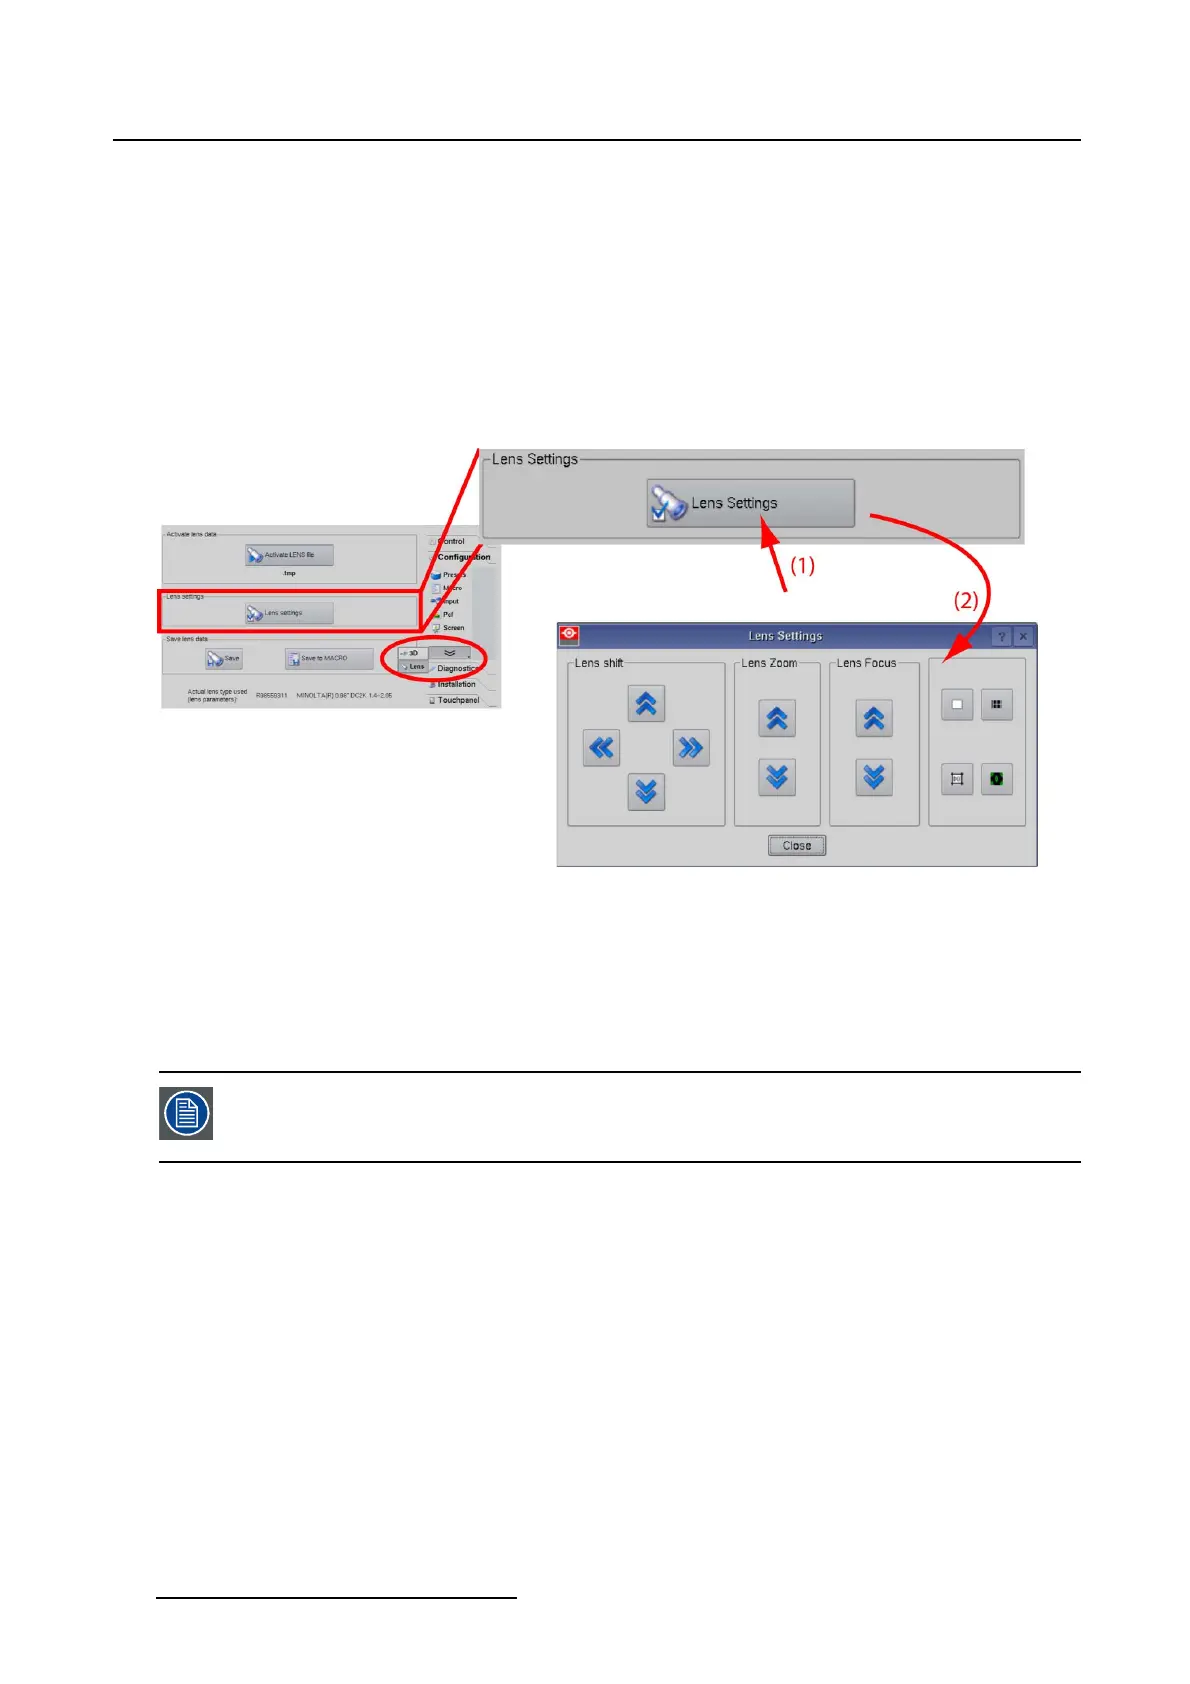
2. Tip on Lens Settings. (image 3-55)
The lens adjustment settings window is displayed.
3. To shift the image, tip on the arrow buttons under Lens shift.
Note: Use the pattern short cut keys at the right side to activate or deactivate an test pattern.
The image can be moved left-right and up-down.
4. To zoom the image, tip on the arrow buttons under Lens zoom.
5. To focus the image, tip on the arrow buttons under Lens focus.
Image 3-55
Lens settings
3.8.4 Save to file
What can be done?
The new Lens data can be saved in a new or existing file. This file can be used in different macros.
When the lens parameters are not selected, you will be prompted to select the correct
lens that is used in conjunction with this projector. The lens parameters dialog box
opens.
How to save
1. While in Configuration, tip on the double arrow downwards and select Lens.(image3-56)
The Extra overview is displayed.
2. Tip on Save (1).
The file selection window starts up (2).
3. Select an existing file to overwrite (3a) or tip in the filename input field and enter a new file name (3b).
4. Tip OK (4).
82
R59770488 COMMUNICATOR TOUCH PANEL 06/06/2012
 Loading...