5. Installation
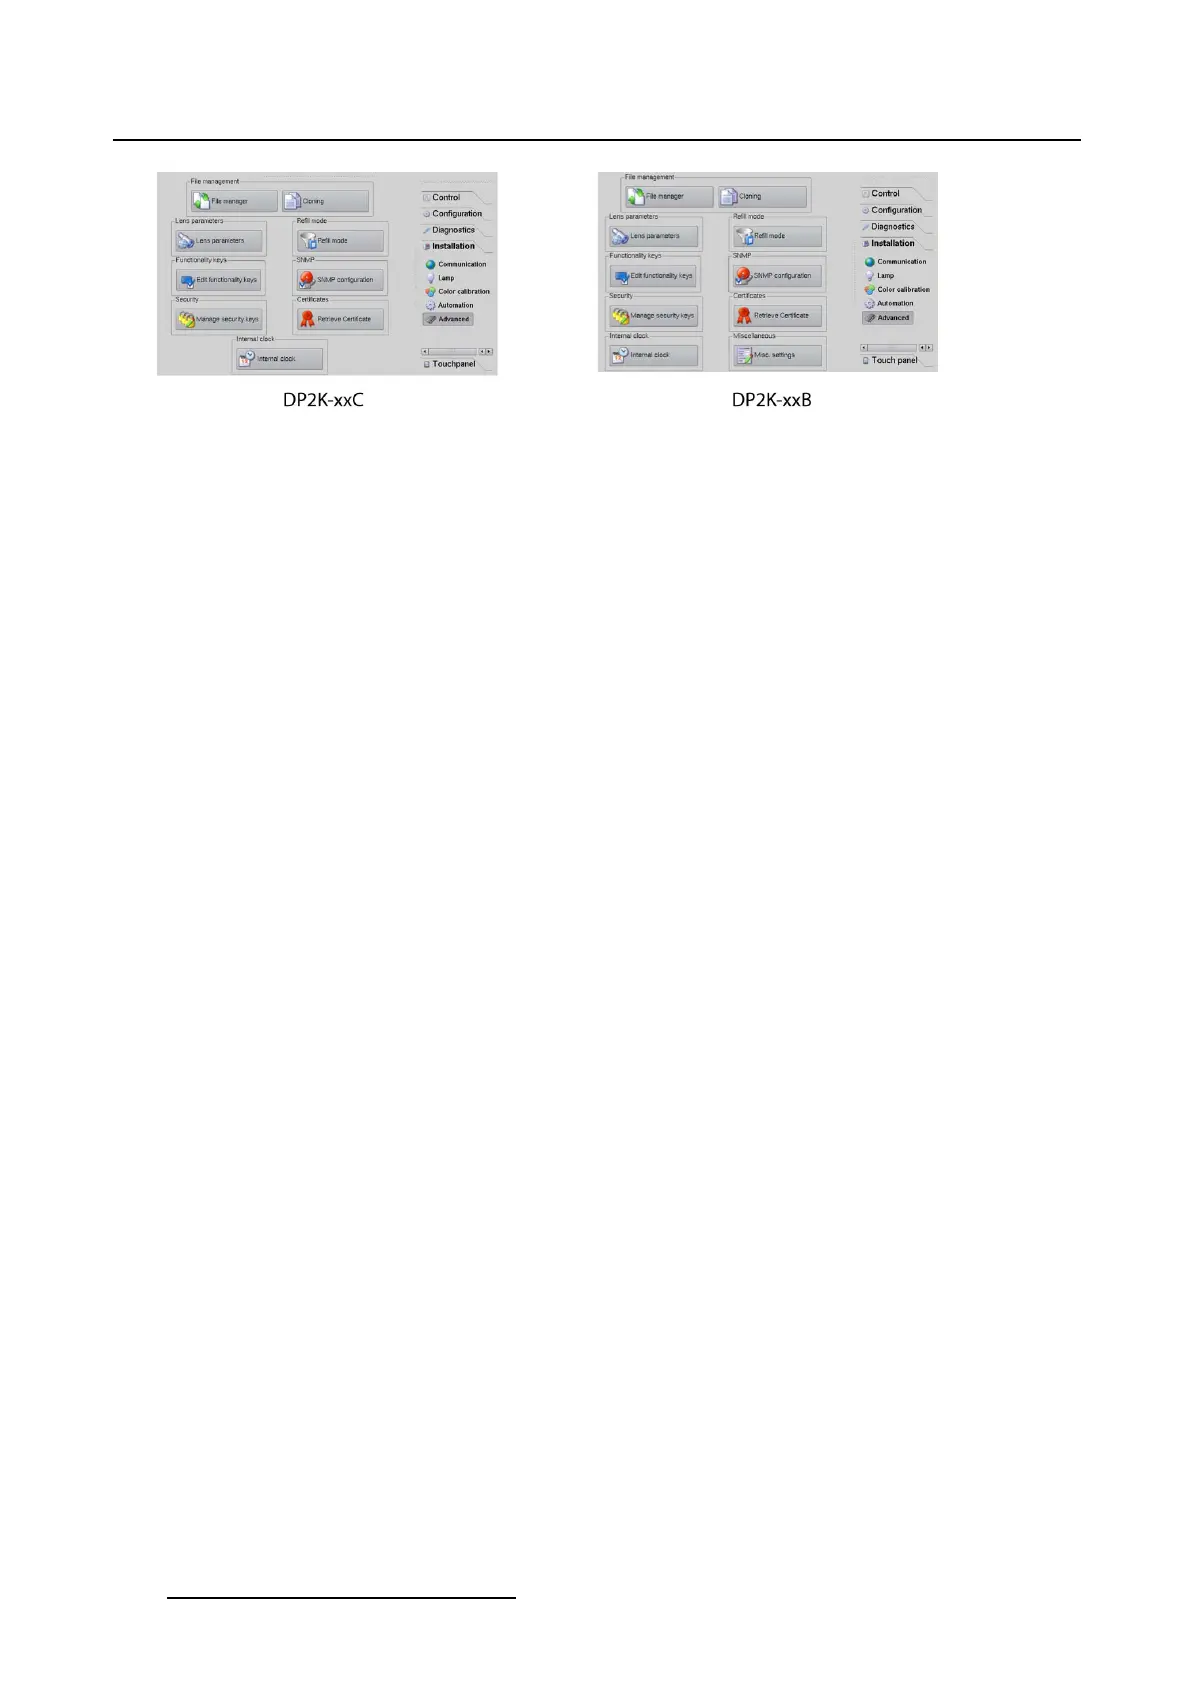
Image 5-29
Overview
• Set up of the ICP Clock
• Set up of the Link Decryptor Clock
• File manager
• File management, cloning
• Restoring a clone fi le
• Lens selection
• Lens homing and return
•Refill mode
• Functionality keys
•SNMPconfiguration
• Security
•Certificate
• External exhaust fan selection
• Image orientation
5.9.1 Set up of the ICP Clock
About the ICP clock
This clock can be set to:
• touch panel time
•Userdefined time
• UTC/GMTtimeusingNTP(timebasedonaservertime)
Most of the logging is done by the ICP board and uses the internal clock of that bo
ard.
How to set the clock to user defined time
While in the Advanced tab page:
1. Tip on Internal clock (1). (image 5-30)
The Projector internal clock window opens.
2. Tip on ICP tab to open the ICP clock if not yet open.
3. Select the clock synchronization source. Click on the radio button of your source.
Select User defined time (4).
4. To change the month, tip on the left or right arrow button next to the current month indication (5).
5. To select the day, tip on a day in the calender view (6).
The background of the selected day changes to dark blue.
150
R59770488 COMMUNICATOR TOUCH PANEL 06/06/2012
 Loading...