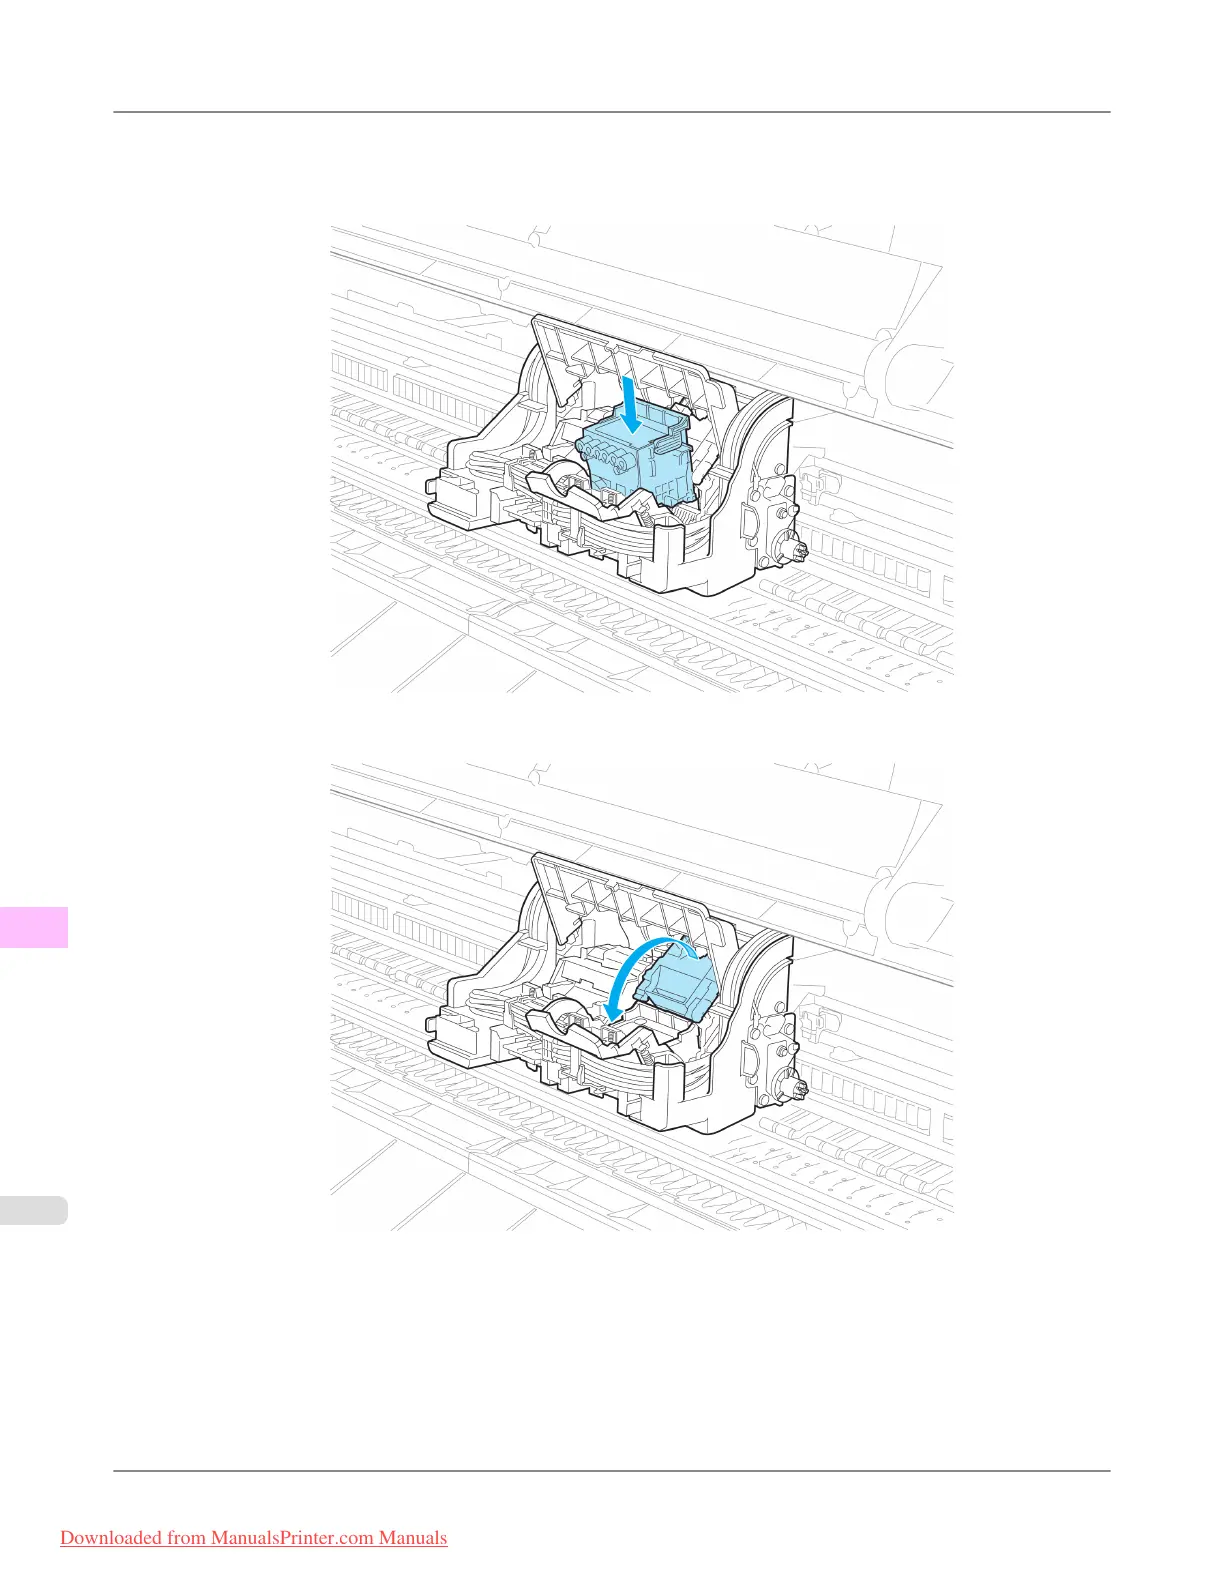
10. With the nozzles facing down and the metal contacts toward the back, tilt the Printhead slightly forward and insert it
into the Carriage. Carefully push the printhead firmly into the Carriage, ensuring that the nozzles and metal contacts
do not touch the carriage.
11. Pull the Printhead Fixer Cover down toward the front to lock the Printhead in place.
Maintenance
>
Printheads
>
Replacing the Printhead iPF8300
11
1008
Downloaded from ManualsPrinter.com Manuals