1
st
one for setting the preceding node and start rotor
angle, and the 2
nd
one for setting the succeeding node
and end rotor angle. To set the preceding or succeeding
node, either left-click on an existing node to select it, or
left-click on an empty area to create a new node and
select it. In both cases, the start and end rotor angles
depend on the y-coordinate of the mouse pointer,
however the start and end velocity and acceleration are set
to 0 as default.
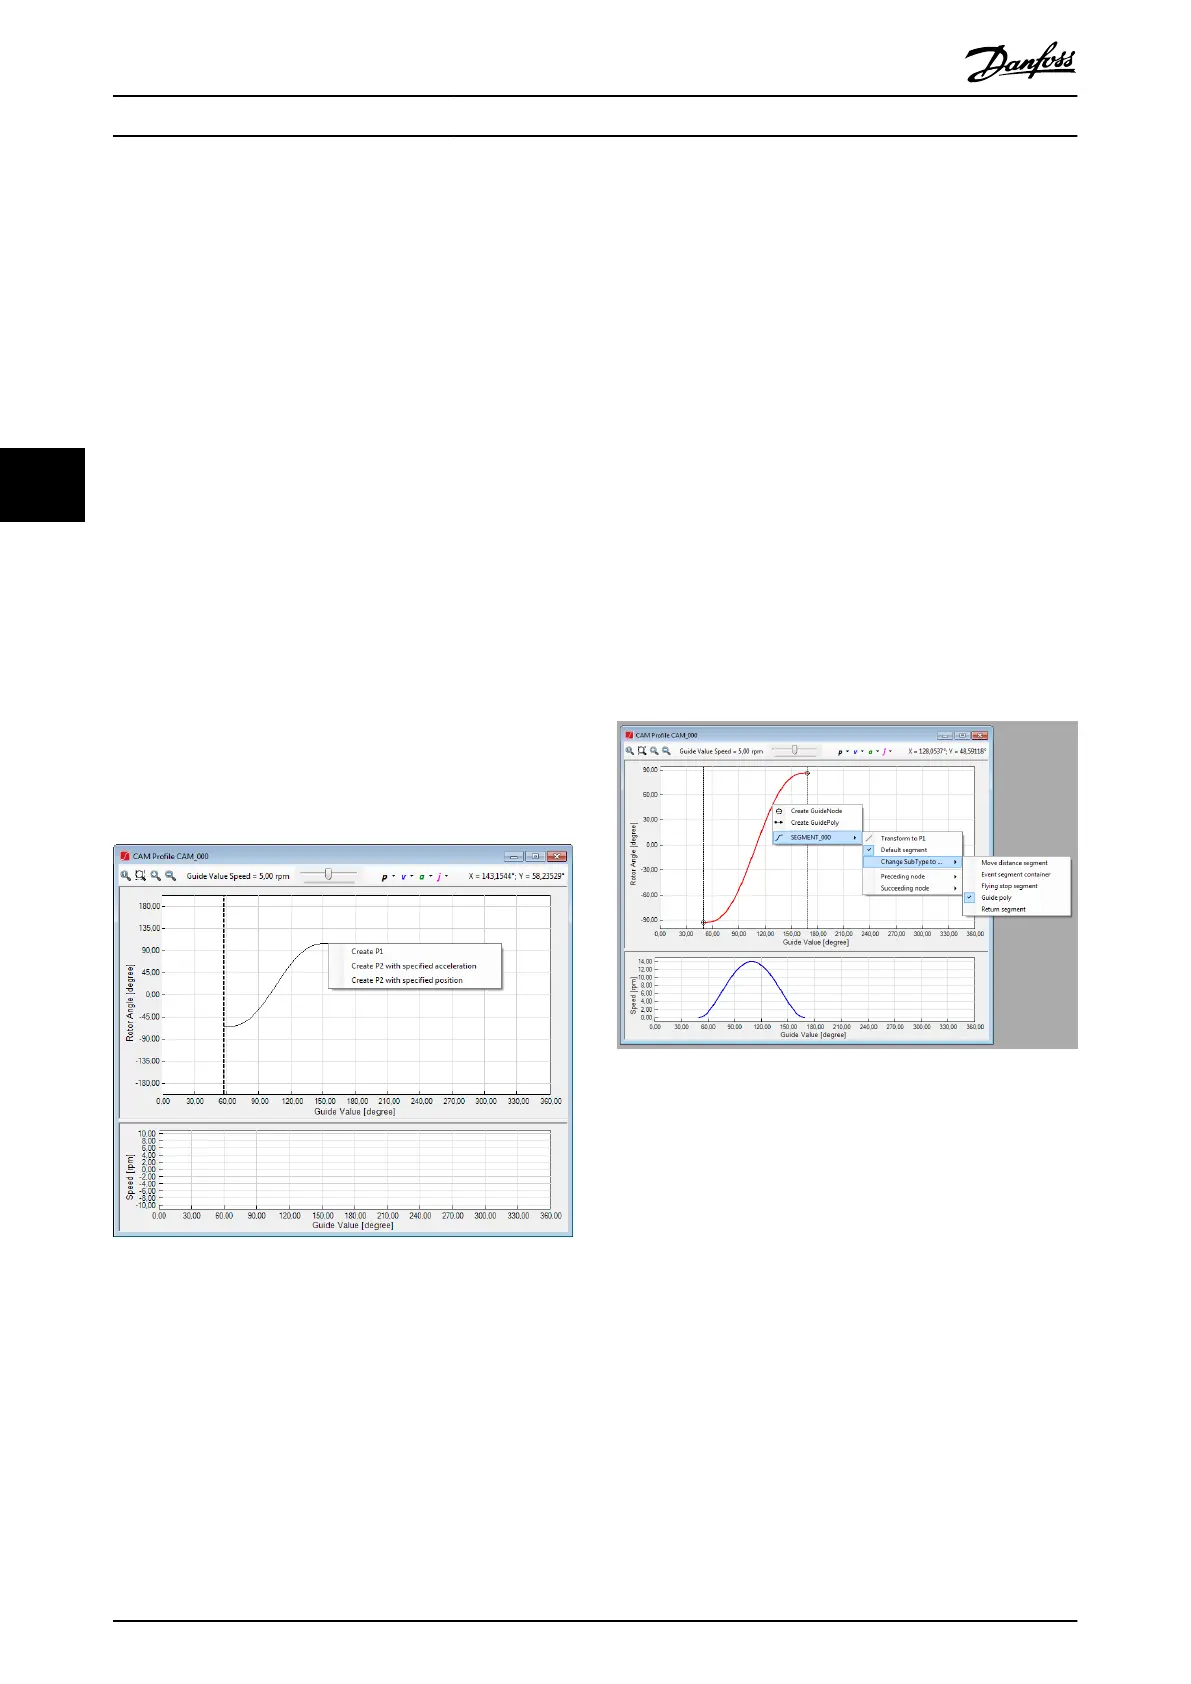
It is possible to create 3 dierent types of Guide poly by
using the right-mouse button when selecting the
succeeding node:
•
Create a 1
st
order Guide poly (P1, linear position,
constant velocity, zero acceleration).
•
Create a 2
nd
Guide poly with
specied acceleration
(P2, quadratic position, linear velocity, constant
acceleration).
•
Create a 2
nd
Guide poly with specied end
position (P2, quadratic position, linear velocity,
constant acceleration calculated from end
position).
After right-clicking and selecting the desired type in the
context menu (see Illustration 5.69), the succeeding node
and end rotor angle are selected using the left mouse
button.
Illustration 5.69 Advanced CAM Editor: Create Special Guide
Poly Types
The segment context menu oers functionalities for fast
segment transformation. All functionalities contained in the
segment context menu are also available in the segment
properties list (see Illustration 5.70).
The context menu contains the entries Preceding node and
Succeeding node, which are used to view and change the
selected preceding and succeeding node of a segment.
It is possible to transform
Guide poly and Time polys to 1
st
and 2
nd
order polynomials (P1 or P2) by using the
Transform to P1 or Transform to P2 entry.
Using the Default segment entry, it is possible to specify if
the segment is the default segment of its preceding node.
Using the segment context menu, it is possible to change
the subtype of a segment by right-clicking on a segment,
opening the segment submenu, and selecting the desired
target type under the entry Change SubType (see
Illustration 5.70).
For guide segments, the Change SubType to . . . entry
allows switching a segment between the following types:
•
Move distance segment
•
Event segment container
•
Flying stop segment
•
Guide poly
•
Return segment
The transformation options of the guide segment context
menu are shown in Illustration 5.70.
Illustration 5.70 Advanced CAM Editing: Segment Context
Menu
When there is an existing Event segment container, the
advanced CAM Editor context menu contains entries for
creating an event node and creating a Time poly (see
Illustration 5.71). The process for creating event nodes and
event segments is similar to the process for creating guide
nodes and guide segments. The main dierences are:
•
Event nodes do not contain any coordinates so
the point in time they are passed fully depends
on their predecessor event segments. Therefore,
when selecting the option Create event node and
placing an event node using the left mouse
button, the event node is not instantly shown at
the position on which was clicked. Instead, it is
only shown after an event segment is set to have
the event node as successor node.
•
When creating a Time poly, its predecessor node
has to already exist and a path must also exist
Operation with ISD Toolbox
VLT
®
Integrated Servo Drive ISD
®
510 System
148 Danfoss A/S © 01/2017 All rights reserved. MG36D102
55
 Loading...